
Building an engine & a bike from random parts - 1979 - 1981
- StanG
-
 Topic Author
- Offline
- Banned
-

- Posts: 1987
- Thanks: 237
Re: Building an engine & a bike from random parts - 1979 - 1981
6 years 2 months ago
The head is attached. Torque in two steps and sequence (pretty obvious if not having a manual) as per manual.
The topic has been locked.
- StanG
-
Topic Author
- Offline
- Banned
-
- Posts: 1987
- Thanks: 237
Re: Building an engine & a bike from random parts - 1979 - 1981
6 years 2 months ago - 6 years 2 months ago
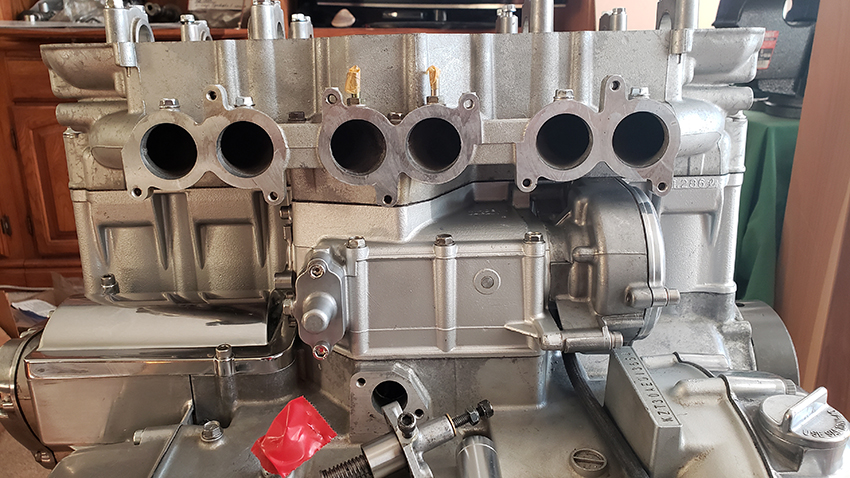
The coolant pieces above the water pump in place, sealed, tightened. Except the top on top of the head - must still cut the gasket.
The rubber intake one is fine. The other two - must find the damn screws!!!!!! lol So, juts rest there on the engine my cookies.
This cover? Maybe. The reed valves are blocked, but since all is already in place and tight, I might use it for the 'screwed up frame' bike. But a good mock up for now.
I can't close it until I source two 240 valve shims, one 235 and one 230. THen the camshafts will go on. Anyone has them?
UPDATE: shims problem solved") Now just waiting for arrival.
Now just waiting for arrival.
The rubber intake one is fine. The other two - must find the damn screws!!!!!! lol So, juts rest there on the engine my cookies.
This cover? Maybe. The reed valves are blocked, but since all is already in place and tight, I might use it for the 'screwed up frame' bike. But a good mock up for now.
I can't close it until I source two 240 valve shims, one 235 and one 230. THen the camshafts will go on. Anyone has them?
UPDATE: shims problem solved
Now just waiting for arrival.
Last edit: 6 years 2 months ago by StanG.
The topic has been locked.
- StanG
-
Topic Author
- Offline
- Banned
-
- Posts: 1987
- Thanks: 237
Re: Building an engine & a bike from random parts - 1979 - 1981
6 years 2 months ago
0ne half link forward or leave it? Any thoughts? It would make the dot a bit below the mating surface. But most important is playing with valve advance. Hmm....
The topic has been locked.
- StanG
-
Topic Author
- Offline
- Banned
-
- Posts: 1987
- Thanks: 237
Re: Building an engine & a bike from random parts - 1979 - 1981
6 years 2 months ago
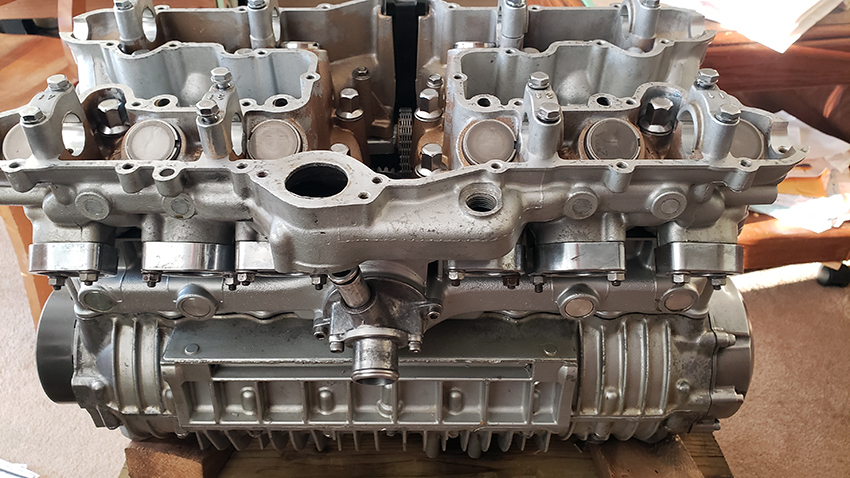
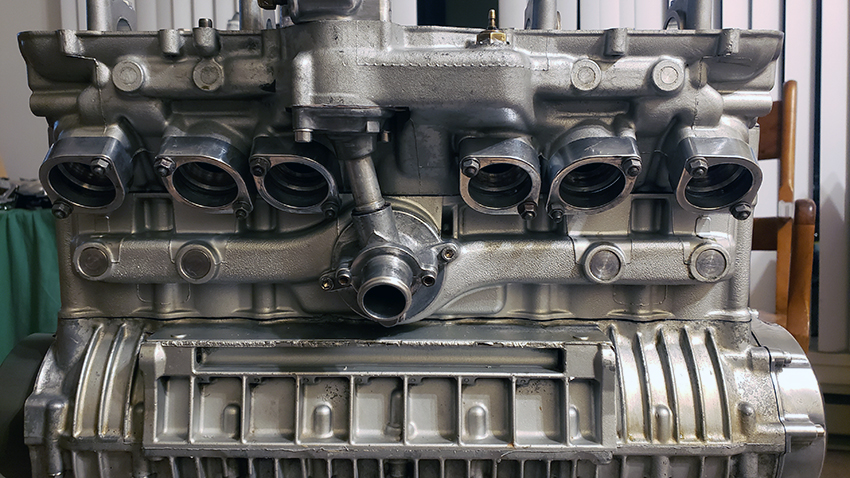
Well, did the crankshaft spin by hand and all fell right into places. The marks align perfectly on both ends, the timing is perfect! The modified tensioner works great. The engine turns freely and smooth.
0ne of the shims I ordered came with a small manufacturers damage, passed the quality control somehow. I'm getting a replacement and I know exactly where it's going, so it will be an easy swap. The inconvenience is I have to wait until bolting the engine cover shut.
All looks good.

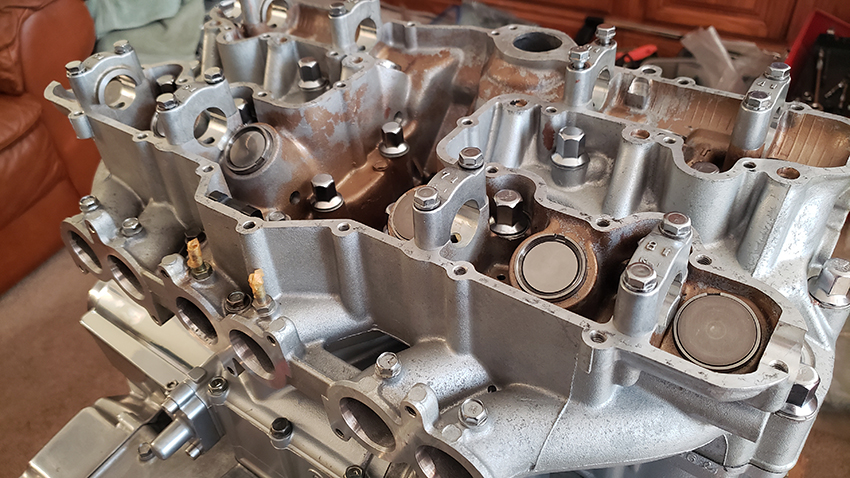
If you wonder why my head is not polished and shiny, I just left any detailing for later. When the engine is all sealed from the coronavirus, hahaha, I will put a rotary tool to work and clean it up. Then spray some silver. In a way, correct mechanics were the focus of this crazy project, esthetics second. But it will come together at the end.
The modified tensioner works great. The engine turns freely and smooth.0ne of the shims I ordered came with a small manufacturers damage, passed the quality control somehow. I'm getting a replacement and I know exactly where it's going, so it will be an easy swap. The inconvenience is I have to wait until bolting the engine cover shut.
All looks good.
If you wonder why my head is not polished and shiny, I just left any detailing for later. When the engine is all sealed from the coronavirus, hahaha, I will put a rotary tool to work and clean it up. Then spray some silver. In a way, correct mechanics were the focus of this crazy project, esthetics second. But it will come together at the end.
The topic has been locked.
- biltonjim
-

- Offline
- Platinum Member
-

- Posts: 972
- Thanks: 250
Re: Building an engine & a bike from random parts - 1979 - 1981
6 years 2 months ago
An admirable achievement, Stan. So this time you’re choosing to paint the engine silver - no black parts?
The topic has been locked.
- StanG
-
Topic Author
- Offline
- Banned
-
- Posts: 1987
- Thanks: 237
Re: Building an engine & a bike from random parts - 1979 - 1981
6 years 2 months ago
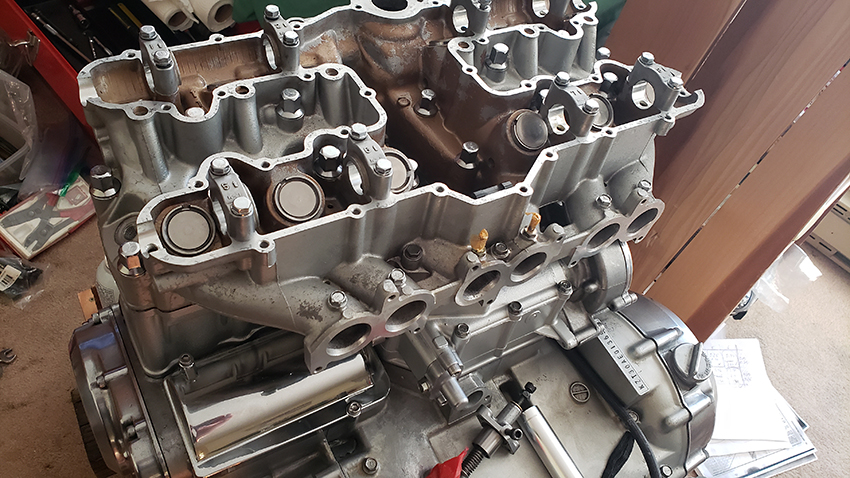
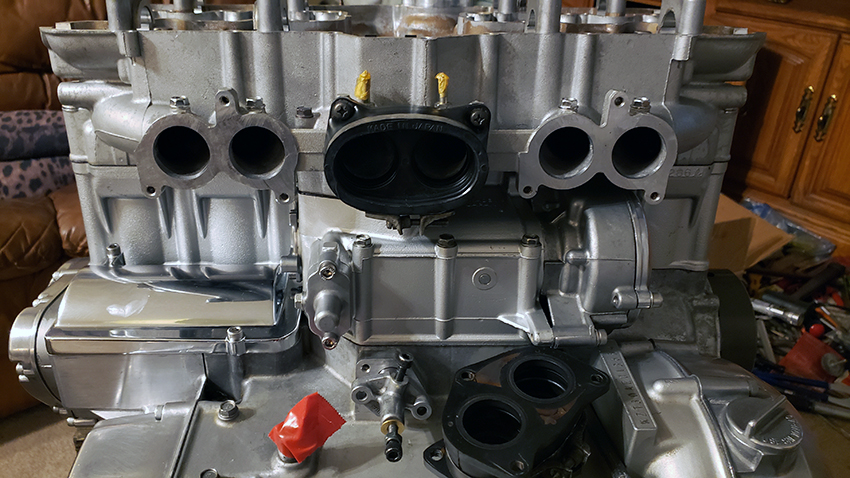
Thank you. Yes, this time no black parts! The cylinder block has a perfect original paint, I will keep it this way. The crank case is not bad looking and could stay as is, but could get a few touch ups. The cylinder head is I think I will paint silver. It will require masking, so while doing it I will mask the rest and paint the crank case as well. Normally I would paint the parts when they were separated, but this engine has an easy access to all the areas so it will be an easy job.
The left side engine covers are polished aluminum. Not as mirror shiny as they could be, but good enough for me right now. I haven't used any rotary power tool on them, and by hand takes a lot of work, so I rather spend my energy on something else.
The right engine covers. The charger cover I found has old chrome, pitted, so that has to be done. It could be used but overall it would just look bad and unfinished. I am wondering if I should chrome plate it again or just remove the chrome and polish it matching the left side covers? Hmm...
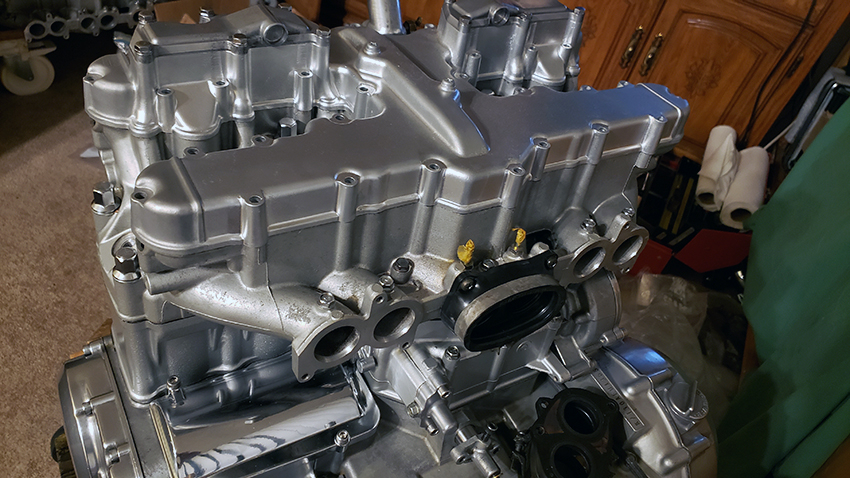
The clutch cover. The one installed, temporarily, is polished aluminum and has a scar. That's fine. This cover can be removed, replaced etc. any time. The engine doesn't go anywhere! Still lots of things to do. The cover is 5.3 liters. I also have the usual 4.6 l cover that comes with shallow sump. Basically, they are identical except for the window. I like the bigger window, but using a shallow sump and the 4.6 liter of oil I would need to adjust the correct oil level reference line. That's very easy, and I posted all three different cover sizes how the relate. I have both, one shallow and one deep oil pans ready. I'm not sure yet which way will I go. Perhaps I should just install the shallow keeping everything compact. The bikes with shallow sump run just fine, and this is just another item that can be replaced easily having the engine off the frame (which I still don't have).
The advancer little cover is polished aluminum, and will stay this way.
The carburetors, when ready and installed, will be just aluminum. I don't remember now which set I will use, and if it has some plated parts. Will see.
Like with everything else I've done, the biggest obstacle is doing again everything in the kitchen/living room. So far so good, but I will have to find a way to lift this sucker off the ground. Probably a 2x4 and a strap to jack the engine up. I will move it to another dolly I made from wood. But eventually the engine needs to be in a steel frame, and that needs to be fabricated and welded. And that's the problem for me. Ideal would be to find a discarded stripped frame without a title, so I could cut the needed section and have this engine mounted. You can imagine I can't just have it sit on a dolly. The radiator need to be hooked up, and ideally I'd also have a triple tree so I can attach all controls on a cute short handlebar for testing. The DIY stand is not a complicated design, but without being able to cut and weld, it's an obstacle. And I also have that frame with title which needs cutting and welding all the missing brackets I got from Paul in the UK.That rebuild project is going nowhere as I just can't afford taking the frame with bits and pieces to a welding shop. What a bummer with that frame! I'd have that bike already complete and running by now if not for that.
What else here... Ah, right. The cam cover. It will stay silver. I have one just media blasted, and I might just keep it this way, unless this engine would end up in a bike one day. Which is my ultimate goal - making a stock bike from nothing. So far, I managed making this engine, and making a complete bike's front - triple tree with a handlebar and all the controls, shocks, all cables, wheels and brakes. All serviced and ready! Except, no frame to go to, hahaha
In the meantime, my goal is to have this engine in a solid stand with caster wheels so I can wheel it around, have all the electronics hooked up and the carburetors will have the air box attached. I want it to be used for testing carburetors.
It's a bit soon to talk about it, but I'm wondering about what after the first start. Since the engine want be in a bike, and it will not go to a dyno, what about breaking it in?
Today I will do the final install of the timing advancer - if I can find that little 0-ring. And I still don't have the cam cover gasket. This proves to be difficult having the US and Canadian borders closed.
Can't wait to have the oil pan installed, filling it with oil and cranking the engine with a battery!
The left side engine covers are polished aluminum. Not as mirror shiny as they could be, but good enough for me right now. I haven't used any rotary power tool on them, and by hand takes a lot of work, so I rather spend my energy on something else.
The right engine covers. The charger cover I found has old chrome, pitted, so that has to be done. It could be used but overall it would just look bad and unfinished. I am wondering if I should chrome plate it again or just remove the chrome and polish it matching the left side covers? Hmm...
The clutch cover. The one installed, temporarily, is polished aluminum and has a scar. That's fine. This cover can be removed, replaced etc. any time. The engine doesn't go anywhere! Still lots of things to do. The cover is 5.3 liters. I also have the usual 4.6 l cover that comes with shallow sump. Basically, they are identical except for the window. I like the bigger window, but using a shallow sump and the 4.6 liter of oil I would need to adjust the correct oil level reference line. That's very easy, and I posted all three different cover sizes how the relate. I have both, one shallow and one deep oil pans ready. I'm not sure yet which way will I go. Perhaps I should just install the shallow keeping everything compact. The bikes with shallow sump run just fine, and this is just another item that can be replaced easily having the engine off the frame (which I still don't have).
The advancer little cover is polished aluminum, and will stay this way.
The carburetors, when ready and installed, will be just aluminum. I don't remember now which set I will use, and if it has some plated parts. Will see.
Like with everything else I've done, the biggest obstacle is doing again everything in the kitchen/living room. So far so good, but I will have to find a way to lift this sucker off the ground. Probably a 2x4 and a strap to jack the engine up. I will move it to another dolly I made from wood. But eventually the engine needs to be in a steel frame, and that needs to be fabricated and welded. And that's the problem for me. Ideal would be to find a discarded stripped frame without a title, so I could cut the needed section and have this engine mounted. You can imagine I can't just have it sit on a dolly. The radiator need to be hooked up, and ideally I'd also have a triple tree so I can attach all controls on a cute short handlebar for testing. The DIY stand is not a complicated design, but without being able to cut and weld, it's an obstacle. And I also have that frame with title which needs cutting and welding all the missing brackets I got from Paul in the UK.That rebuild project is going nowhere as I just can't afford taking the frame with bits and pieces to a welding shop. What a bummer with that frame! I'd have that bike already complete and running by now if not for that.
What else here... Ah, right. The cam cover. It will stay silver. I have one just media blasted, and I might just keep it this way, unless this engine would end up in a bike one day. Which is my ultimate goal - making a stock bike from nothing. So far, I managed making this engine, and making a complete bike's front - triple tree with a handlebar and all the controls, shocks, all cables, wheels and brakes. All serviced and ready! Except, no frame to go to, hahaha
In the meantime, my goal is to have this engine in a solid stand with caster wheels so I can wheel it around, have all the electronics hooked up and the carburetors will have the air box attached. I want it to be used for testing carburetors.
It's a bit soon to talk about it, but I'm wondering about what after the first start. Since the engine want be in a bike, and it will not go to a dyno, what about breaking it in?
Today I will do the final install of the timing advancer - if I can find that little 0-ring. And I still don't have the cam cover gasket. This proves to be difficult having the US and Canadian borders closed.
Can't wait to have the oil pan installed, filling it with oil and cranking the engine with a battery!
The topic has been locked.
Moderators: dcarver220b
Time to create page: 0.174 seconds