
Rear Master Cylinder Re-sleeving
- Neville
-
 Topic Author
- Offline
- Sustaining Member
-

- Posts: 93
- Thanks: 82
Rear Master Cylinder Re-sleeving
1 month 3 weeks ago - 1 month 3 weeks ago
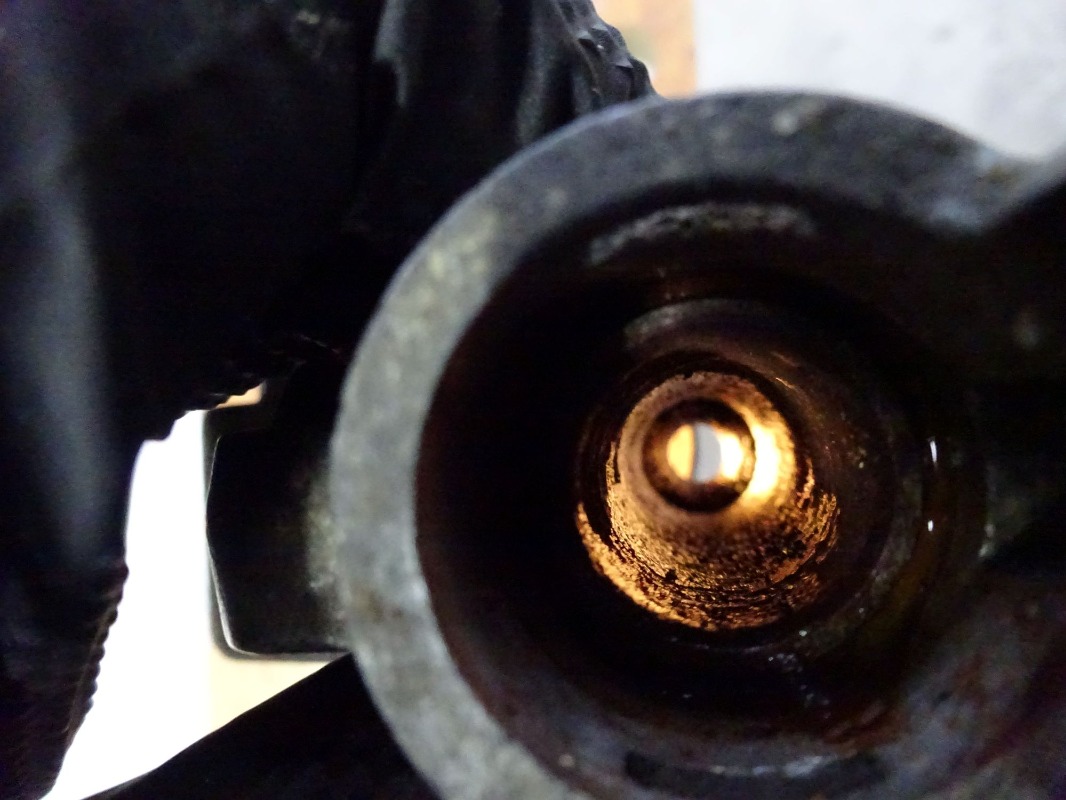
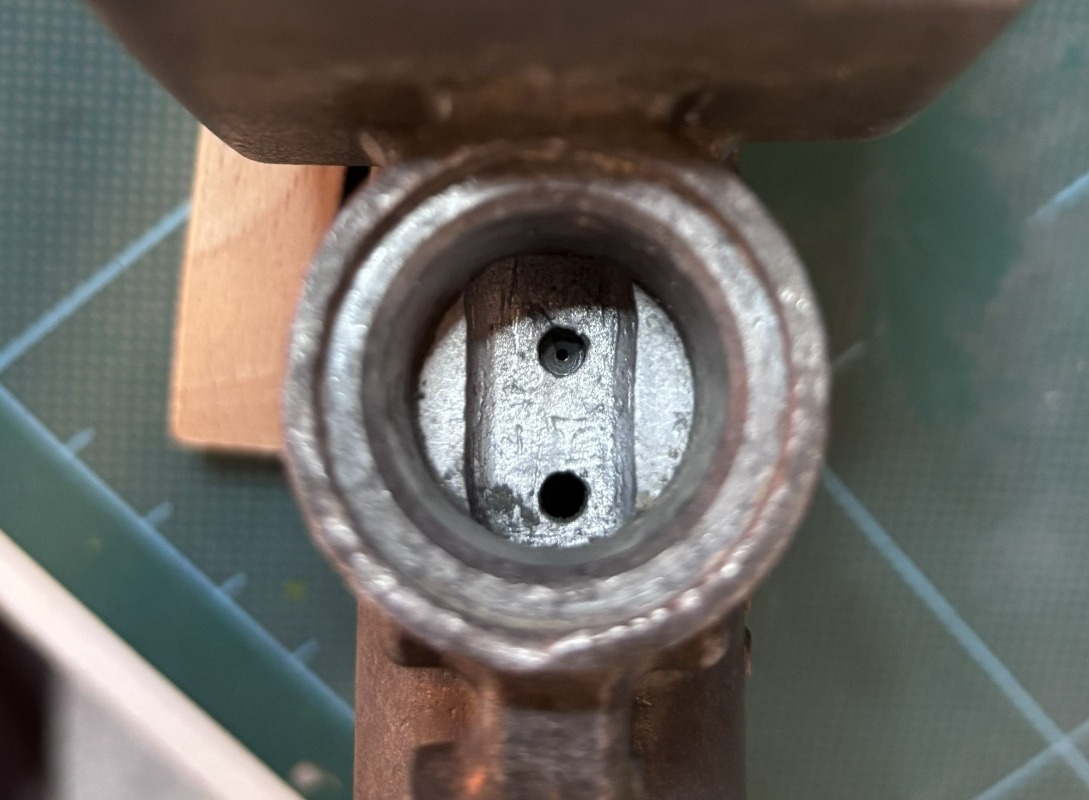
The rear brake on my A1 has never really worked as well as I wanted – a little too “soft” in feel. On several occasions I have tried to remove the scores and ridges in the master cylinder but these have generally been too deep to remove using the usual “wet and dry paper on a stick” approach as others have recommended. The picture below shows some fairly deep radial grooves that I was unable to polish out. I have found it increasingly difficult to bleed the brake with a stream of small bubbles emerging from the bleed nipple even after I’ve gone through around half a bottle of brake fluid.
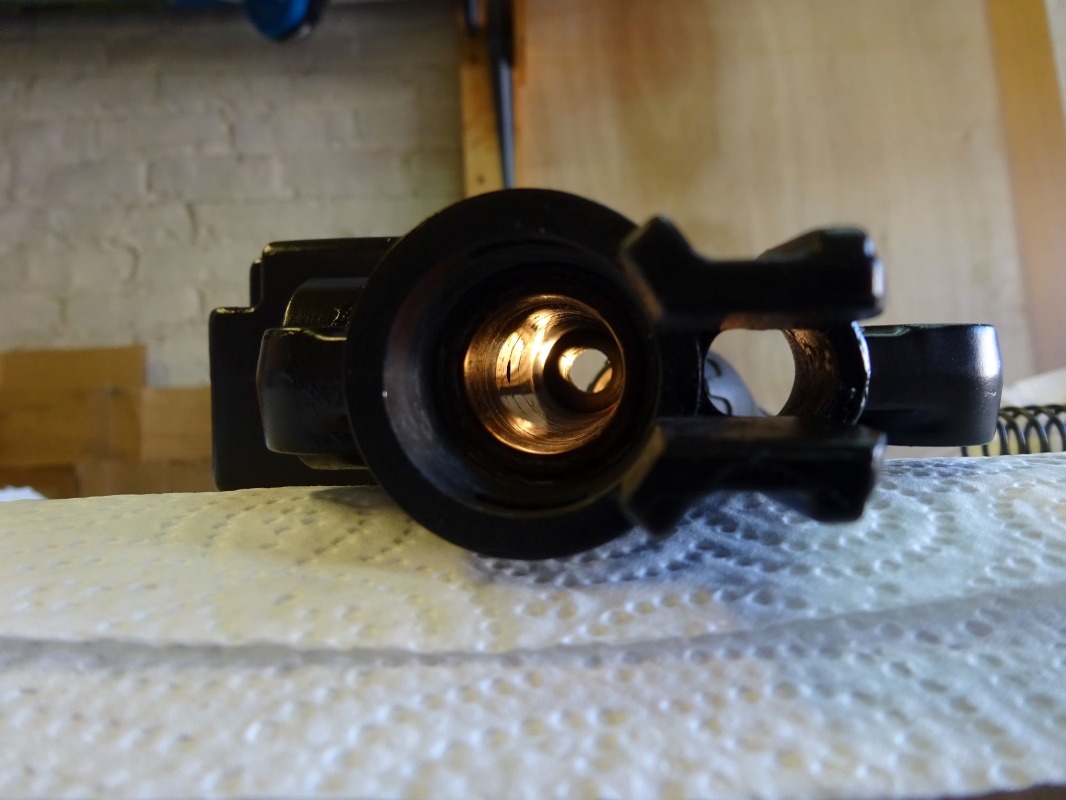
On exploring further on the Forum, I found a couple of articles on brake master cylinder repair where the old liner is bored out and a stainless
steel liner is inserted that prevents the usual corrosion problems. As my current rear brake was still serviceable, I was reluctant to explore getting this renovated as it might take some time and would leave the bike unrideable.I kept a lookout for any rear master cylinders for sale on Ebay and eventually ended up with two of these. Why two? Well as usual, as soon as one appeared and I bought it, another one showed up immediately afterwards that I thought might be in better condition.
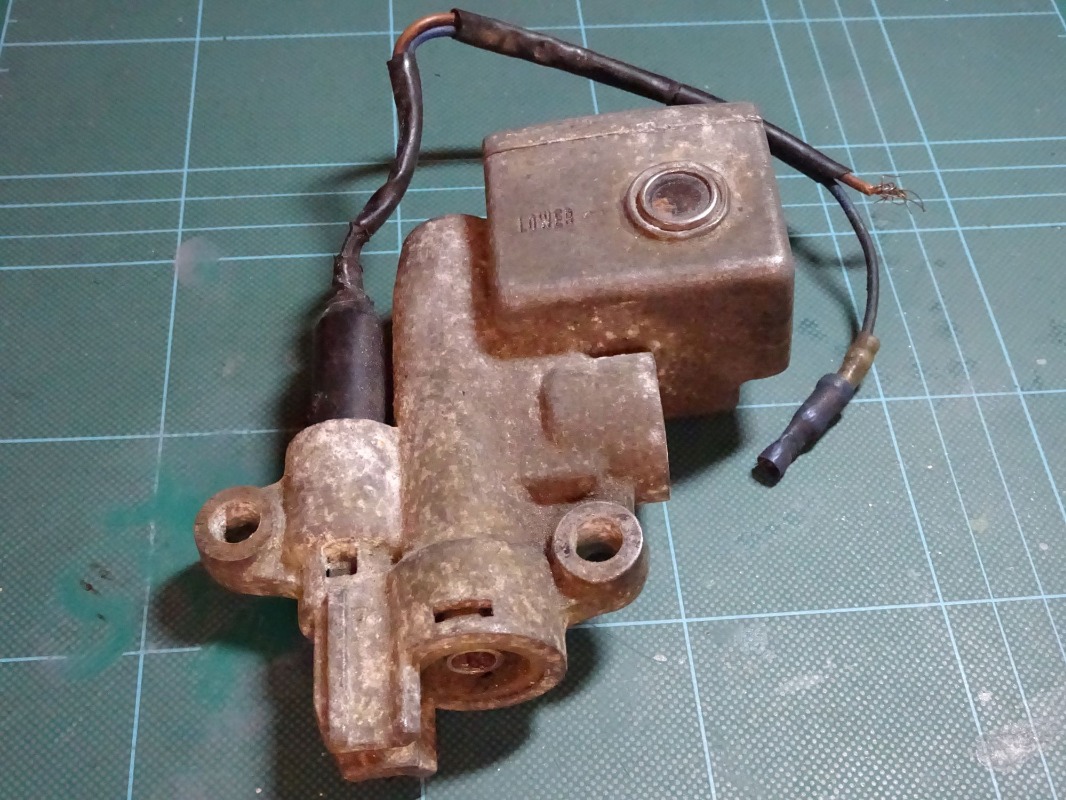
As expected, neither of these were serviceable but both would be good candidates for re-sleeving. One came apart fairly easily but the second fought me quite hard with both the piston and brake light switch corroded in place. However, I did get it all apart in the end
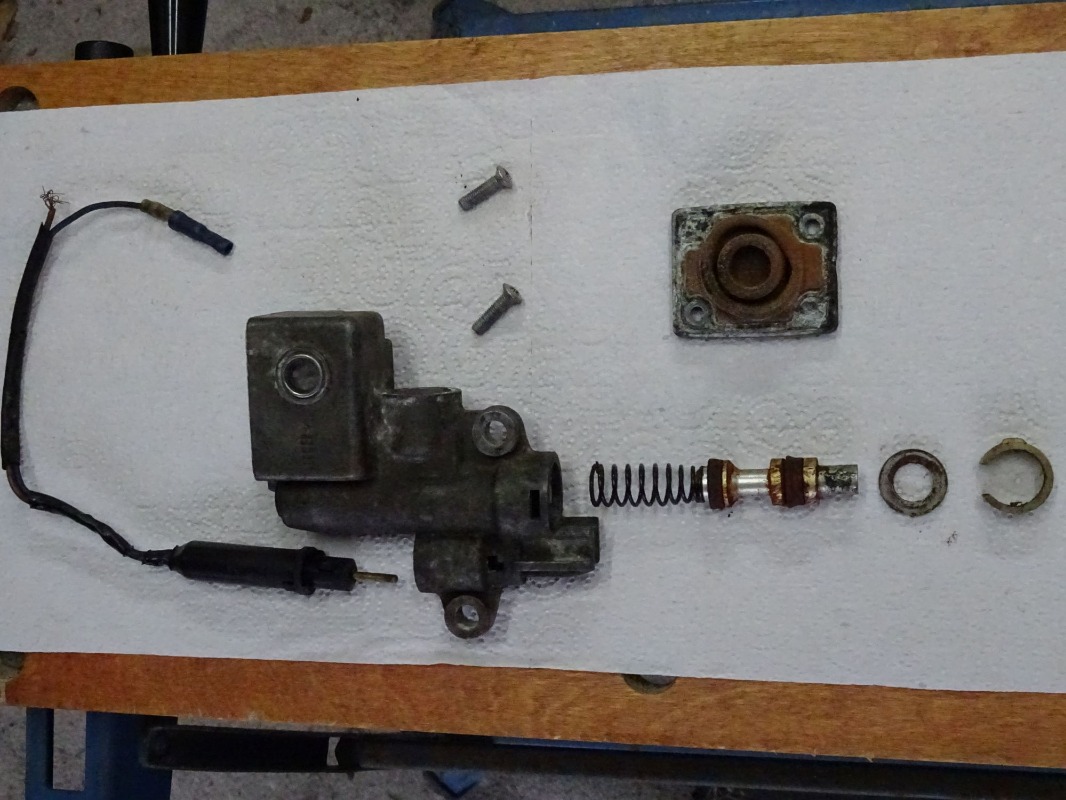
The bore on the used master cylinder was in poor shape and heavily rusted but as it was going to be re-sleeved, so not an issue. I cleaned up the outside with my Dremel and brass wheels until it looked a bit more presentable.
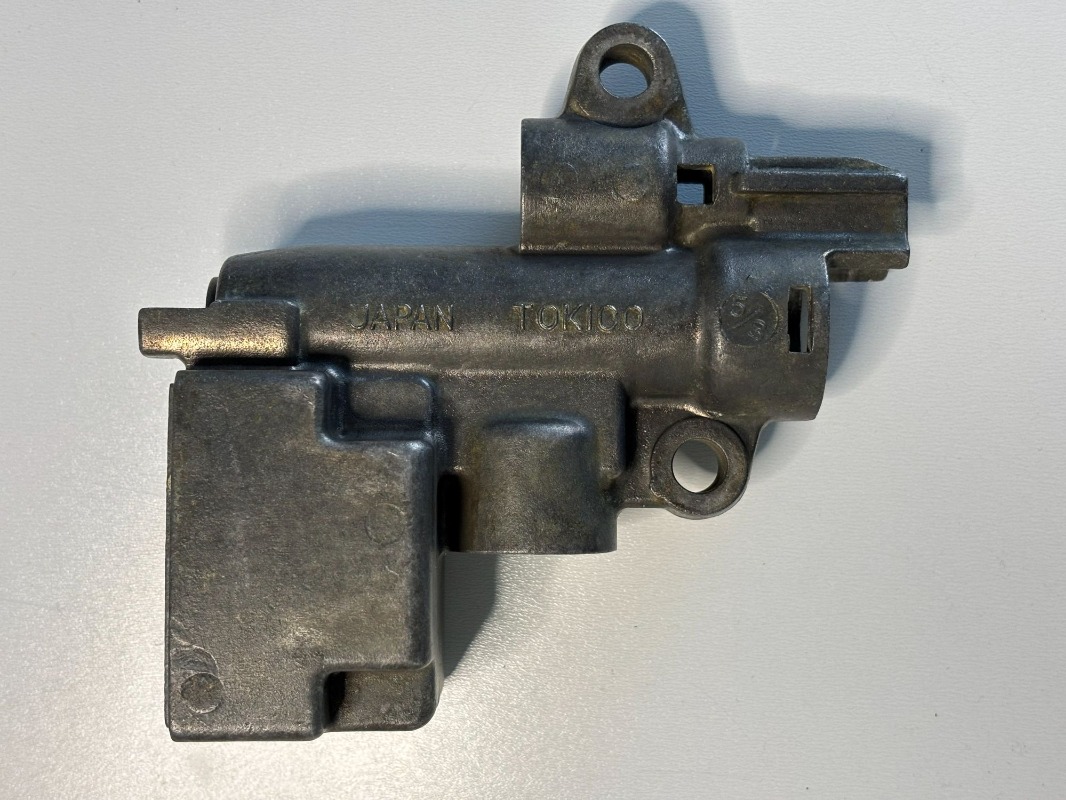
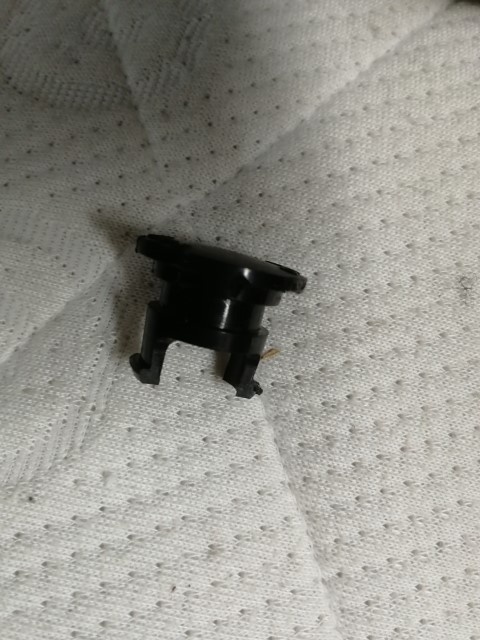
My search of the Forum revealed that there is a company called Past Parts in the UK who have re-sleeved these master cylinders before. They are based in Bury St Edmunds near Cambridge. Their work took longer than planned due to difficulty in removing the plastic plug that covers the fluid and compensating port drillings but persistence proved successful and the plug was largely undamaged and able to be re-used. The cost (£94 including return postage) was also very reasonable, despite the extra time and effort it took to remove the plug.
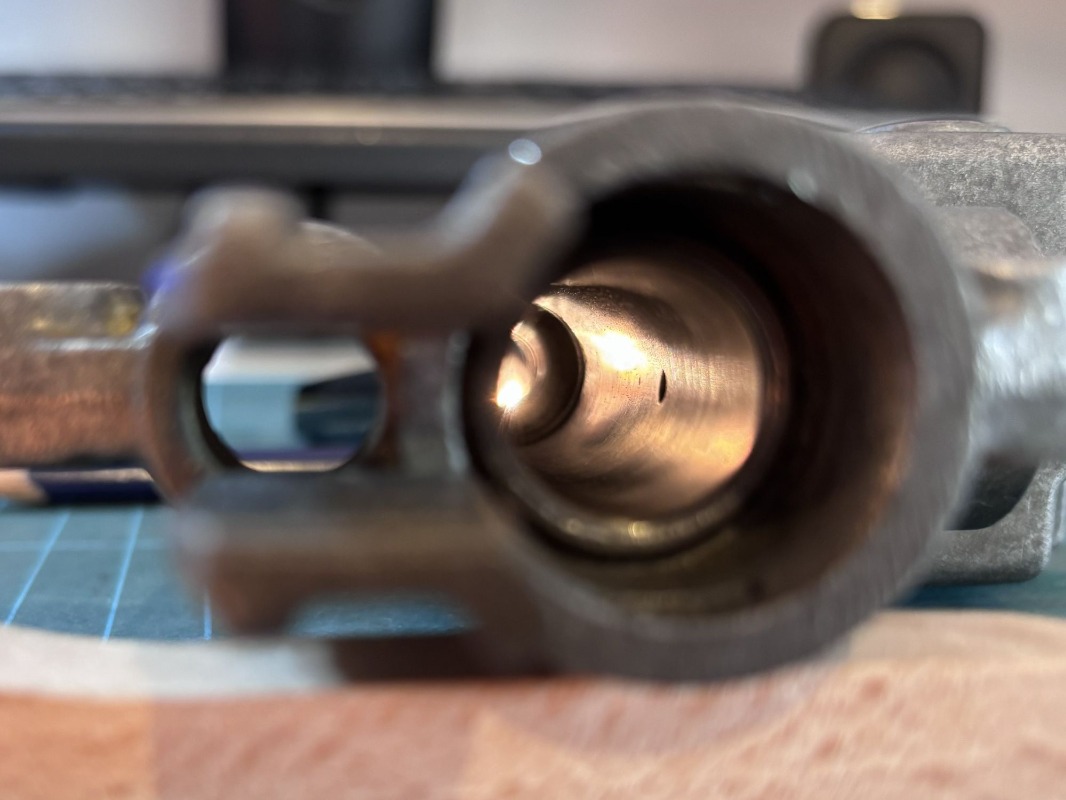
The re-sleeved stainless steel cylinder was back to “as new” with a well honed and smooth bore.
I refitted the plug with a new O-ring as the old one was heavily pitted. I could not find any information on the O-ring specification but measured the plug and hole diameters and used a sizing tool to estimate the dimensions – my calculations suggested an 18.5mm OD, 13.5mm ID and 2.5mm section which seemed to match with the old O-ring and sealed well when assembled. The plug is held in place by two tangs that click into place above and below the port drillings
Based on trial and lots of error, I have found that it’s best to fit the dust seal to the push rod before installing the plastic liner that holds the dust seal and piston in place. Trying to fit the push rod afterwards and fit the dust seal over its spigot is almost impossible as there is not enough access. It’s also important to ensure that there is some clearance between the top of the push rod and the piston (8-10mm of brake lever motion before engaging). Bleeding the brake took some time but it’s now free of any of those pesky small bubbles and working much better.
On exploring further on the Forum, I found a couple of articles on brake master cylinder repair where the old liner is bored out and a stainless
steel liner is inserted that prevents the usual corrosion problems. As my current rear brake was still serviceable, I was reluctant to explore getting this renovated as it might take some time and would leave the bike unrideable.I kept a lookout for any rear master cylinders for sale on Ebay and eventually ended up with two of these. Why two? Well as usual, as soon as one appeared and I bought it, another one showed up immediately afterwards that I thought might be in better condition.
As expected, neither of these were serviceable but both would be good candidates for re-sleeving. One came apart fairly easily but the second fought me quite hard with both the piston and brake light switch corroded in place. However, I did get it all apart in the end
The bore on the used master cylinder was in poor shape and heavily rusted but as it was going to be re-sleeved, so not an issue. I cleaned up the outside with my Dremel and brass wheels until it looked a bit more presentable.
My search of the Forum revealed that there is a company called Past Parts in the UK who have re-sleeved these master cylinders before. They are based in Bury St Edmunds near Cambridge. Their work took longer than planned due to difficulty in removing the plastic plug that covers the fluid and compensating port drillings but persistence proved successful and the plug was largely undamaged and able to be re-used. The cost (£94 including return postage) was also very reasonable, despite the extra time and effort it took to remove the plug.
The re-sleeved stainless steel cylinder was back to “as new” with a well honed and smooth bore.
I refitted the plug with a new O-ring as the old one was heavily pitted. I could not find any information on the O-ring specification but measured the plug and hole diameters and used a sizing tool to estimate the dimensions – my calculations suggested an 18.5mm OD, 13.5mm ID and 2.5mm section which seemed to match with the old O-ring and sealed well when assembled. The plug is held in place by two tangs that click into place above and below the port drillings
Based on trial and lots of error, I have found that it’s best to fit the dust seal to the push rod before installing the plastic liner that holds the dust seal and piston in place. Trying to fit the push rod afterwards and fit the dust seal over its spigot is almost impossible as there is not enough access. It’s also important to ensure that there is some clearance between the top of the push rod and the piston (8-10mm of brake lever motion before engaging). Bleeding the brake took some time but it’s now free of any of those pesky small bubbles and working much better.
Last edit: 1 month 3 weeks ago by Neville. Reason: Poor format
The following user(s) said Thank You: dcarver220b, zed_thirteen, Kawboy
Please Log in or Create an account to join the conversation.
- Kawboy
-

- Offline
- Sustaining Member
-
- Posts: 3280
- Thanks: 1219
Re: Rear Master Cylinder Re-sleeving
1 month 3 weeks ago
Nice to hear that somebody is working on something !!!
Good job with the refurb and thanks for sharing. Using a stainless sleeve means you won't have to worry about that again.
Good job with the refurb and thanks for sharing. Using a stainless sleeve means you won't have to worry about that again.
The following user(s) said Thank You: scotch, Neville
Please Log in or Create an account to join the conversation.
- zed_thirteen
-

- Offline
- Sustaining Member
-
- Posts: 560
- Thanks: 149
Re: Rear Master Cylinder Re-sleeving
1 month 3 weeks ago
I can recommend Past Parts to anyone in the UK. I've had both my CBX master cylinders re-sleeved with stainless by them. Really friendly and very helpful chaps. They also get the master cylinders powder coated after the machining process.
1980 KZ1300 B2 Touring/A2
1980 CBX1000-A
1990 ZZ-R1100 C1
1980 CBX1000-A
1990 ZZ-R1100 C1
The following user(s) said Thank You: scotch, stocktoy
Please Log in or Create an account to join the conversation.
- Neville
-
Topic Author
- Offline
- Sustaining Member
-
- Posts: 93
- Thanks: 82
Re: Rear Master Cylinder Re-sleeving
1 month 3 weeks ago
Yes, really helpful and friendly staff - I would have gone for the powder coating option myself but was worried about the effect on the seal for the fluid level window - I did not want to take the risk.
Please Log in or Create an account to join the conversation.
- dcarver220b
-

- Offline
- Sustaining Member
-
- Posts: 1311
- Thanks: 303
Re: Rear Master Cylinder Re-sleeving
1 month 3 weeks ago
Helpful info... I'm in USA. Next project KZ will need a re-sleeve...
Please Log in or Create an account to join the conversation.
- zed_thirteen
-
- Offline
- Sustaining Member
-
- Posts: 560
- Thanks: 149
Re: Rear Master Cylinder Re-sleeving
1 month 3 weeks agogood point, both CBX masters have separate reservoirs so no viewing windowYes, really helpful and friendly staff - I would have gone for the powder coating option myself but was worried about the effect on the seal for the fluid level window - I did not want to take the risk.
1980 KZ1300 B2 Touring/A2
1980 CBX1000-A
1990 ZZ-R1100 C1
1980 CBX1000-A
1990 ZZ-R1100 C1
Please Log in or Create an account to join the conversation.
Time to create page: 0.139 seconds