
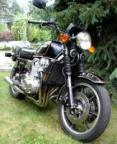
Another Carburetor Project.
- KZQ
-
 Topic Author
- Offline
- Administrator
-

- Lifelong Rider Suffering Through MBD
- Posts: 1149
- Thanks: 337
Re: Another Carburetor Project.
3 years 1 month ago - 3 years 1 month ago
Well, I believe I've finally finished this carburetor project.
As I installed the Dyno Jet kit I decided to use the same jets, 100s, as I did on my 81 which is fitted with a DG six into one exhaust system. This bike however has most of the original exhaust system including those pre-mufflers, if that's what they are, under the engine. The actual mufflers are short stainless steel units of unknown origin. I'm thinkin that the combination of the stock pre-mufflers and the large main jets yielded the way too rich mixture that resulted.
Off came the carbs a second time so that I could swap the 100s for the 96s that also came in the jet kit.
Interestingly, with the 100 main jets the bike had a pronounced power peak at 5K RPM. Once I fitted the 96s that power peak was gone and the extra power was spread throughout the RPM range, making the bike more tractable. If I had continued with the 100s I’m sure the plugs would have fouled out after 50 or so miles of riding. I followed Dyno Jet’s suggestion and set the idle needles at 3 ½ turns.
In addition to two sizes of main jets, the Dyno Jet kit also comes with lighter weights for the diaphragms and specially contoured jet needles that seem tapered to richen the mixture at lower throttle settings.If I was to point to the most important setting I adjusted, it would be that I wet set the fuel levels. As I started on this effort I found all the float bowl fuel levels to be too high.
Bill
1968 BSA Shooting Star, 1970 BSA 650 Lightning, 1974 Kawasaki W3, 1976 KZ900 A4, 1979 KZ750 B4, 1979 KZ750 B4 Trike, 1981 KZ1300, 1982 KZ1100 Spectre, 1985 Kawasaki ZN1300, 2000 Honda Valkyrie Tourer, 2009 Yamaha RoadLiner S
Last edit: 3 years 1 month ago by KZQ.
The following user(s) said Thank You: zed_thirteen
Please Log in or Create an account to join the conversation.
- Kawboy
-

- Offline
- Sustaining Member
-

- Posts: 3210
- Thanks: 1175
Re: Another Carburetor Project.
3 years 1 month ago
Hi Bill,
Regarding finding the float level setting to be too high- I would suggest that if the floats are the original Nitrophyl floats, that they are becoming saturated with fuel and weighing them down causing the floats to sink which effectively causes the float setting wet to read high. I have a gram scale for weighing the floats and a dried out set of floats weigh 10-11 grams. When I take that set of floats and float them in a container of gasoline, they ride in the fuel almost at the half joint or maybe better said the same level as the stainless tab that hinges the float.
When checking float setting using the wet method and finding the setting too high the first thing that should come to mind is checking the floats for saturation or if they are brass floats, checking for pinholes or leaking seams. just a teaching moment for all of us and a subtle reminder. Please don't take it personally.
KB
Please Log in or Create an account to join the conversation.
- KZQ
-
Topic Author
- Offline
- Administrator
-
- Lifelong Rider Suffering Through MBD
- Posts: 1149
- Thanks: 337
Re: Another Carburetor Project.
3 years 1 month ago - 3 years 1 month agoHi Kawboy,Hi Bill,
Regarding finding the float level setting to be too high- I would suggest that if the floats are the original Nitrophyl floats, that they are becoming saturated with fuel and weighing them down causing the floats to sink which effectively causes the float setting wet to read high. I have a gram scale for weighing the floats and a dried out set of floats weigh 10-11 grams. When I take that set of floats and float them in a container of gasoline, they ride in the fuel almost at the half joint or maybe better said the same level as the stainless tab that hinges the float.
When checking float setting using the wet method and finding the setting too high the first thing that should come to mind is checking the floats for saturation or if they are brass floats, checking for pinholes or leaking seams. just a teaching moment for all of us and a subtle reminder. Please don't take it personally.
KB
No issue here Kawboy, we're all in this together.
This bike had the original floats which, I think, were saturated with alcohol. Instead of swapping them out for new or even brass floats I just reset them to the correct fuel level. I'm convinced that if this bike had never seen alcoholic gasoline the floats would not have absorbed anything. That's the advantage of Scotch's brass floats which would not be affected by the alcohol.
There's also the possibility that these were previously adjusted by setting them to a given height above the carbs while they are upside down on a bench, a method that does not account for the weight of the floats. I set the fuel level (wet method) to be 5/16 of an inch ( 8MM ) below the top of the fuel bowl.
Regards
Bill
1968 BSA Shooting Star, 1970 BSA 650 Lightning, 1974 Kawasaki W3, 1976 KZ900 A4, 1979 KZ750 B4, 1979 KZ750 B4 Trike, 1981 KZ1300, 1982 KZ1100 Spectre, 1985 Kawasaki ZN1300, 2000 Honda Valkyrie Tourer, 2009 Yamaha RoadLiner S
Last edit: 3 years 1 month ago by KZQ.
Please Log in or Create an account to join the conversation.
- Jtsolakis
-
- Offline
- New Member
-

- Posts: 1
- Thanks: 0
Re: Another Carburetor Project.
5 months 2 weeks ago
How is the bike running now after a few years??
Please Log in or Create an account to join the conversation.
- KZQ
-
Topic Author
- Offline
- Administrator
-
- Lifelong Rider Suffering Through MBD
- Posts: 1149
- Thanks: 337
Re: Another Carburetor Project.
5 months 1 week ago - 5 months 1 week agoIt was running fine when I put it up. I wasn't riding it enough to justify keeping the tank and carbs full of fuel.How is the bike running now after a few years??
Bill
1968 BSA Shooting Star, 1970 BSA 650 Lightning, 1974 Kawasaki W3, 1976 KZ900 A4, 1979 KZ750 B4, 1979 KZ750 B4 Trike, 1981 KZ1300, 1982 KZ1100 Spectre, 1985 Kawasaki ZN1300, 2000 Honda Valkyrie Tourer, 2009 Yamaha RoadLiner S
Last edit: 5 months 1 week ago by KZQ.
Please Log in or Create an account to join the conversation.
Moderators: dcarver220b
Time to create page: 0.168 seconds