Welcome, Guest
Username: Password: Remember me

TOPIC:

My KZ1300 project thread (photo heavy) 8 years 8 months ago #8798

  • brandonsmash
  • brandonsmash's Avatar Topic Author
  • Offline
  • Premium Member
  • Premium Member
  • Posts: 132
  • Thank you received: 8
Argh, some moisture made it into the cylinders during the degreasing. I had to clean some minor rust off the cylinder walls. I'm not too worried, though, as it's not pitted at all and once the engine runs a few revolutions the new rings will take care of the rest.

Anyway, I pulled off the valve cover and head to ready that assembly.

Block:


Cleaning the head prior to assembly:


I seated the overbore head gasket and dropped the head on. Somehow I lost one of the washers for the head nuts, though, so I'll need to pick up a new one tomorrow. Then I can torque the head to spec.
Cut to approximate, smash to fit!

Please Log in or Create an account to join the conversation.

My KZ1300 project thread (photo heavy) 8 years 8 months ago #8806

  • Kawboy
  • Kawboy's Avatar
  • Offline
  • Sustaining Member
  • Sustaining Member
  • Posts: 2997
  • Thank you received: 1029
quote Brandonsmash "seated the overbore head gasket and dropped the head on. Somehow I lost one of the washers for the head nuts, though, so I'll need to pick up a new one tomorrow. Then I can torque the head to spec".[/quote]

No, you need to find that washer. It may have fallen into the engine cavity when you pulled the head unless you know for sure that you pulled all the washers before removing the head. That would be an ugly thing to let float around in the engine.

Please Log in or Create an account to join the conversation.

Last edit: by Kawboy.

My KZ1300 project thread (photo heavy) 8 years 8 months ago #8810

  • brandonsmash
  • brandonsmash's Avatar Topic Author
  • Offline
  • Premium Member
  • Premium Member
  • Posts: 132
  • Thank you received: 8
It's pretty strange. I'm generally quite aware of nuts and washers as I remove them and bag/tag them. In this case I removed the cylinder head a long time ago (something like 10 months, I think) and just had an odd number of washers in my baggie. I'll poke around my shop benches and whatnot before pulling off the crankcase cover (because splitting the cases in a non-starter).
Cut to approximate, smash to fit!

Please Log in or Create an account to join the conversation.

My KZ1300 project thread (photo heavy) 8 years 8 months ago #8814

  • Ledkz1300
  • Ledkz1300's Avatar
  • Offline
  • Platinum Member
  • Platinum Member
  • Posts: 717
  • Thank you received: 76
I sincerely hope that the washer was misplaced elsewhere and has not fallen into the crankcase. Yikes!

I just started a thread on doing a big bore then I found this. I believe I have the same kit. What are the specs for the overbore and were there any special requirements? How much did it cost you?

Thanks!

Please Log in or Create an account to join the conversation.

Last edit: by Ledkz1300.

My KZ1300 project thread (photo heavy) 8 years 8 months ago #8827

  • brandonsmash
  • brandonsmash's Avatar Topic Author
  • Offline
  • Premium Member
  • Premium Member
  • Posts: 132
  • Thank you received: 8
I had to do a lot of searching but I found a local machinist who punched out the cylinders and glass-beaded the block for me. He charged me $350 for the whole job, which I think was quite reasonable.

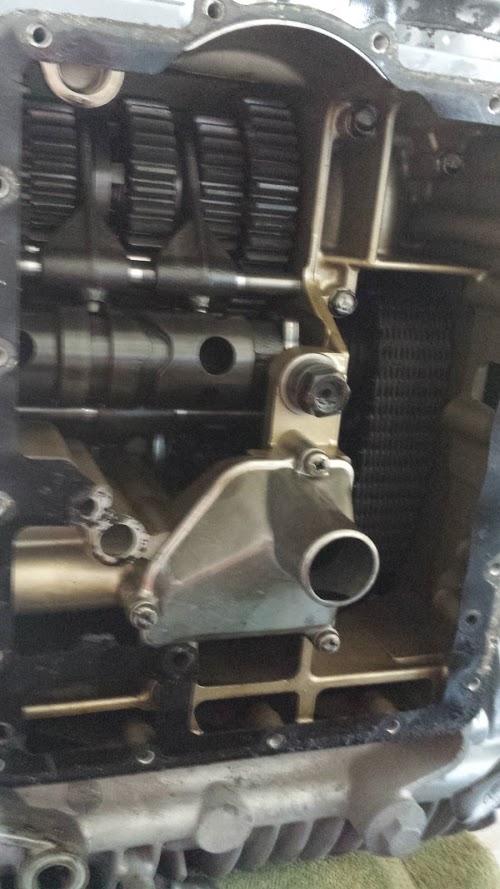
For the sake of peace of mind I pulled off the oil pan. No washer, hooray! However, I DID find one of the half-moon valve cover plugs there. Yikes! Anyway, nothing else crazy.

Looking up from underneath:

Cut to approximate, smash to fit!

Please Log in or Create an account to join the conversation.

My KZ1300 project thread (photo heavy) 8 years 8 months ago #8828

  • brandonsmash
  • brandonsmash's Avatar Topic Author
  • Offline
  • Premium Member
  • Premium Member
  • Posts: 132
  • Thank you received: 8
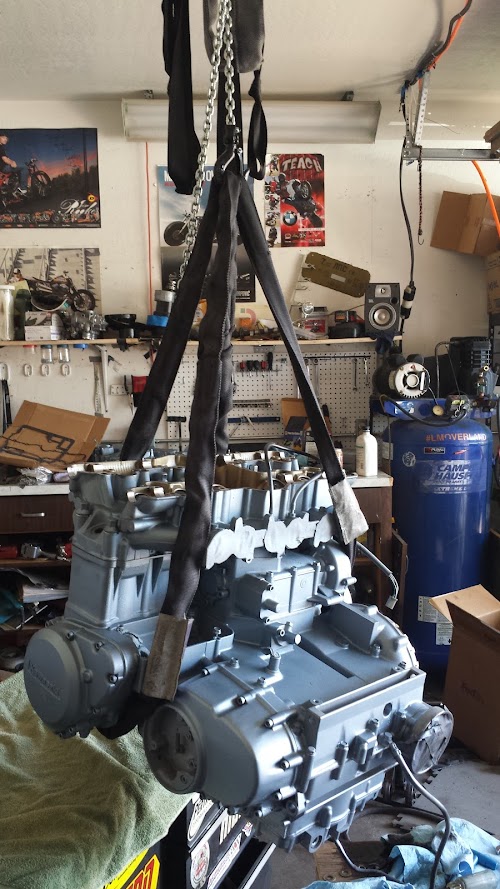
Moving the whole engine assembly is a pain in the butt. I'm a big, strong guy but there are few good places to grab on the engine. However, I'm also a rigger by trade and long ago I installed rig points in the ceiling of my garage. To lift the engine from its shorter paint stand to the table I'll use to install the frame I just rigged an overhead hoist and a bridle to the engine:


I pulled off the oil pan (see above). Not too much sludge accumulated down here, which is good:


Soon it'll be time to install the engine to the frame. Here's the tank/frame setup. I'm quite pleased with the paint:

Cut to approximate, smash to fit!
The following user(s) said Thank You: KZQ

Please Log in or Create an account to join the conversation.

Time to create page: 0.136 seconds
Powered by Kunena Forum