
Q. -What do you get when you cross a B.B.Q. with a spark-plug?
- scotch
-
 Topic Author
- Offline
- Sustaining Member
-

- Posts: 2029
- Thanks: 933
Q. -What do you get when you cross a B.B.Q. with a spark-plug?
1 month 3 weeks ago
Answer: "Scotchs Color-it-Tuned" !
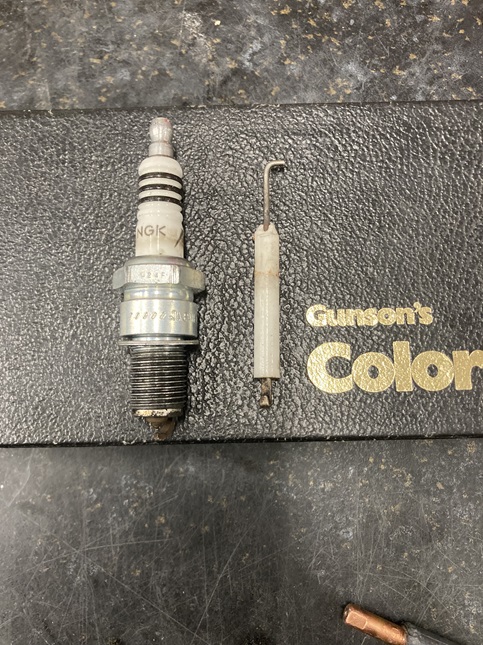
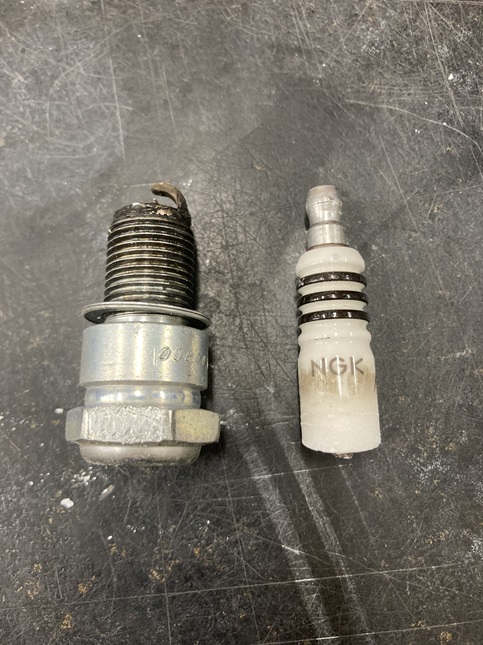
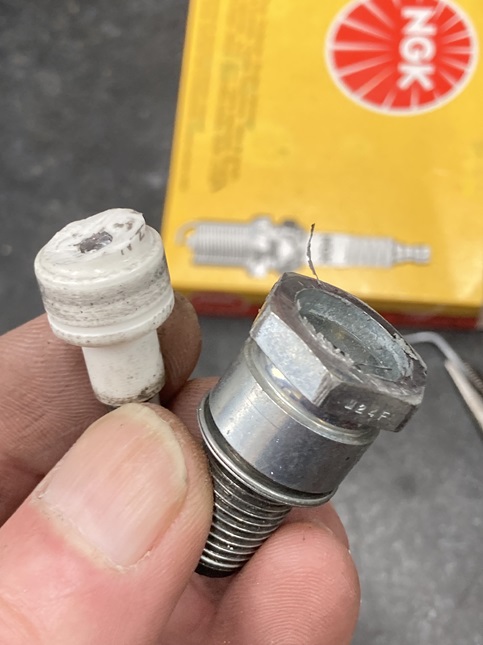
A spark-plug and a BBQ ignitor electrode
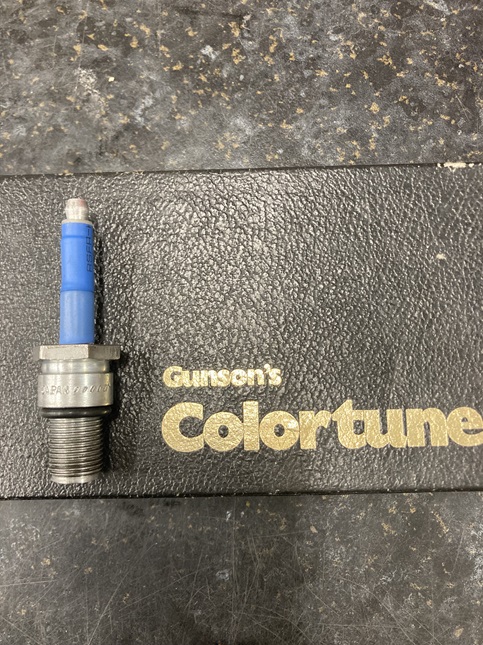
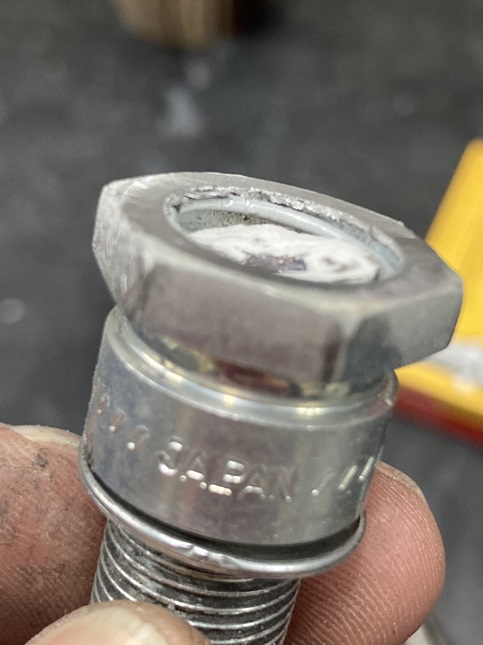
The two, assembled
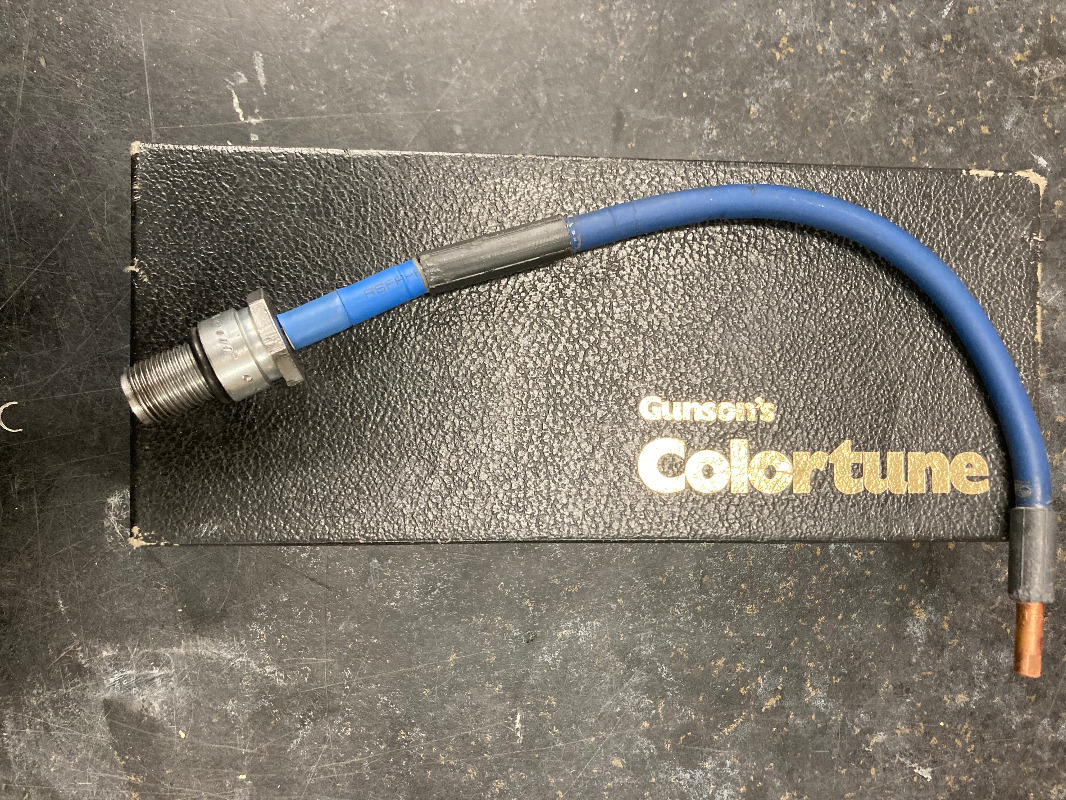
With an extension
Showing transparency
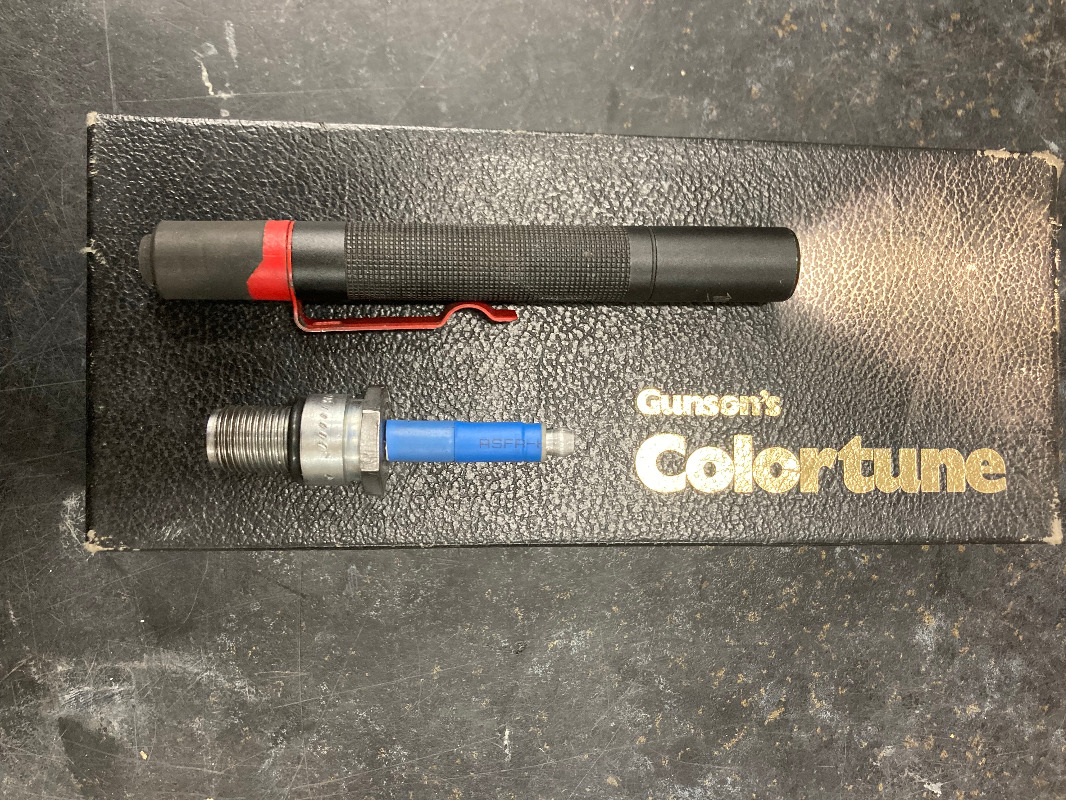
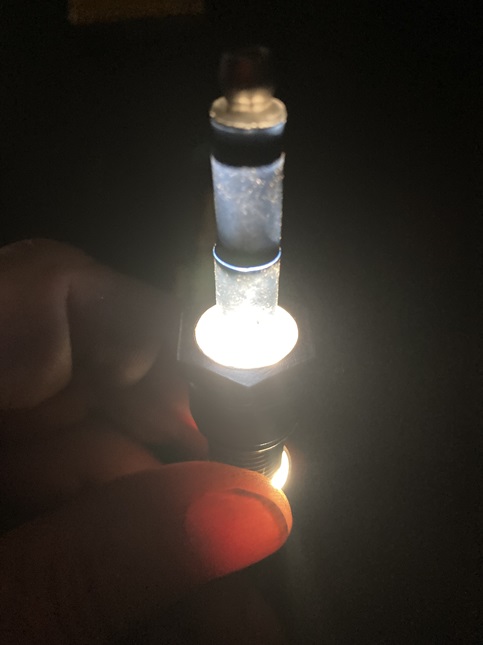
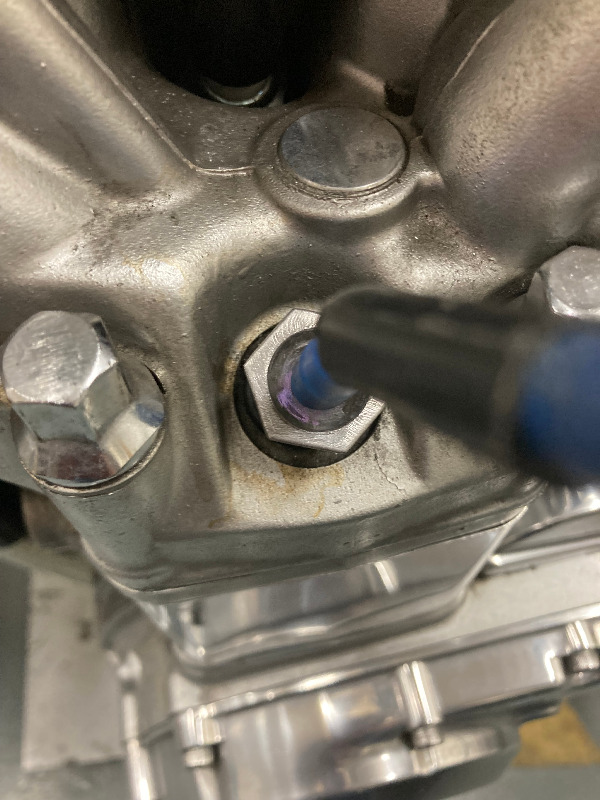
Couldn't get a great picture but when installed and with the naked eye, it works brilliantly
A spark-plug and a BBQ ignitor electrode
The two, assembled
With an extension
Showing transparency
Couldn't get a great picture but when installed and with the naked eye, it works brilliantly
1980 KZ 1300 sr# KZT30A-009997
Always High - Know Fear !
Always High - Know Fear !
Please Log in or Create an account to join the conversation.
- stocktoy
-

- Offline
- Sustaining Member
-
- Posts: 381
- Thanks: 90
Re: Q. -What do you get when you cross a B.B.Q. with a spark-plug?
1 month 3 weeks ago
Interesting
The following user(s) said Thank You: scotch
Please Log in or Create an account to join the conversation.
- dcarver220b
-

- Offline
- Sustaining Member
-
- Posts: 1276
- Thanks: 295
Re: Q. -What do you get when you cross a B.B.Q. with a spark-plug?
1 month 3 weeks ago
How did you connect the igniter to the plug base? Expoxy?
Please Log in or Create an account to join the conversation.
- scotch
-
Topic Author
- Offline
- Sustaining Member
-
- Posts: 2029
- Thanks: 933
Re: Q. -What do you get when you cross a B.B.Q. with a spark-plug?
1 month 3 weeks ago - 1 month 3 weeks ago
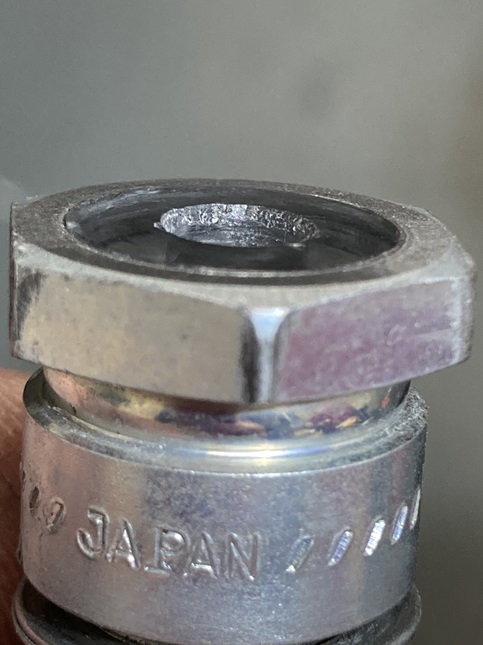
Start by breaking 0ff the ceramic.
Grind off the rolled edge
Punch-out the remaining ceramic
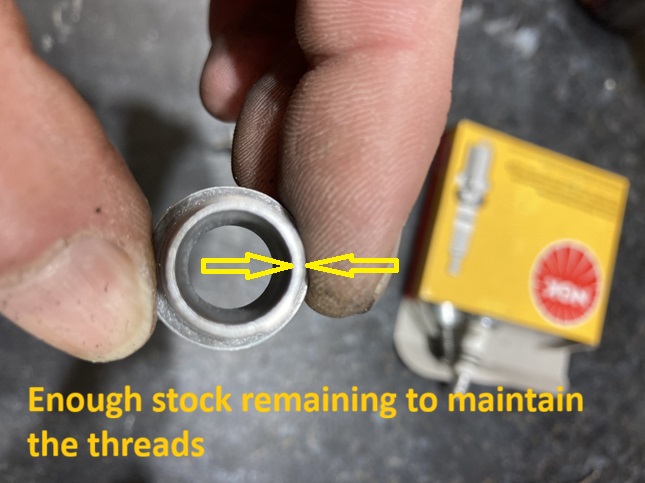
To increase the viewing area, drill out to 13/32"
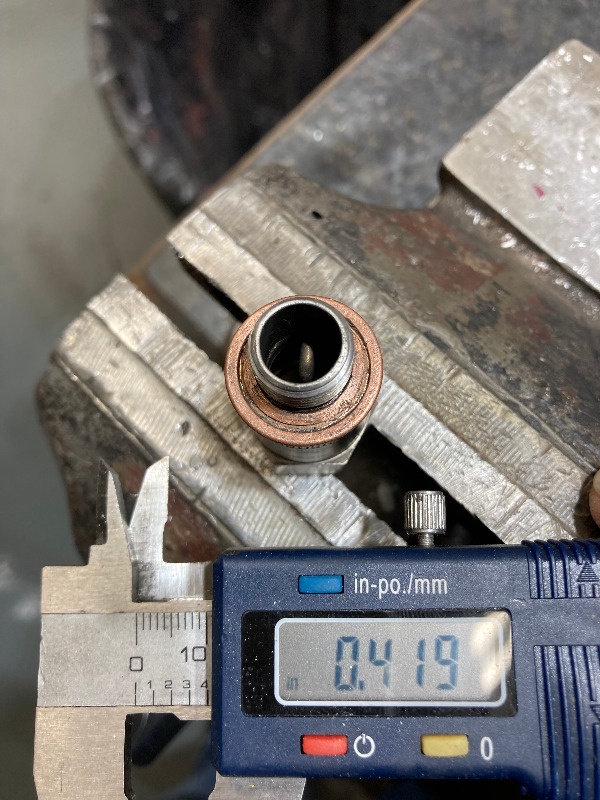
A 7/8" hole saw cuts the 1/2" thick Lexan lens and also leaves a center-hole. Use a nut/bolt as a mandrel so the lens can be mounted in a drill-press
Use a coarse file to turn-down the "lens"
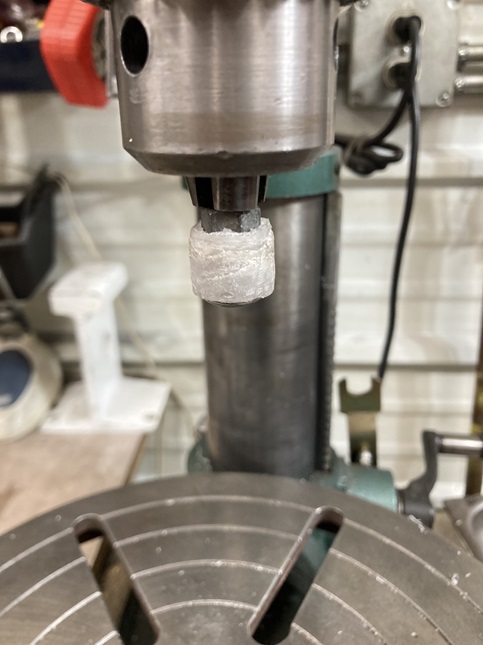
Use a FINE file to get the final diameter to within several thou.
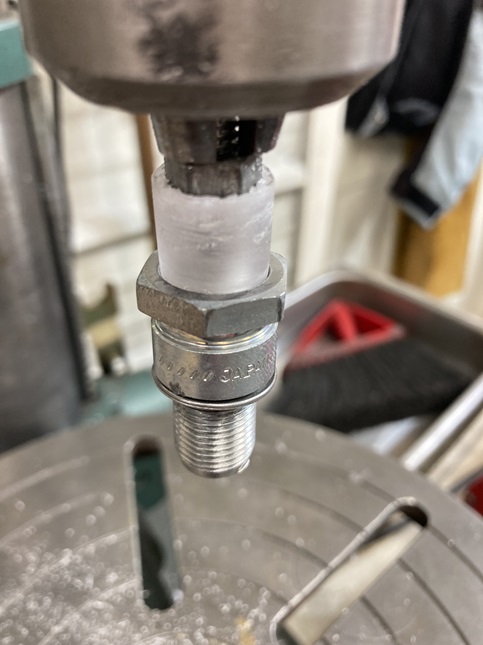
Apply "crazy glue" to the inner bore and press the lens into the body

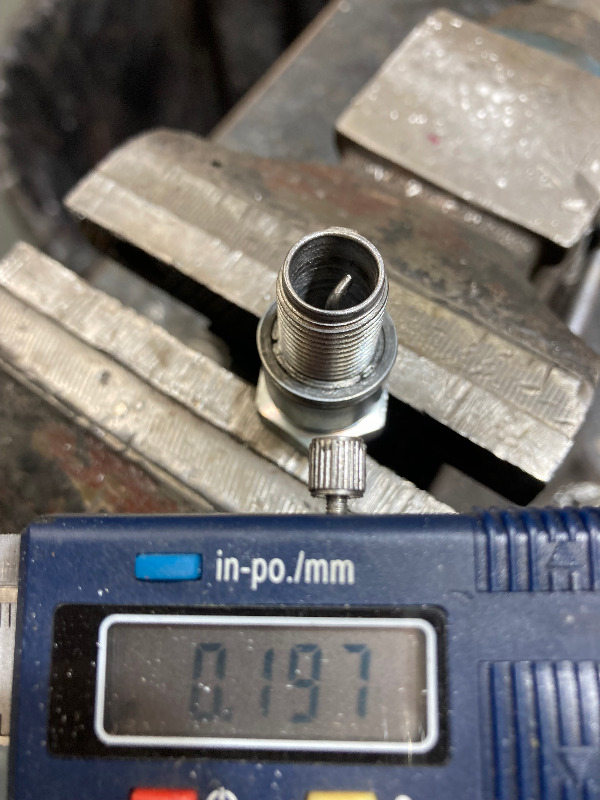
The hole saw center-hole is typically 1/4". Depending on the diameter of the ceramic, enlarge the center-hole if required.
The fit should be as close/snug as possible. Trying to press the ceramic into a hole too tight may break the ceramic !
Use crazy-glue or epoxy to secure the ceramic. Note: If using crazy-glue, position the ceramic first !
Epoxy allows for positioning and adjusting !
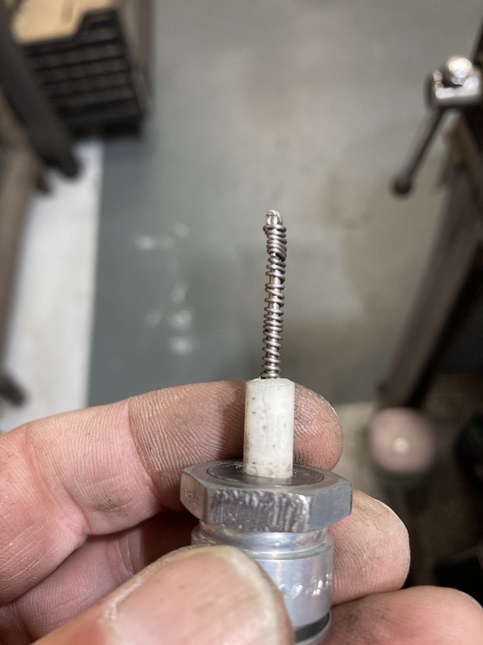
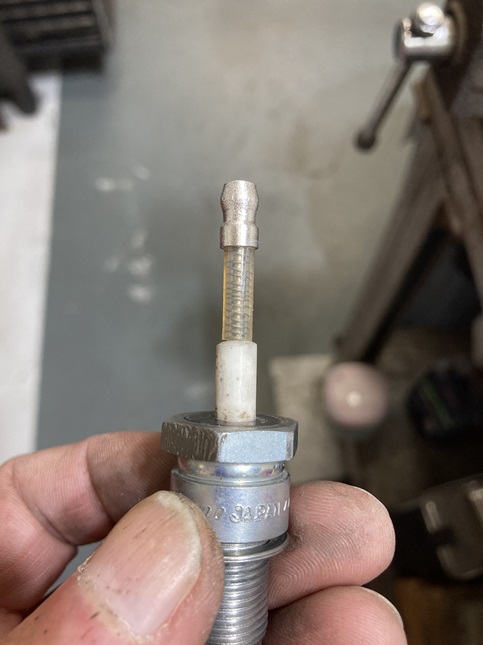
The final depth of the electrode is somewhat arbitrary. The following is what was chosen. A "Gunson's" is shown for comparison.
The spark-plug end of the wire electrode (on the spark-plug used) comes flattened and folded over. Keep this feature !
Wrap the entire length, including the folded end, with fine wire
The finished winding diameter at the fold-over, must allow the terminal-end to thread on.
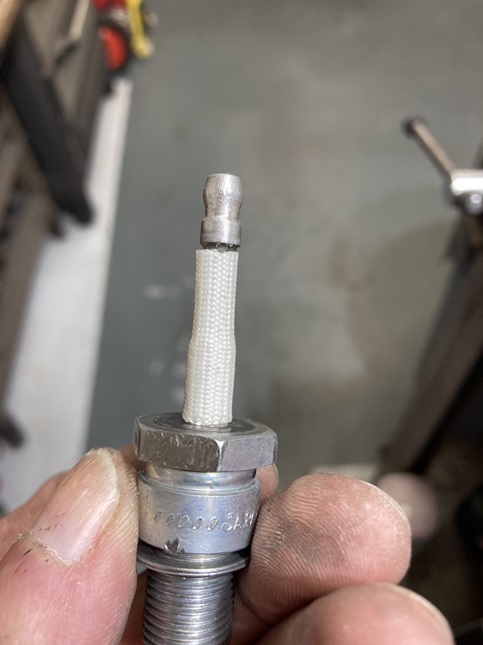
Slide a piece of plastic tubing over the wire-wound electrode. This is merely for "build-up".
A piece of woven insulation is then added.
Shrink-tubing is the final layer.
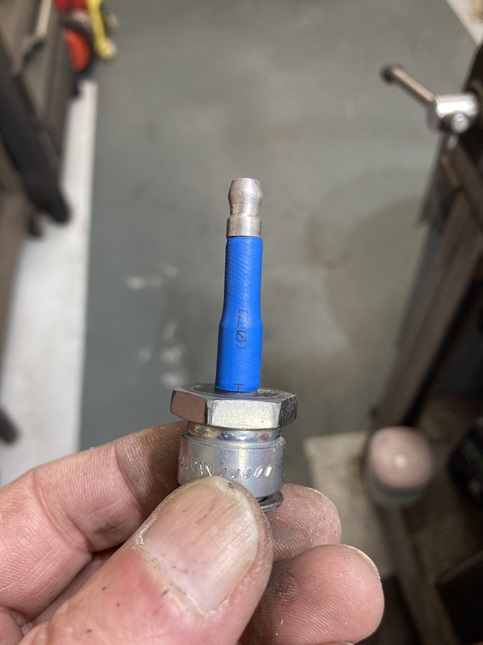
The wire electrode is S/S so can not be soldered !
After the insulation/shrink-tubing has been applied and after the terminal end has been threaded on; put a few drops of crazy glue into the open end of the terminal to secure it to the wire wound electrode.
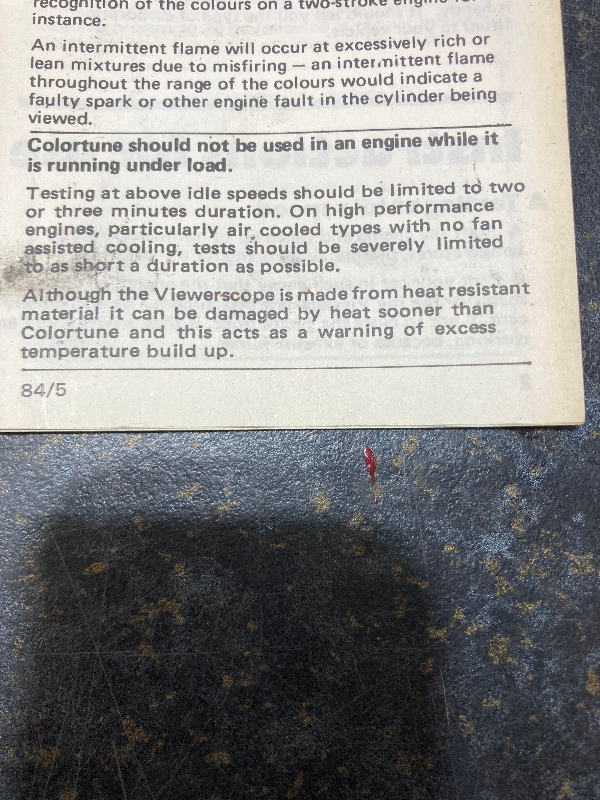
Final note: The lens material in a "Gunson" is unknown. The "Gunson" instructions infer their lens is a synthetic material.
The same caution therefore applies to this project.
Grind off the rolled edge
Punch-out the remaining ceramic
To increase the viewing area, drill out to 13/32"
A 7/8" hole saw cuts the 1/2" thick Lexan lens and also leaves a center-hole. Use a nut/bolt as a mandrel so the lens can be mounted in a drill-press
Use a coarse file to turn-down the "lens"
Use a FINE file to get the final diameter to within several thou.
Apply "crazy glue" to the inner bore and press the lens into the body
The hole saw center-hole is typically 1/4". Depending on the diameter of the ceramic, enlarge the center-hole if required.
The fit should be as close/snug as possible. Trying to press the ceramic into a hole too tight may break the ceramic !
Use crazy-glue or epoxy to secure the ceramic. Note: If using crazy-glue, position the ceramic first !
Epoxy allows for positioning and adjusting !
The final depth of the electrode is somewhat arbitrary. The following is what was chosen. A "Gunson's" is shown for comparison.
The spark-plug end of the wire electrode (on the spark-plug used) comes flattened and folded over. Keep this feature !
Wrap the entire length, including the folded end, with fine wire
The finished winding diameter at the fold-over, must allow the terminal-end to thread on.
Slide a piece of plastic tubing over the wire-wound electrode. This is merely for "build-up".
A piece of woven insulation is then added.
Shrink-tubing is the final layer.
The wire electrode is S/S so can not be soldered !
After the insulation/shrink-tubing has been applied and after the terminal end has been threaded on; put a few drops of crazy glue into the open end of the terminal to secure it to the wire wound electrode.
Final note: The lens material in a "Gunson" is unknown. The "Gunson" instructions infer their lens is a synthetic material.
The same caution therefore applies to this project.
1980 KZ 1300 sr# KZT30A-009997
Always High - Know Fear !
Always High - Know Fear !
Last edit: 1 month 3 weeks ago by scotch.
The following user(s) said Thank You: KZQ, zed_thirteen, stocktoy
Please Log in or Create an account to join the conversation.
- dcarver220b
-
- Offline
- Sustaining Member
-
- Posts: 1276
- Thanks: 295
Re: Q. -What do you get when you cross a B.B.Q. with a spark-plug?
1 month 3 weeks ago
You have mad skills, Sir Scotch!
Please Log in or Create an account to join the conversation.
Time to create page: 0.185 seconds