
Welcome to the Kunena forum!
Tell us and our members who you are, what you like and why you became a member of this site.
We welcome all new members and hope to see you around a lot!
Tell us and our members who you are, what you like and why you became a member of this site.
We welcome all new members and hope to see you around a lot!
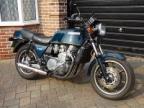
New Member with 1979 Z1300 A1
- scotch
-

- Offline
- Sustaining Member
-

- Posts: 2028
- Thanks: 931
Re: New Member with 1979 Z1300 A1
9 years 7 months ago - 9 years 7 months ago
KZA wrote : Pity someone can't come up with a small unit that indicates charge that would fit into that "spare" idiot light place on the far right of the cluster if you get my meaning ???, perhaps 3 small LEDS .. a red an orange and a green that light up depending on the voltage supplied.
They do. Search EBay for 12 volt LED battery indicator. various types and styles. One in particular fits your description.
They do. Search EBay for 12 volt LED battery indicator. various types and styles. One in particular fits your description.
1980 KZ 1300 sr# KZT30A-009997
Always High - Know Fear !
Always High - Know Fear !
Last edit: 9 years 7 months ago by scotch.
Please Log in or Create an account to join the conversation.
- kza13
-

- Offline
- Platinum Member
-

- Posts: 594
- Thanks: 91
Re: New Member with 1979 Z1300 A1
9 years 7 months ago
Have to look again at e-bay, I thought I got one but it was too big, the circuit board was too wide and long to fit into that small area, but i'll keep looking, be a handy little tell tale to have, cheers
after tuesday even the calendar goes WTF
1979 KAWASAKI Z1300 A1 WITH A DJP SIDECAR
Frame No: KZT3OA003911
Engine No: KZT3OAE004153
Location: Queensland Australia
Please Log in or Create an account to join the conversation.
- Neville
-
 Topic Author
- Offline
- Sustaining Member
-
- Posts: 90
- Thanks: 78
Re: New Member with 1979 Z1300 A1
9 years 6 months ago
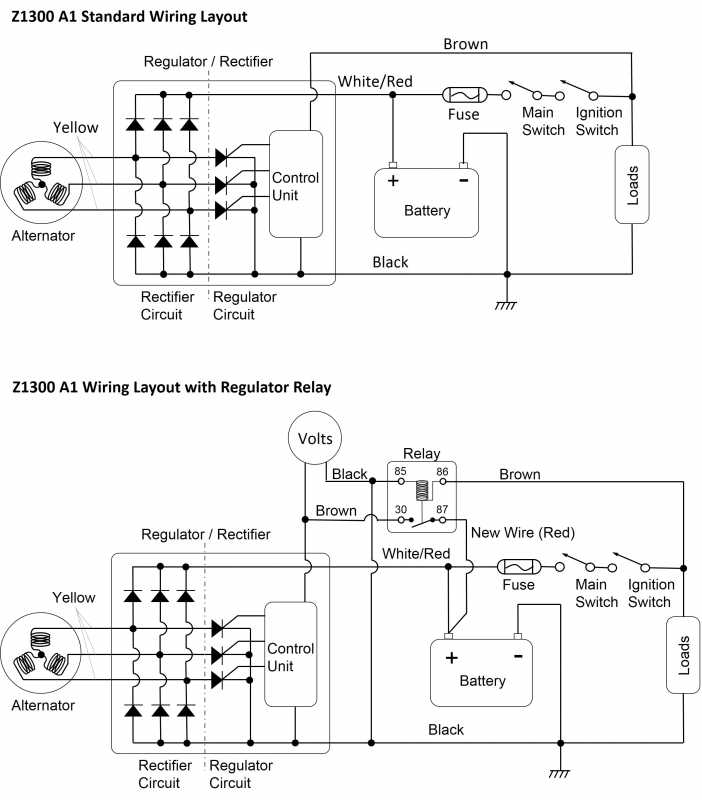
Just to complete this thread, I have attached a wiring diagram below that shows the original charge system layout and the modified arrangement with relay in case anyone else needs to do this. It also shows where I connected the voltmeter as I wanted to monitor battery voltage, not the main feed wire voltage (brown wire).
The following user(s) said Thank You: zed_thirteen, Ledkz1300
Please Log in or Create an account to join the conversation.
- Ledkz1300
-
- Offline
- Platinum Member
-
- Posts: 627
- Thanks: 71
Please Log in or Create an account to join the conversation.
- Neville
-
Topic Author
- Offline
- Sustaining Member
-
- Posts: 90
- Thanks: 78
Re: New Member with 1979 Z1300 A1
6 years 1 month ago
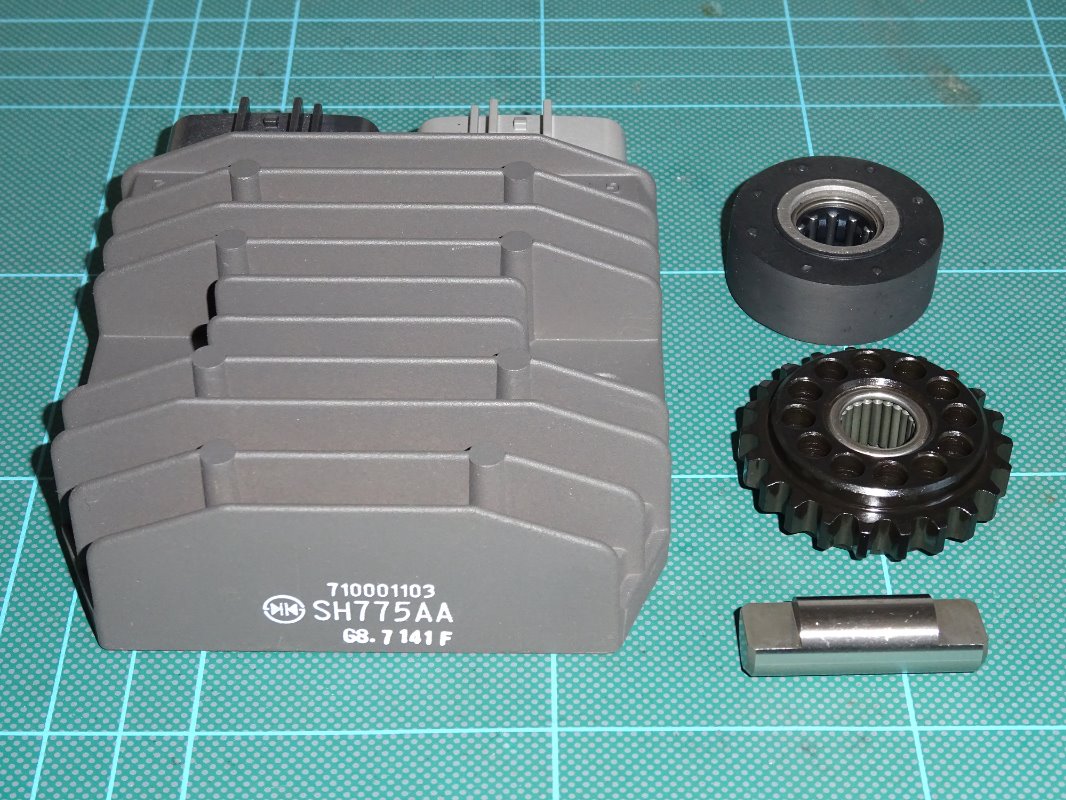
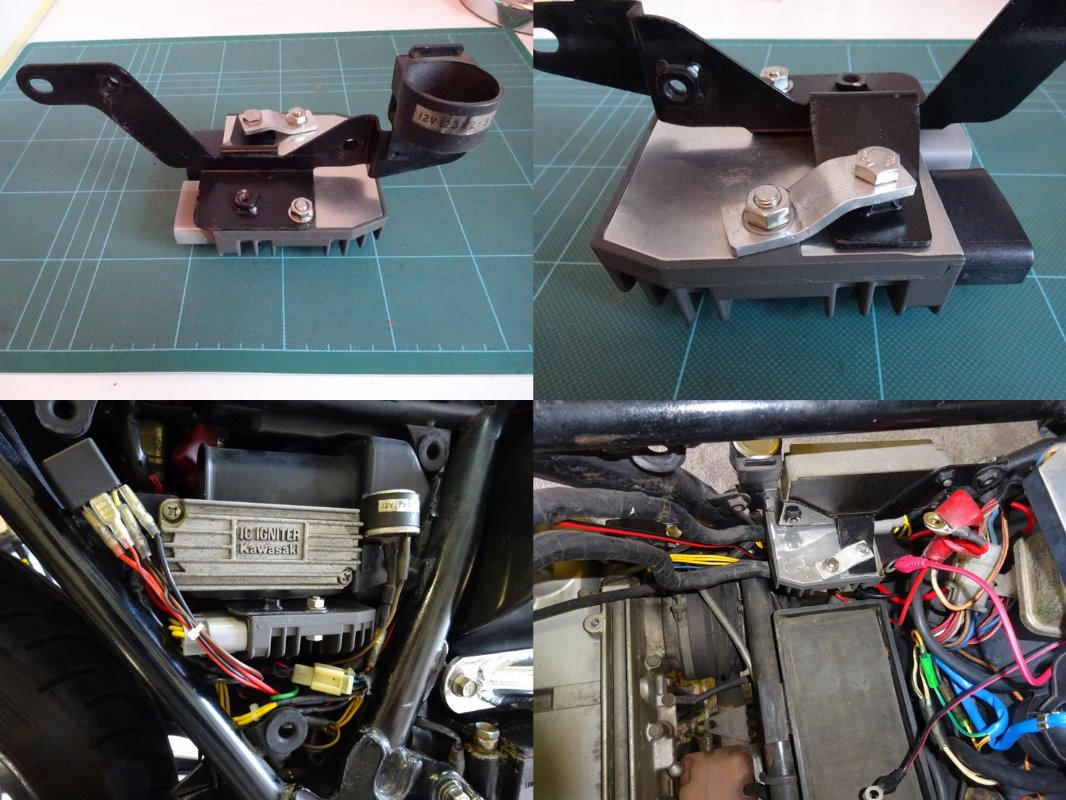
A recent update on my A1 – It turned 40 years old last year so I decided to buy it some birthday presents – I have had long term stator/charging problems so took the advice from this forum and purchased a Shindengen SH775 series regulator. I fitted this in June last year and posted a short item on how I fitted it (see
www.kz1300.com/index.php/forum/bike-proj...goal?start=312#25242
– page 53). It’s a tight fit if you want to retain the waterproof connectors but just fits in the original regulator location with some minor modifications to the bracket. My A1 has now covered over 32,000 miles so again following advice on this forum, decided that it was time to replace the cam idler gear and lower rubber guide wheel.
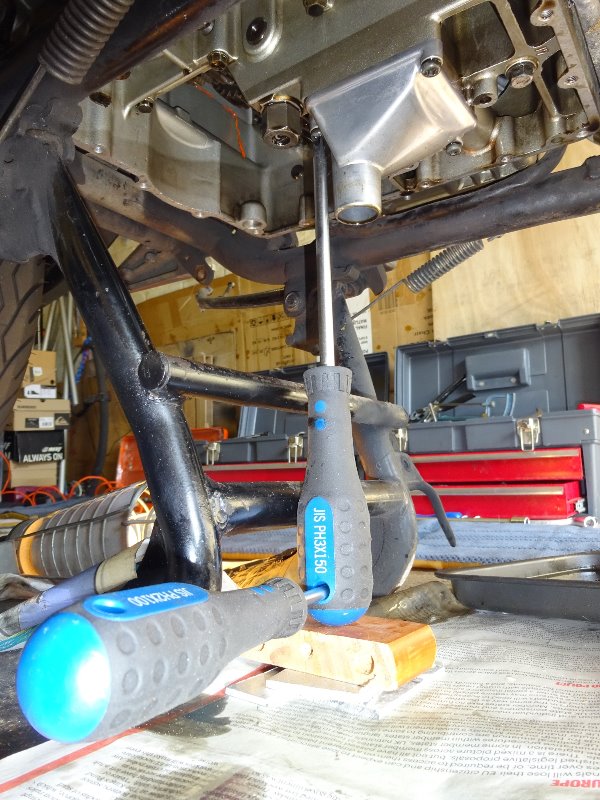
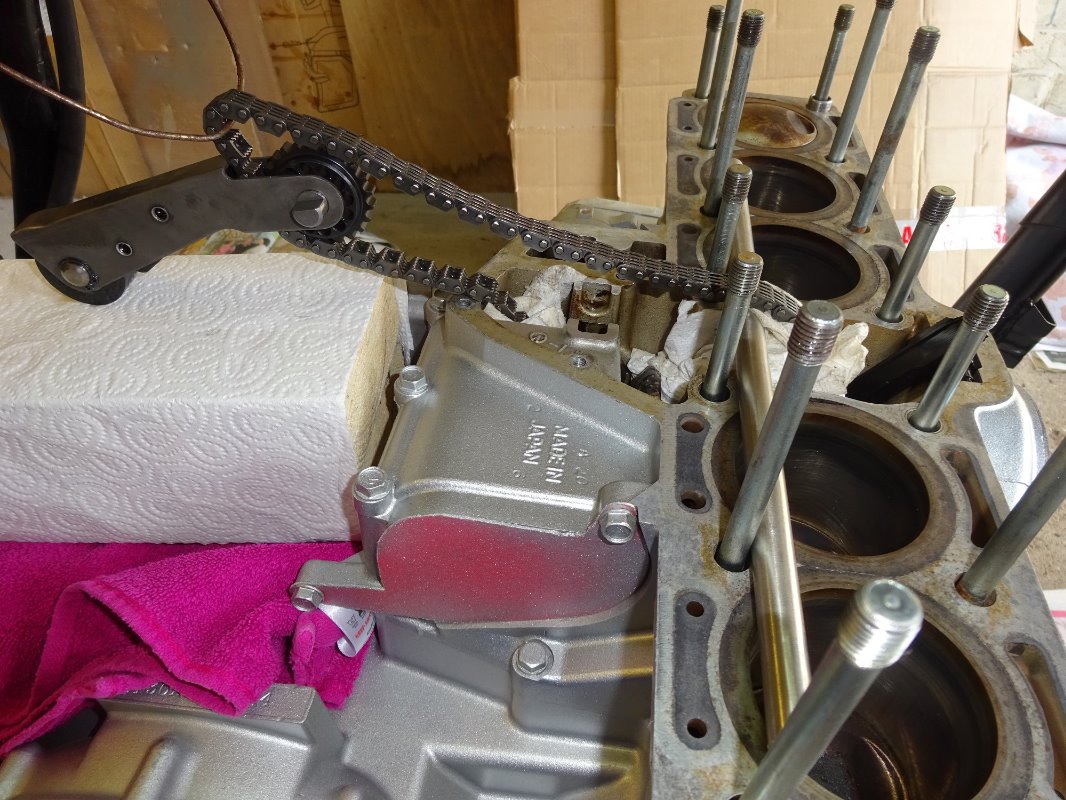
With most of us on lockdown, I finally found the time to not only fit the new parts but also to carry out some renovation work and to repaint the engine as it was showings its age. I also took the opportunity to remove the sump, clean the oil strainer and renovate the outside of the sump. The crosshead screws holding the oil pickup were very tight but using a wedge underneath my JIS driver seemed to work well. My biggest headache was cleaning off the old gasket from underneath the engine which is very time consuming and messy (but essential) to avoid any future leaks.
I have carried out a top end strip (removing the cylinder head) a number of times already so this was fairly straightforward. I would always recommend the use of the original fit head gasket to avoid the chance of any coolant leaks but it is considerably more expensive than a pattern part.
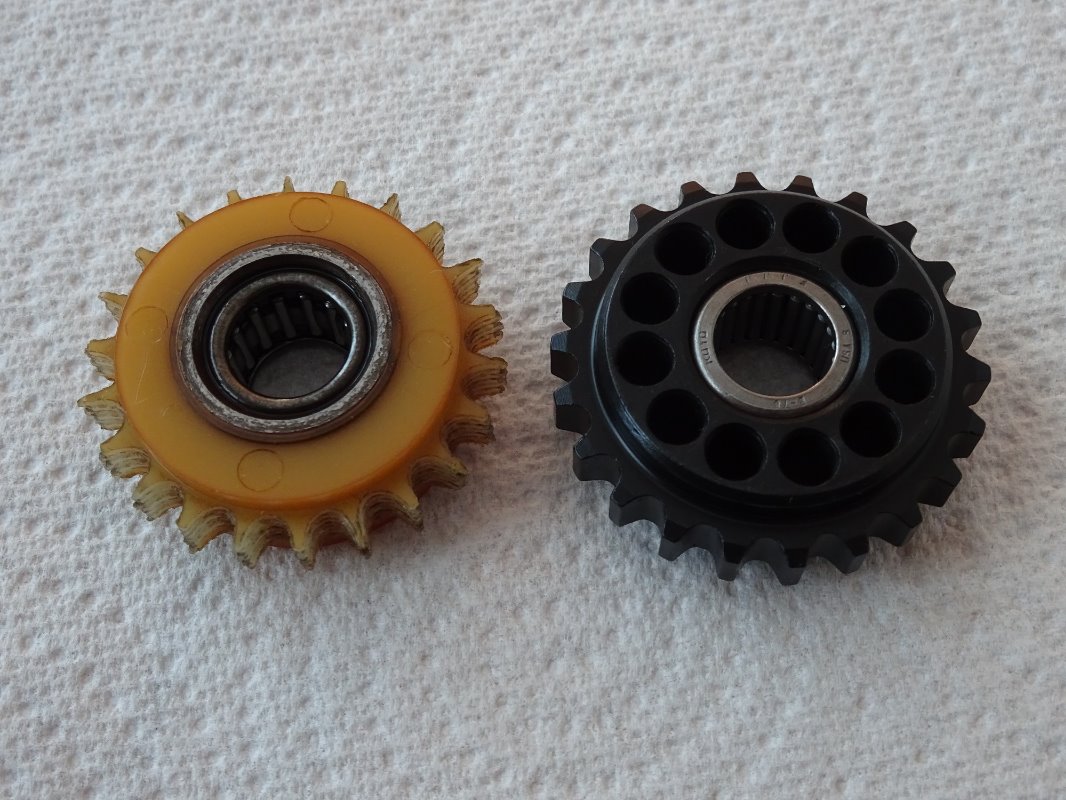
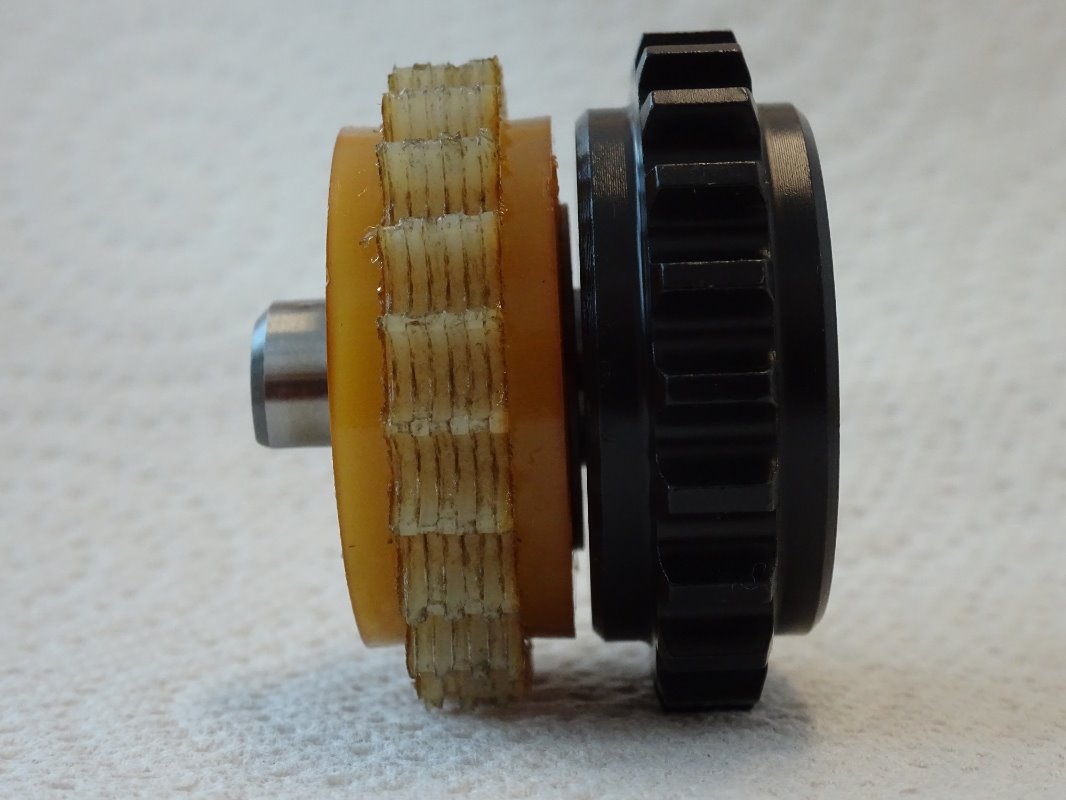
Comparing my old plastic gear with the new Liska unit, it is clear that my plastic gear is close to its wear limit. I also suspect that the wear on this gear is not proportional with mileage and once it starts to wear, losing the exact gear pitch with the cam chain, it will wear far more rapidly. I was always uncomfortable with a plastic gear in this location as it is load bearing and whilst it is a low noise solution and less expensive to make, I am much more comfortable with a more robust solution. For reference, I fitted the ZX-11 tensioner at around 24,000 miles and also shortened the spring by 10mm as recommended but I am sure this puts more stress on the gear. My gear is less worn that many posted on this forum but I still think it was time for replacement.
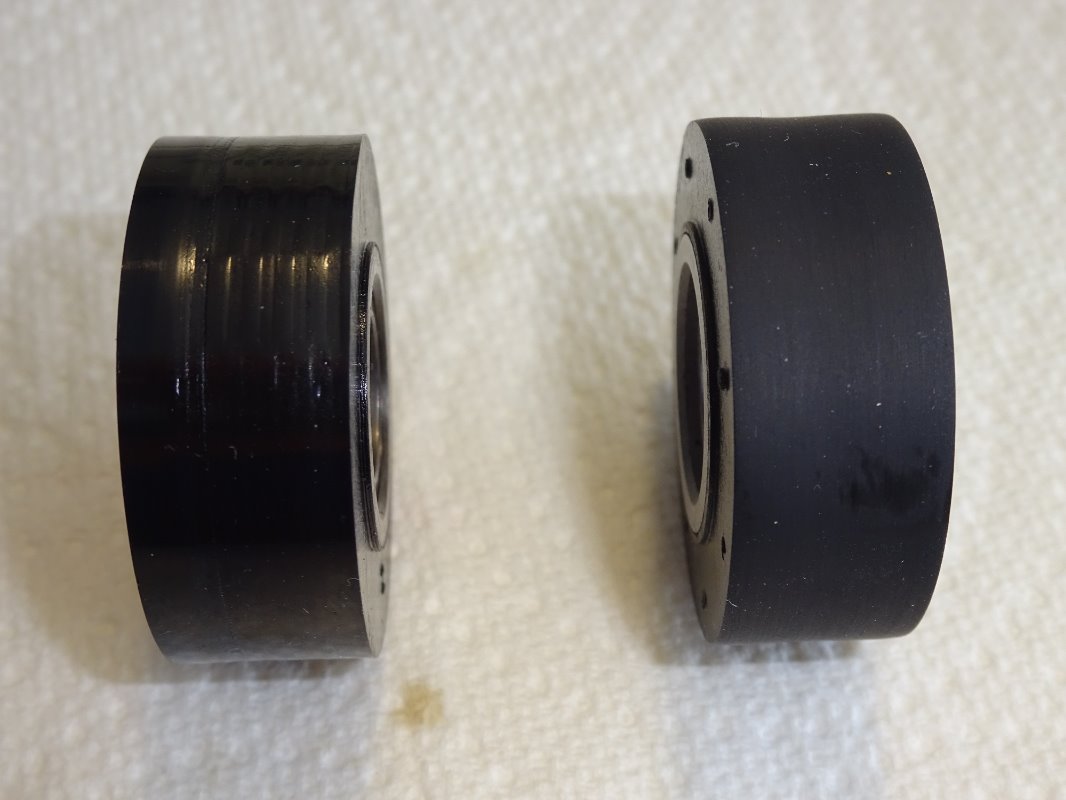
The lower rubber guide wheel was in better condition than I expected but showed some witness marks from the cam chain. I bought the new wheel from MCG in Germany (always good service and quality parts). Fitting was straightforward but ensuring that the idler shaft rubbers are fitted (and glued) correctly and don’t drop down inside the cam chain tunnel (even when this is covered as well as possible) can be nerve wracking.
With most of us on lockdown, I finally found the time to not only fit the new parts but also to carry out some renovation work and to repaint the engine as it was showings its age. I also took the opportunity to remove the sump, clean the oil strainer and renovate the outside of the sump. The crosshead screws holding the oil pickup were very tight but using a wedge underneath my JIS driver seemed to work well. My biggest headache was cleaning off the old gasket from underneath the engine which is very time consuming and messy (but essential) to avoid any future leaks.
I have carried out a top end strip (removing the cylinder head) a number of times already so this was fairly straightforward. I would always recommend the use of the original fit head gasket to avoid the chance of any coolant leaks but it is considerably more expensive than a pattern part.
Comparing my old plastic gear with the new Liska unit, it is clear that my plastic gear is close to its wear limit. I also suspect that the wear on this gear is not proportional with mileage and once it starts to wear, losing the exact gear pitch with the cam chain, it will wear far more rapidly. I was always uncomfortable with a plastic gear in this location as it is load bearing and whilst it is a low noise solution and less expensive to make, I am much more comfortable with a more robust solution. For reference, I fitted the ZX-11 tensioner at around 24,000 miles and also shortened the spring by 10mm as recommended but I am sure this puts more stress on the gear. My gear is less worn that many posted on this forum but I still think it was time for replacement.
The lower rubber guide wheel was in better condition than I expected but showed some witness marks from the cam chain. I bought the new wheel from MCG in Germany (always good service and quality parts). Fitting was straightforward but ensuring that the idler shaft rubbers are fitted (and glued) correctly and don’t drop down inside the cam chain tunnel (even when this is covered as well as possible) can be nerve wracking.
Please Log in or Create an account to join the conversation.
- Neville
-
Topic Author
- Offline
- Sustaining Member
-
- Posts: 90
- Thanks: 78
Re: New Member with 1979 Z1300 A1
6 years 1 month ago - 6 years 1 month ago
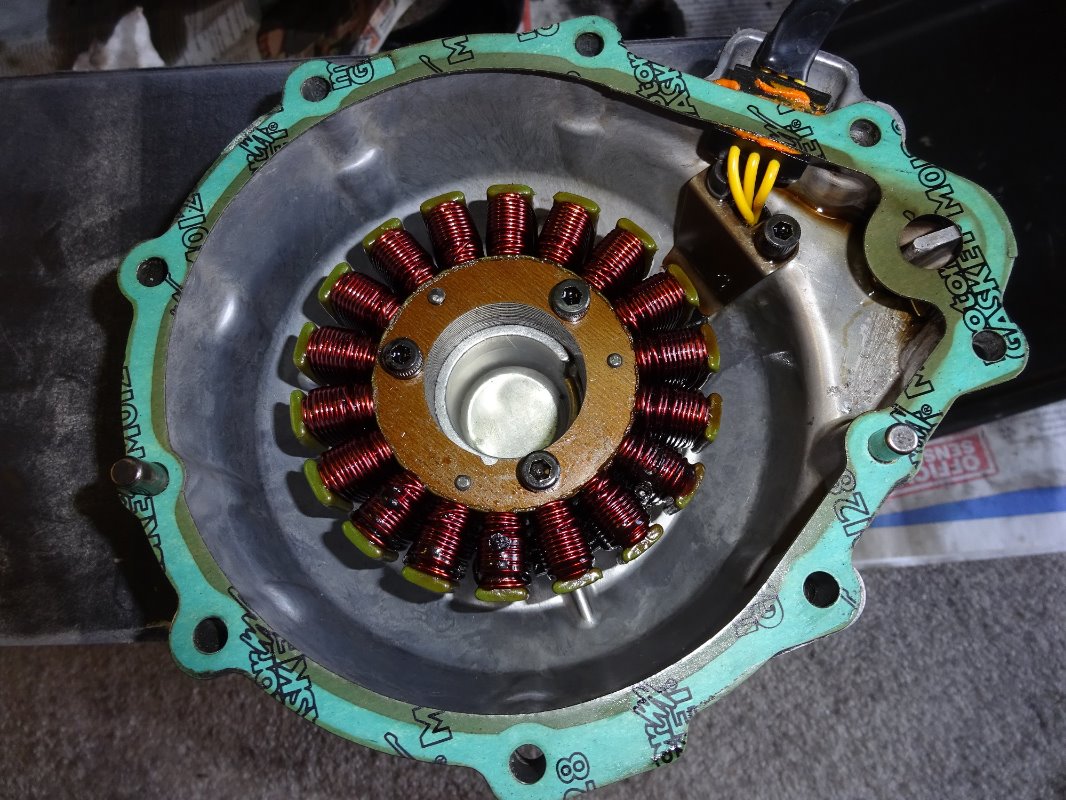
The engine has now covered around 1000 miles since fitting the Shindengen SH775 series regulator and it was good to see that the stator is free from the usual oil pyrolysis that I have observed with all previous stators (see first stator pic) and “shunt” type regulators. I would highly recommend this mod for anyone that has charging/stator issues
.
Stator with Shunt regulator
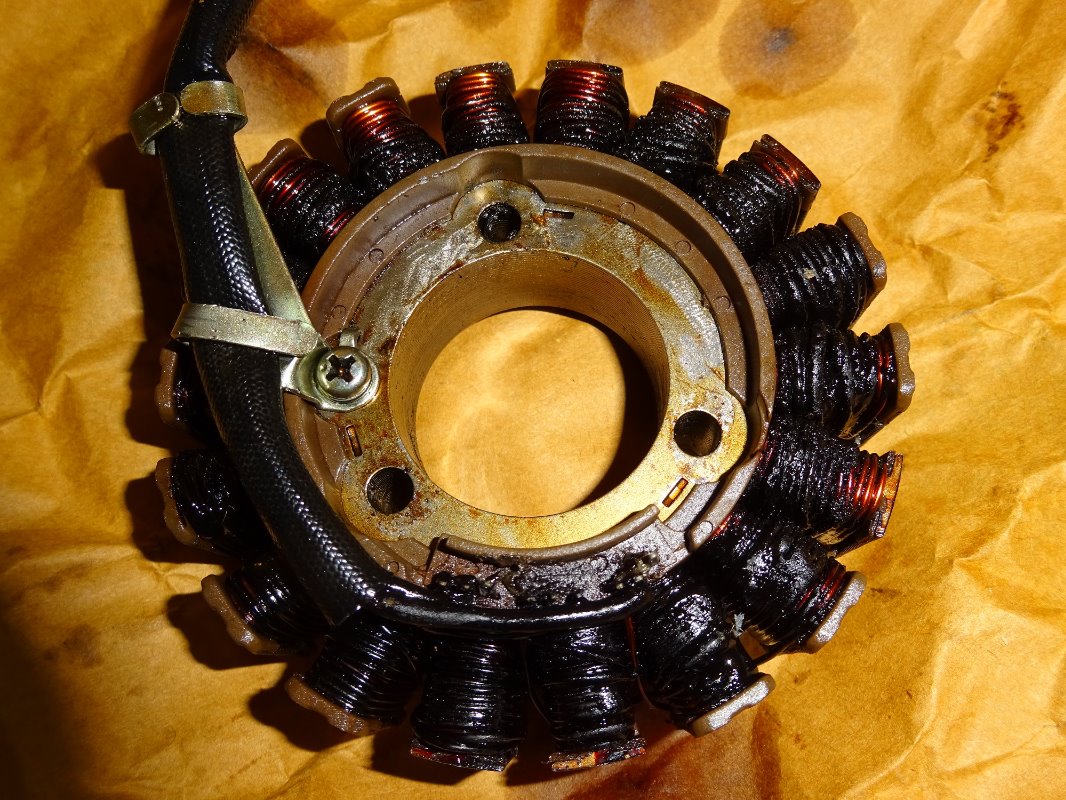
Stator with SH775 after 1000 miles
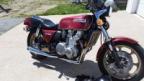
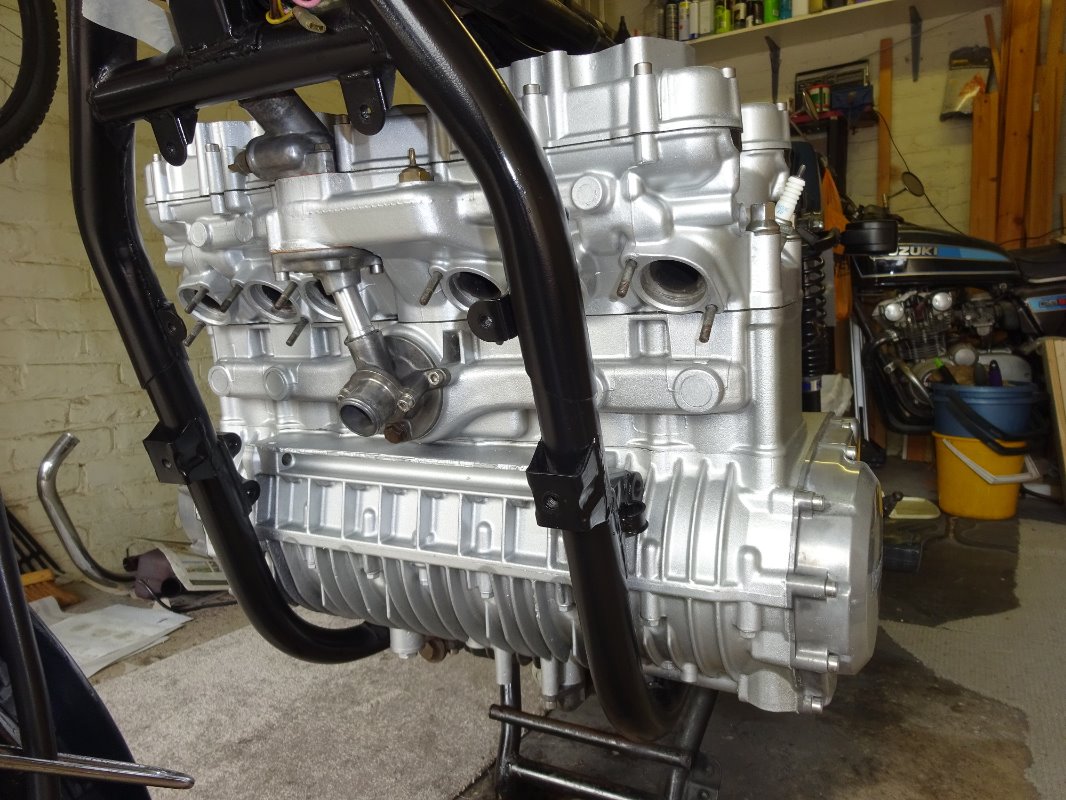
However, it was the renovation and paint work that took the most time. I have seen a number of comments on this forum about the pros and cons of re-spraying the engine either installed or removed. Removing the engine is no small undertaking and there is always the risk of damaging the paintwork during re-installation. I decided to re-spray the cylinder head after it had been removed – allowing easier prep and better access. I also brushed and cleaned the water outlet housing, timing/ignition pickup housing and sump but left them as bare aluminum as that seemed to be the original factory finish? The block and crankcases were prepped and sprayed in the frame and required a substantial amount of masking of the frame, top of the cylinder block, side covers etc. I am not sure the re-spray was any faster by not removing the engine as access for hard to get areas to prepare for painting is much more difficult and time consuming. However, preparation is everything when it comes to painting and I spent many hours with a brass brush, Dremel flex shaft and brass wire attachments and regular vacuuming to remove debris and cleaning with thinners.
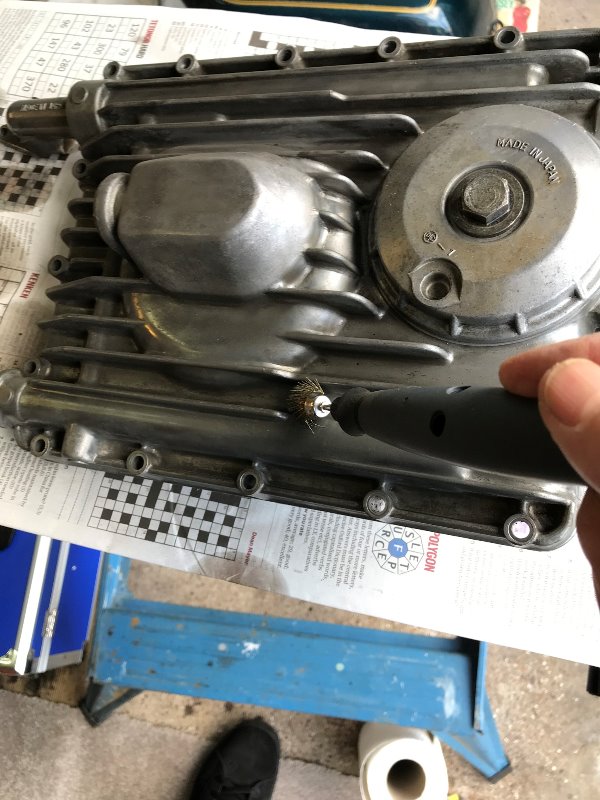
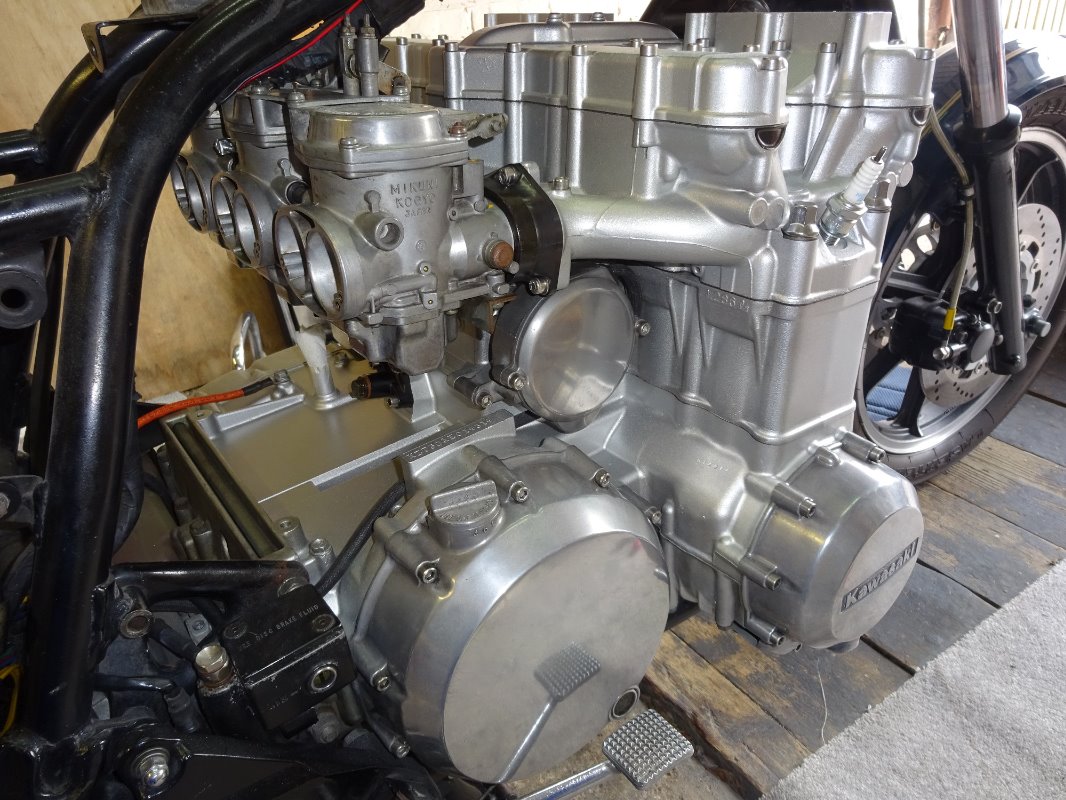
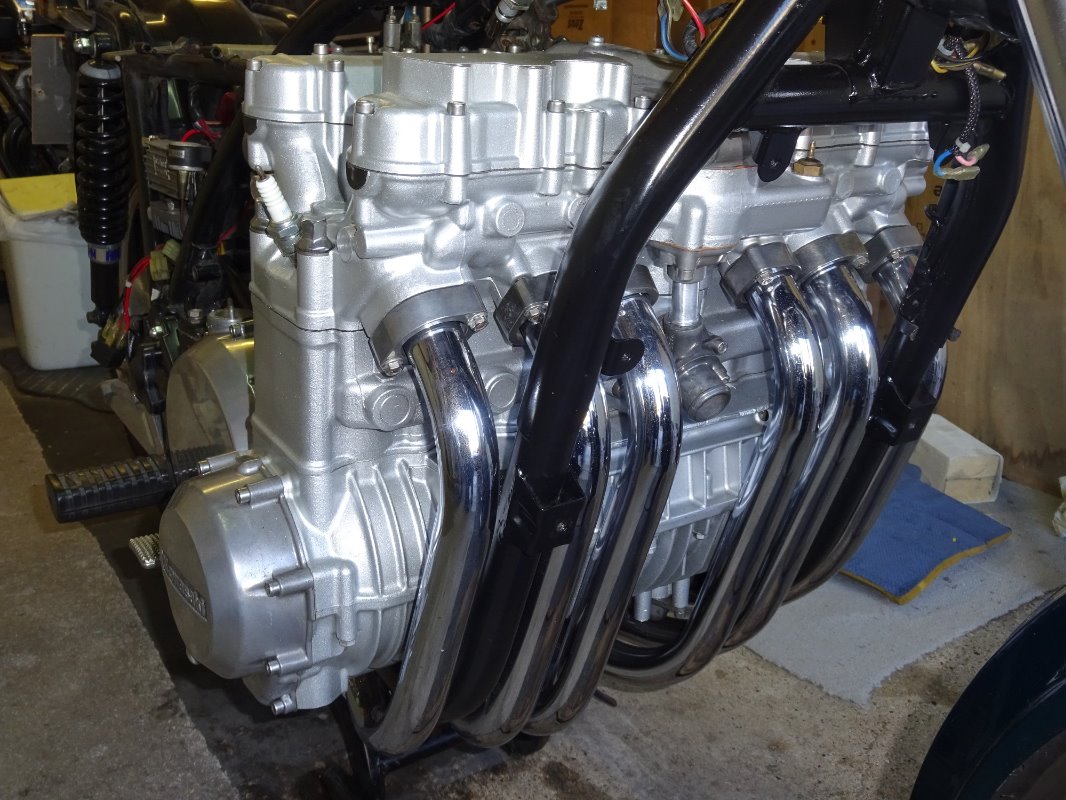
It took me about a week to complete all of the preparation. I used VHT SP995 Cast Aluminum Engine Enamel which needs to be sprayed thinly to avoid any runs but 3 thin coats provided a very good finish. After completion, I ran the engine for an hour or so to “cure” the paint as recommended. Very happy with the results – and also spent some re-spraying the frame down tubes and also cleaning up the exhaust chrome – particularly those hard to reach area

.
Stator with Shunt regulator
Stator with SH775 after 1000 miles
However, it was the renovation and paint work that took the most time. I have seen a number of comments on this forum about the pros and cons of re-spraying the engine either installed or removed. Removing the engine is no small undertaking and there is always the risk of damaging the paintwork during re-installation. I decided to re-spray the cylinder head after it had been removed – allowing easier prep and better access. I also brushed and cleaned the water outlet housing, timing/ignition pickup housing and sump but left them as bare aluminum as that seemed to be the original factory finish? The block and crankcases were prepped and sprayed in the frame and required a substantial amount of masking of the frame, top of the cylinder block, side covers etc. I am not sure the re-spray was any faster by not removing the engine as access for hard to get areas to prepare for painting is much more difficult and time consuming. However, preparation is everything when it comes to painting and I spent many hours with a brass brush, Dremel flex shaft and brass wire attachments and regular vacuuming to remove debris and cleaning with thinners.
It took me about a week to complete all of the preparation. I used VHT SP995 Cast Aluminum Engine Enamel which needs to be sprayed thinly to avoid any runs but 3 thin coats provided a very good finish. After completion, I ran the engine for an hour or so to “cure” the paint as recommended. Very happy with the results – and also spent some re-spraying the frame down tubes and also cleaning up the exhaust chrome – particularly those hard to reach area
Last edit: 6 years 1 month ago by Neville. Reason: wrong picture inserted
Please Log in or Create an account to join the conversation.
Time to create page: 0.188 seconds