
Part 2: Complete rebuild 1979 carburettors
- scotch
-
 Topic Author
- Offline
- Sustaining Member
-

- Posts: 2046
- Thanks: 945
1979 Carb Rebuild (Pt 1)
11 years 7 months ago - 6 months 2 weeks ago
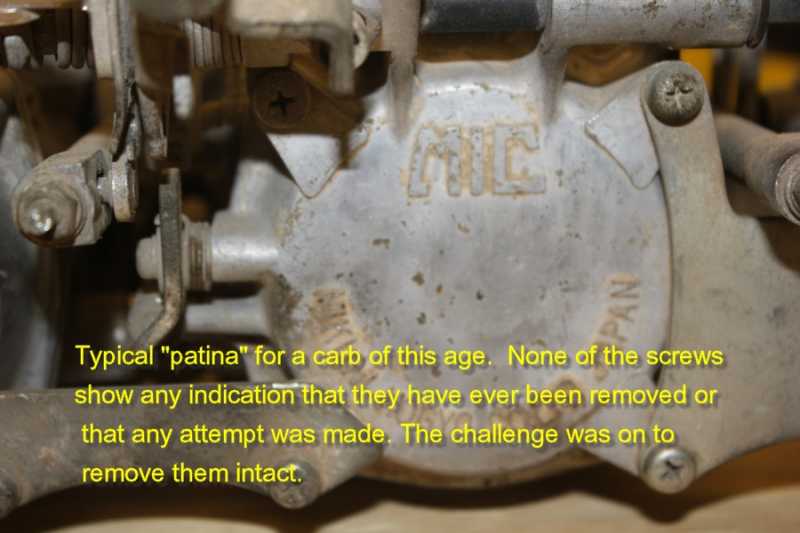
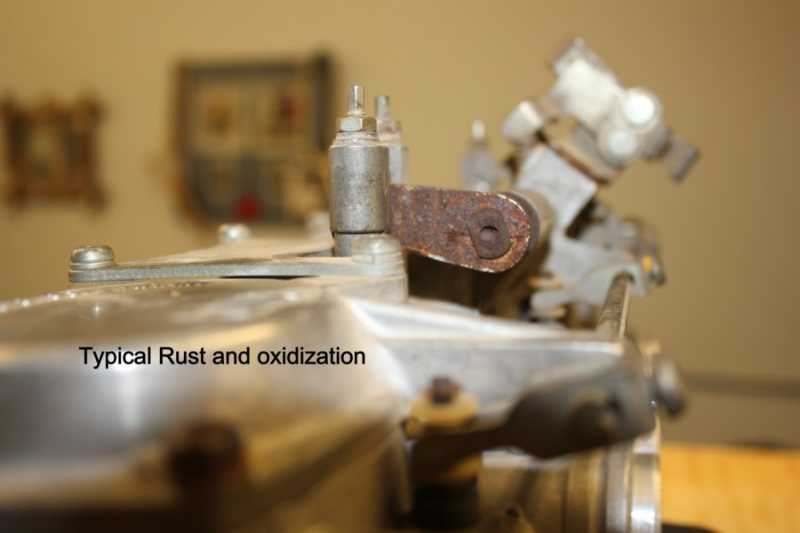
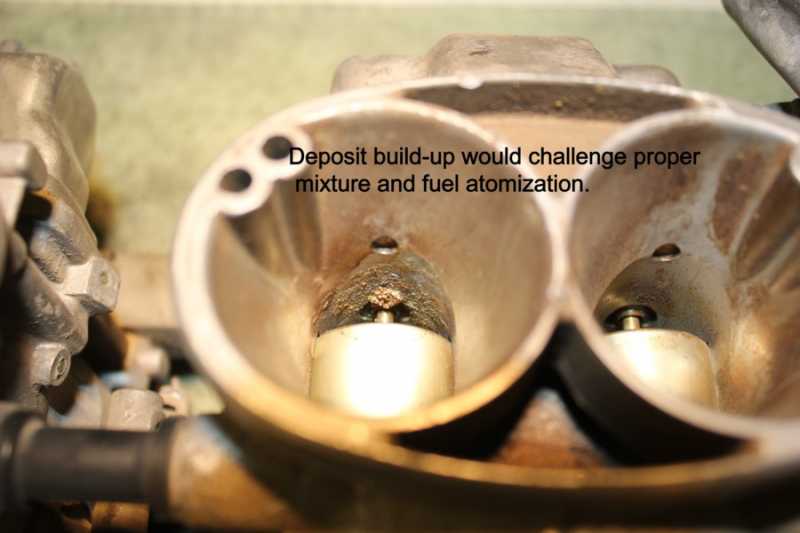
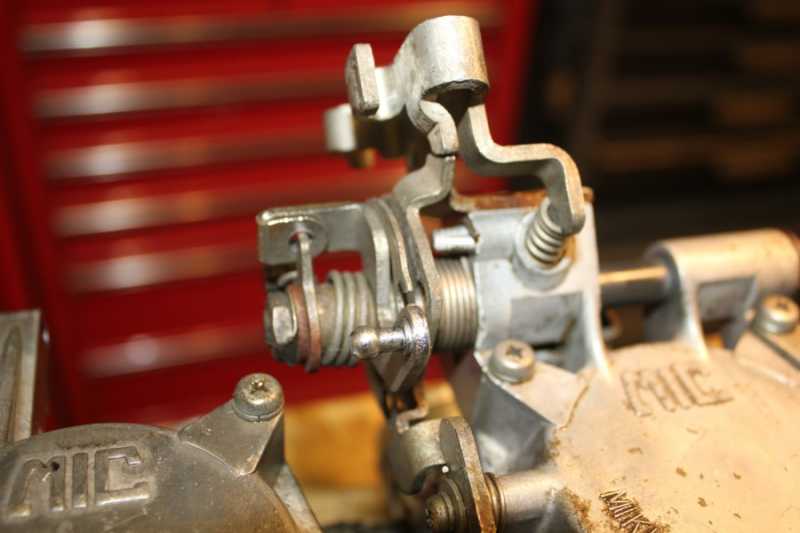
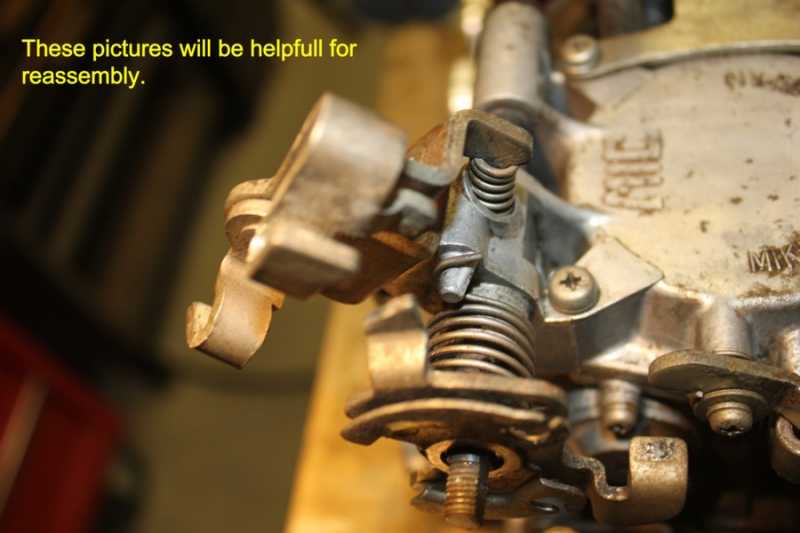
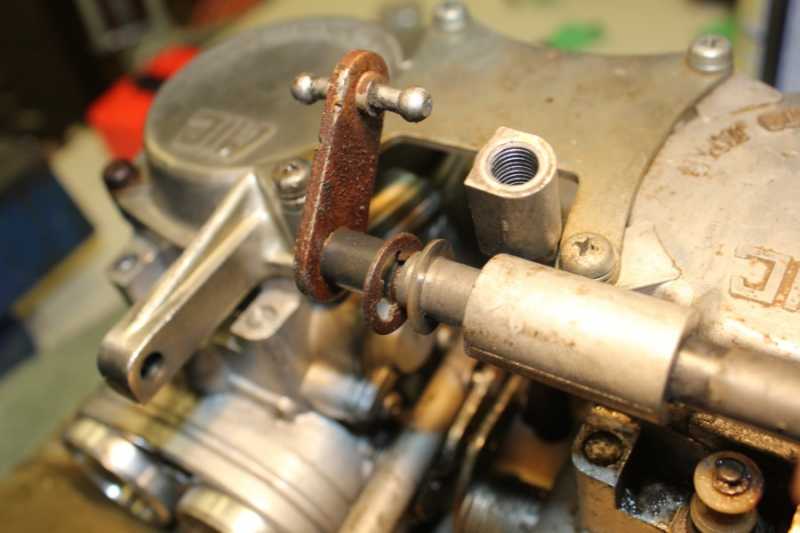
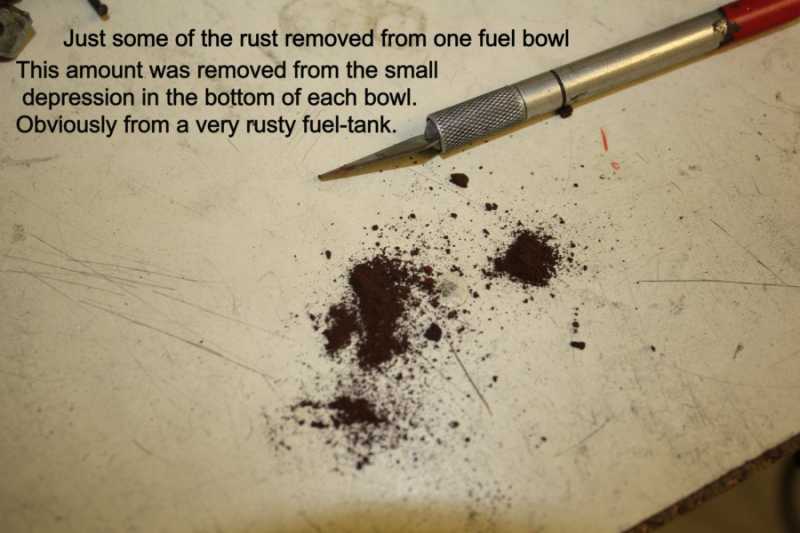
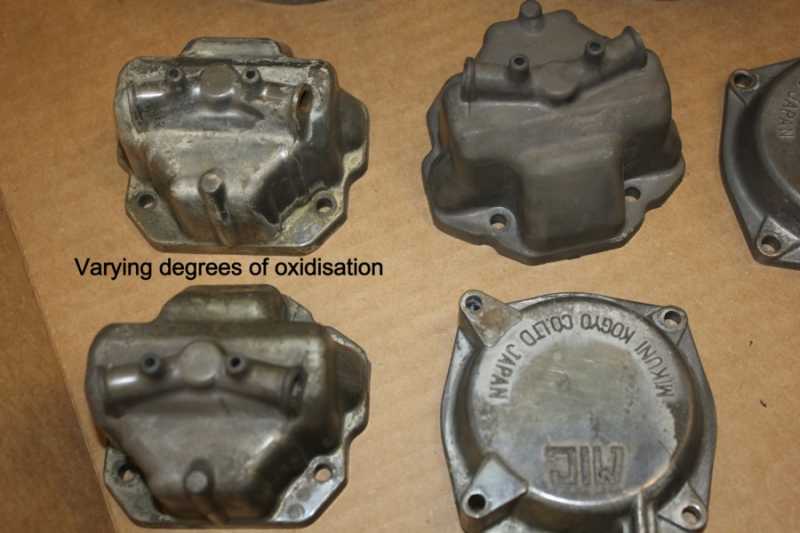
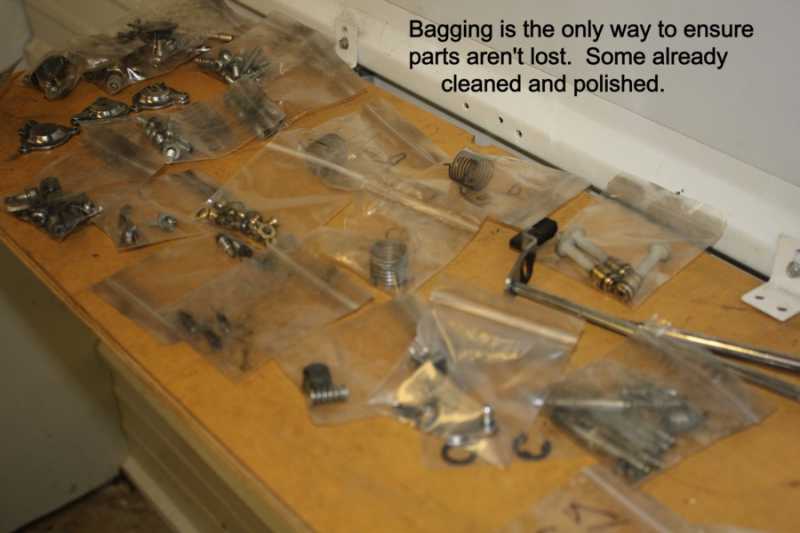
I just received a complete set of carbs from a '79 and thought some pictures and explanations of the complete tear-down and re-build may be of help to others. The pictures are self-explanatory. Part 2 of the tear-down to follow.

1980 KZ 1300 sr# KZT30A-009997
Always High - Know Fear !
Always High - Know Fear !
Last edit: 6 months 2 weeks ago by scotch.
The following user(s) said Thank You: zed_thirteen, Haggler, Askar, PaulD
Please Log in or Create an account to join the conversation.
- scotch
-
Topic Author
- Offline
- Sustaining Member
-
- Posts: 2046
- Thanks: 945
Re: Part 2: Complete rebuild 1979 carburettors
11 years 7 months ago - 6 months 2 weeks ago
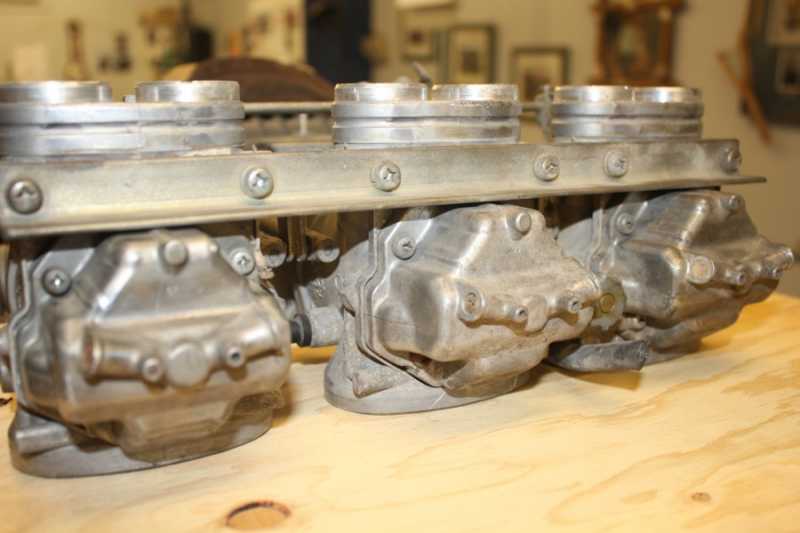
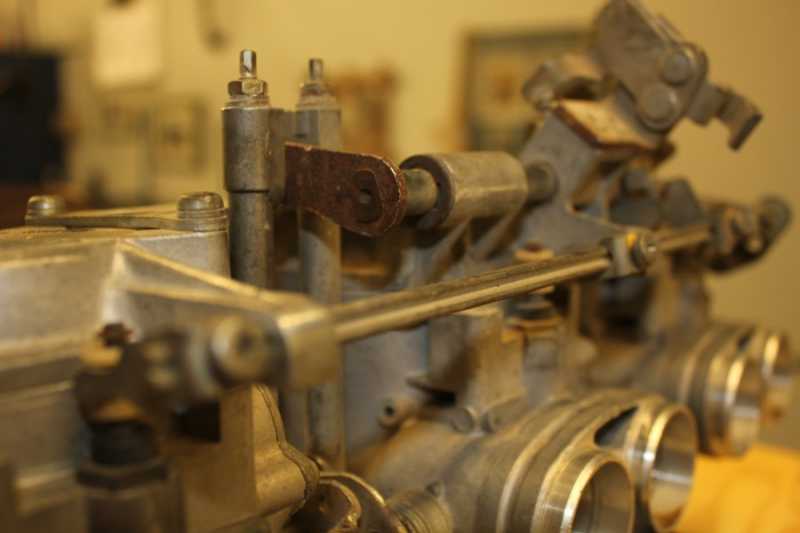
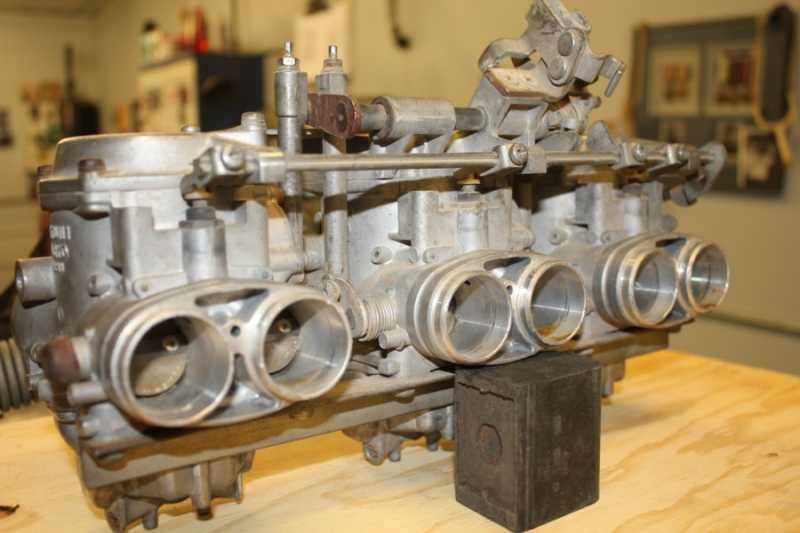
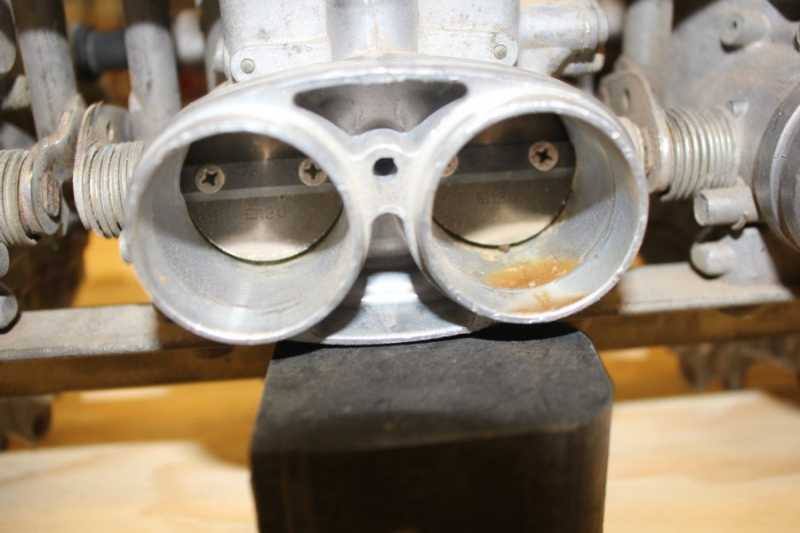
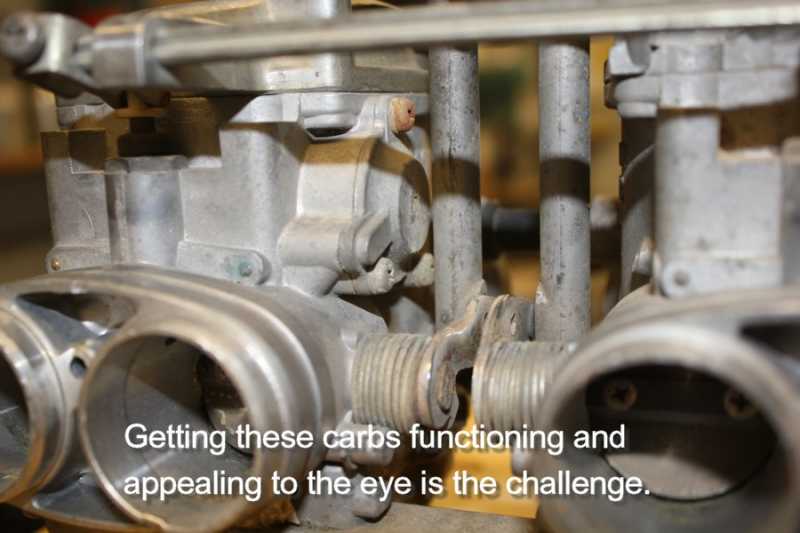
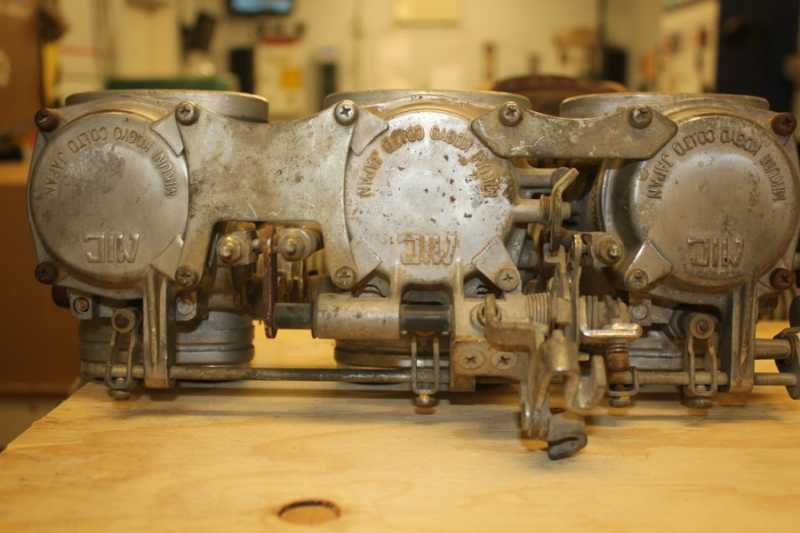
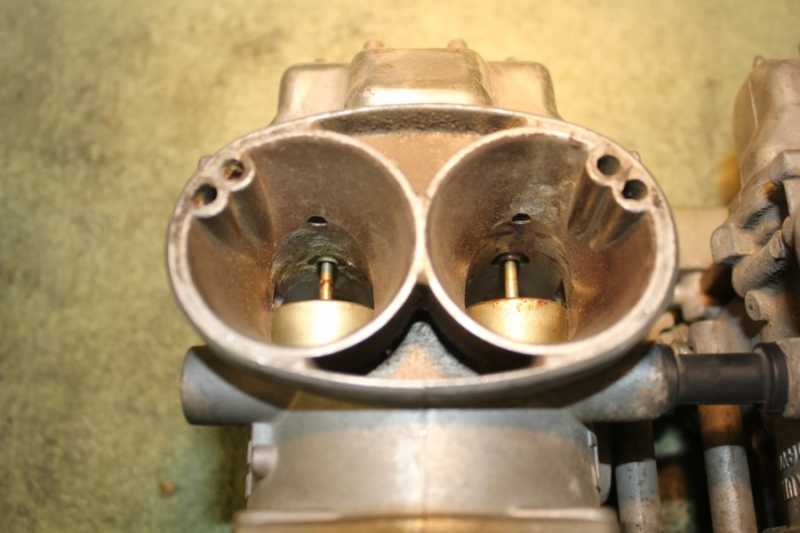
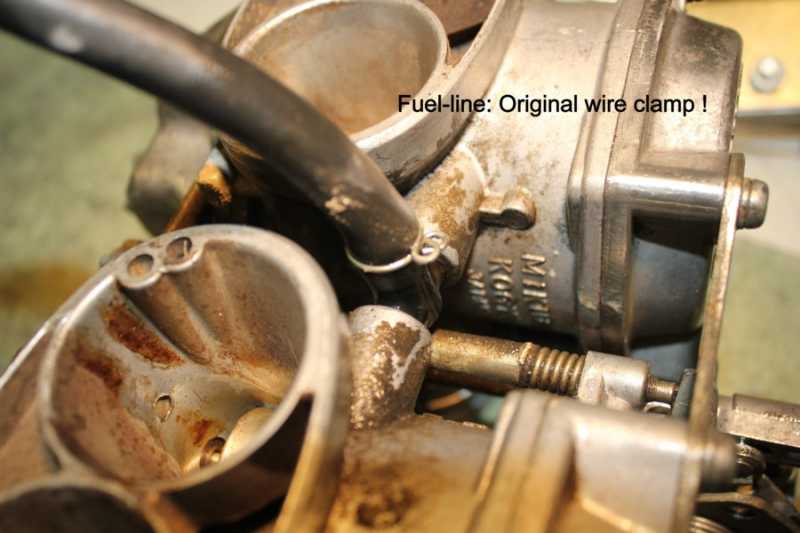
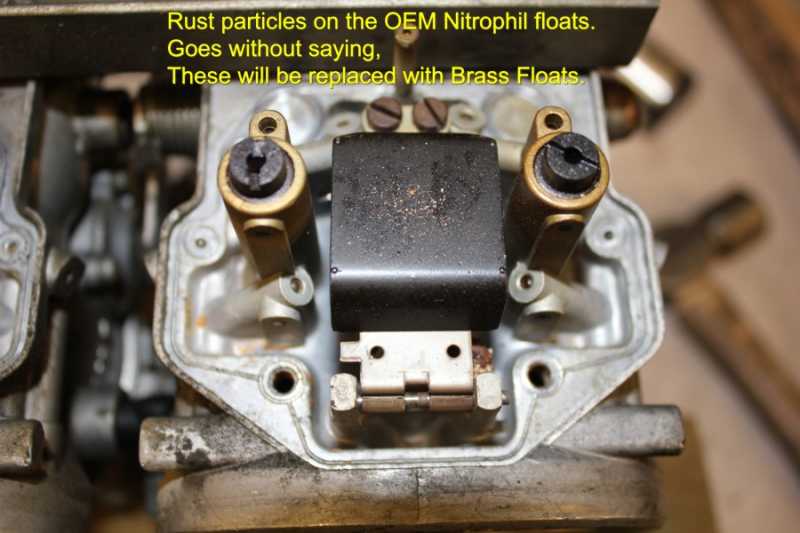
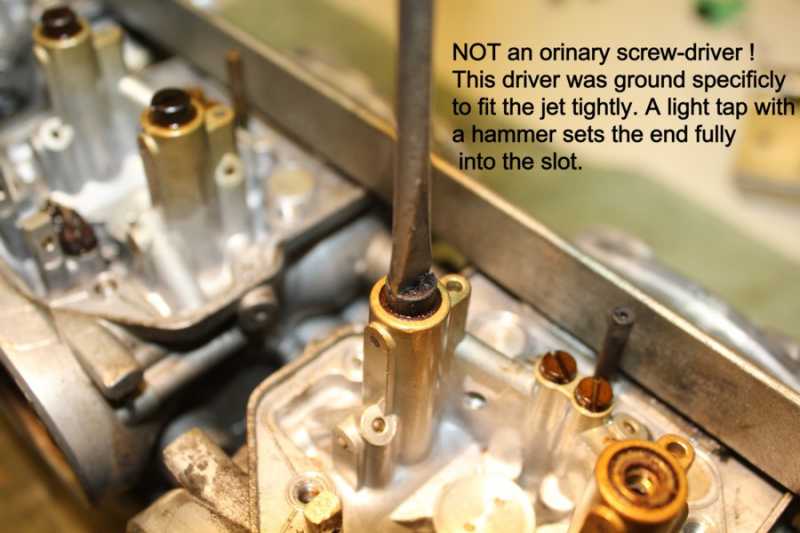
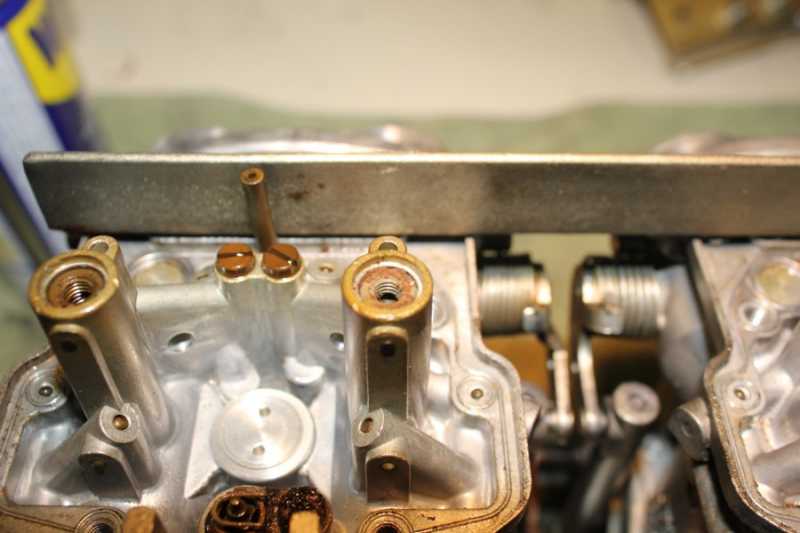
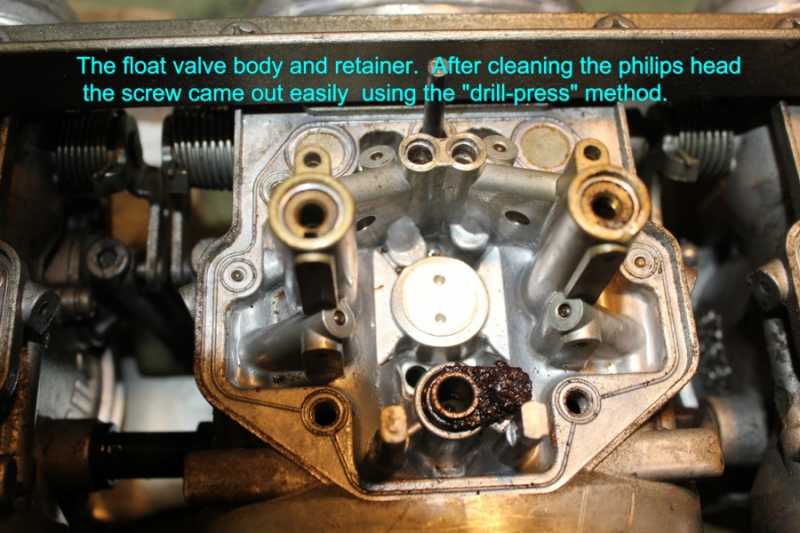
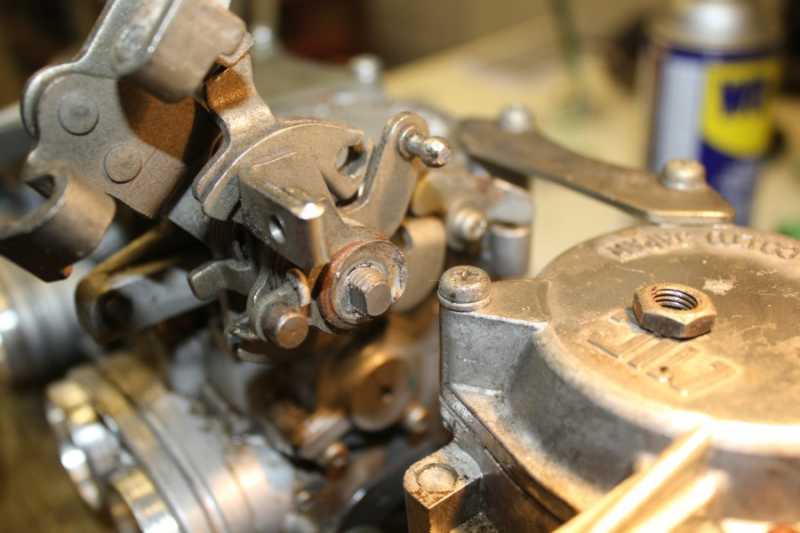
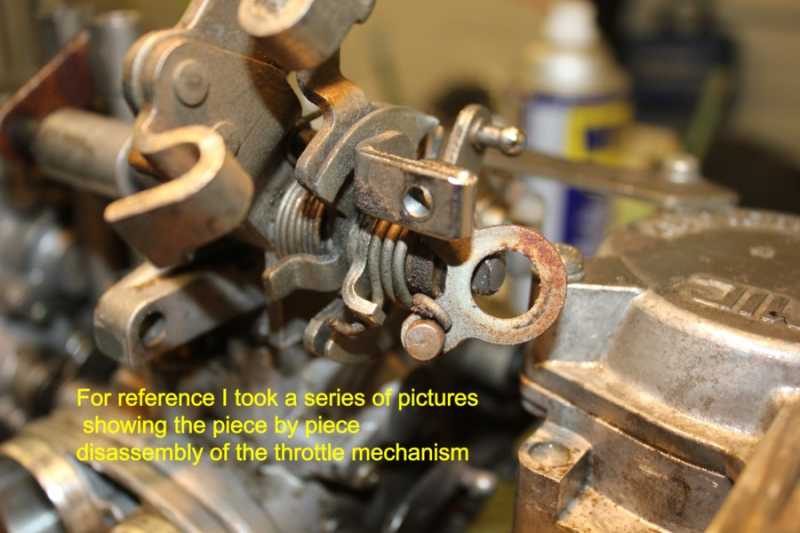
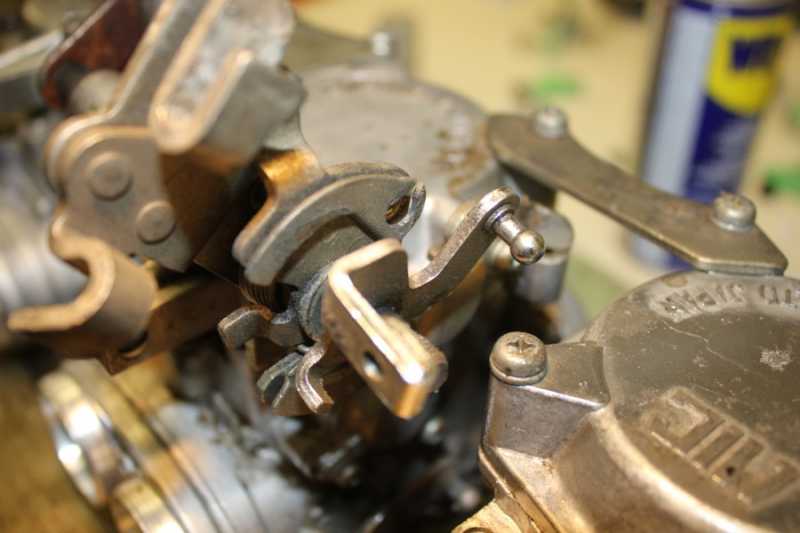
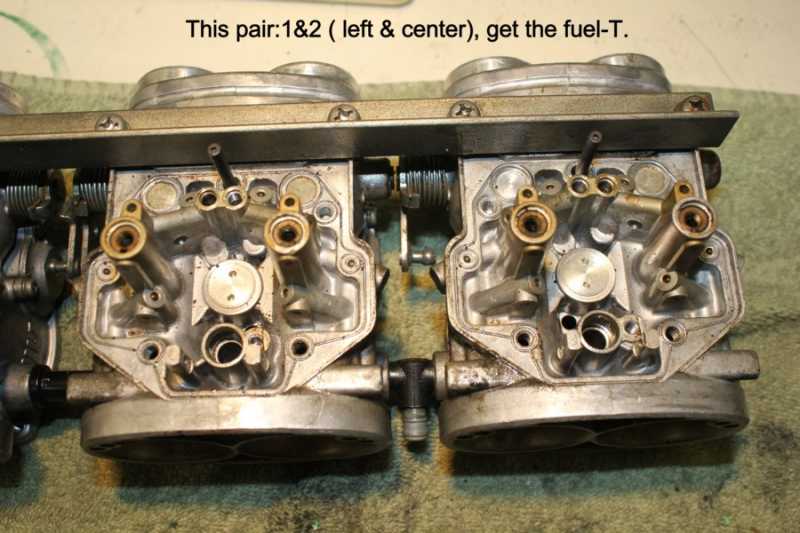
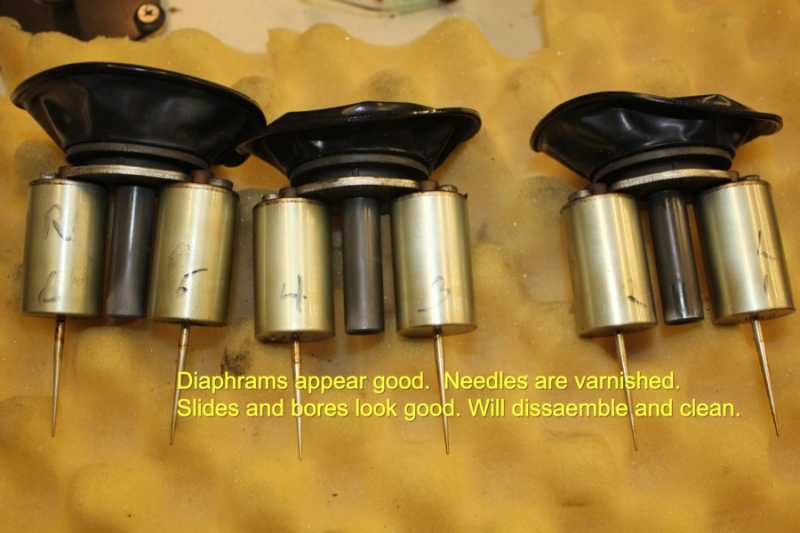
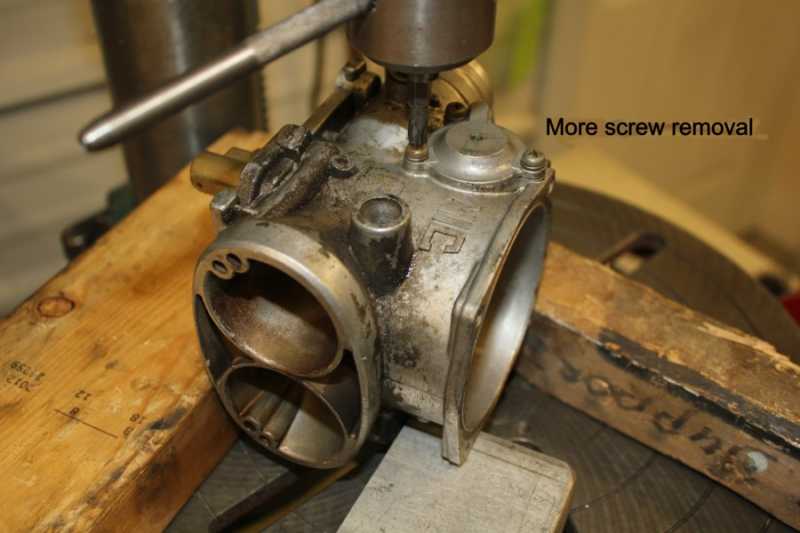
More tear-down pictures:
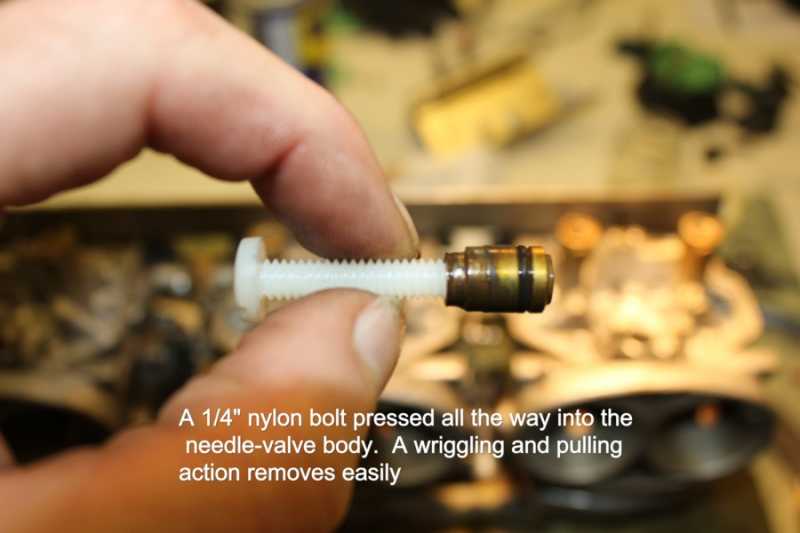
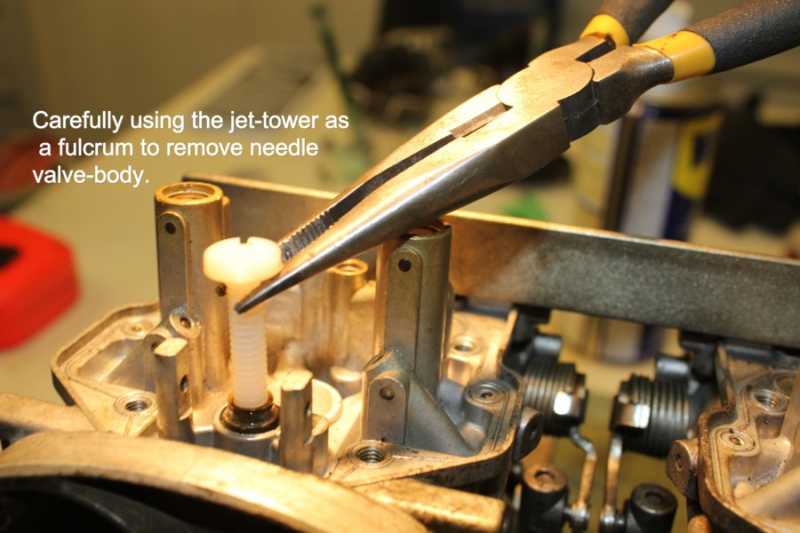
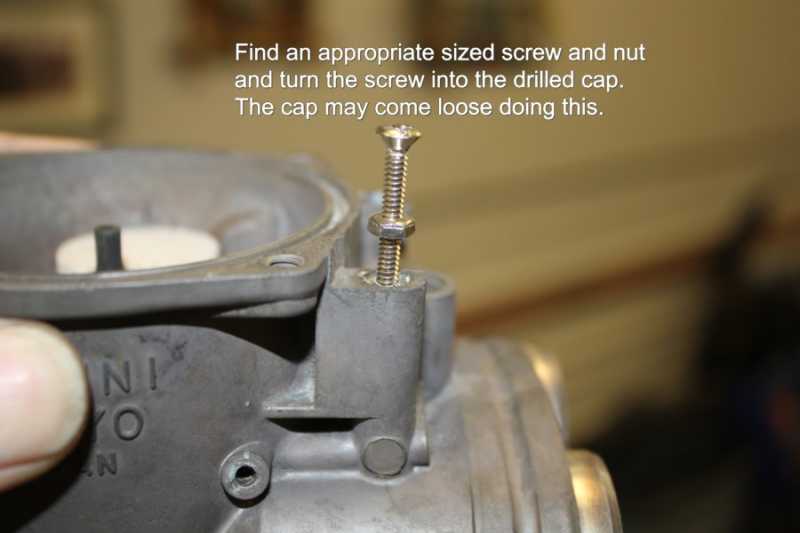
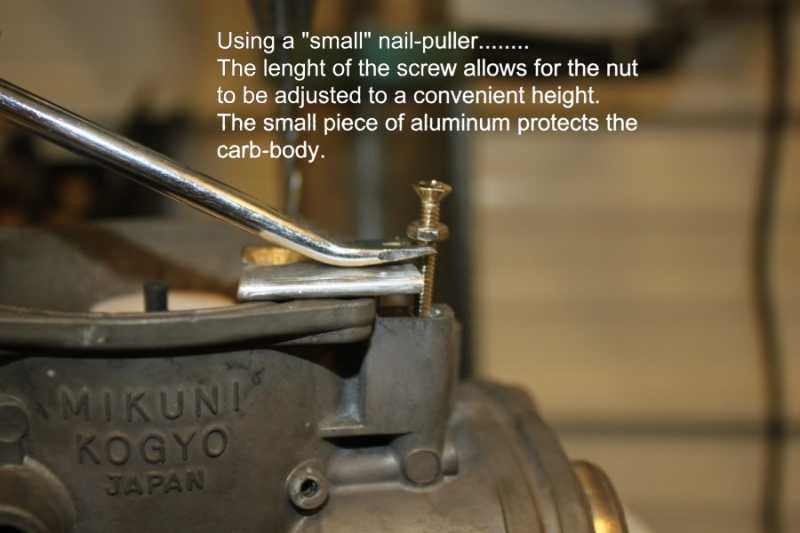
This works most of the time if you're removing relatively new valve-bodies. If the removal is to replace with new valves, use an appropriate sized TAP which will always remove them but with some damage from the TAP threads.


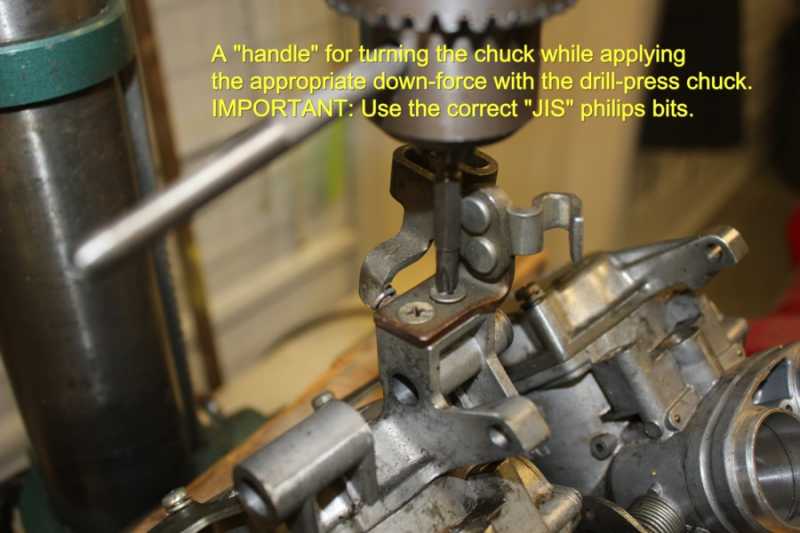


This works most of the time if you're removing relatively new valve-bodies. If the removal is to replace with new valves, use an appropriate sized TAP which will always remove them but with some damage from the TAP threads.
1980 KZ 1300 sr# KZT30A-009997
Always High - Know Fear !
Always High - Know Fear !
-
IMG_3736.jpg
-
IMG_3737.JPG
-
IMG_3738.JPG
-
IMG_3739.jpg
-
IMG_3740.JPG
-
IMG_3742.JPG
-
IMG_3743.JPG
-
IMG_3744.JPG
-
IMG_3745.JPG
-
IMG_3746.JPG
-
IMG_3747.JPG
-
IMG_3748.JPG
-
IMG_3749.JPG
-
IMG_3750.JPG
-
IMG_3752.JPG
-
IMG_3753.JPG
-
IMG_3754.JPG
-
IMG_3756.JPG
-
IMG_3757.JPG
-
IMG_3758.JPG
-
IMG_3759.JPG
-
IMG_3760.JPG
-
IMG_3761.jpg
-
IMG_3762.jpg
-
IMG_3764.jpg
-
IMG_3765.jpg
-
IMG_3767.jpg
-
IMG_3768.JPG
-
IMG_3769.JPG
Last edit: 6 months 2 weeks ago by scotch. Reason: updating
The following user(s) said Thank You: mantelappel, PaulD, rockley
Please Log in or Create an account to join the conversation.
- rob
-

- Offline
- Senior Member
-

- Posts: 51
- Thanks: 11
Re: Part 2: Complete rebuild 1979 carburettors
11 years 7 months ago
Hi Scotch
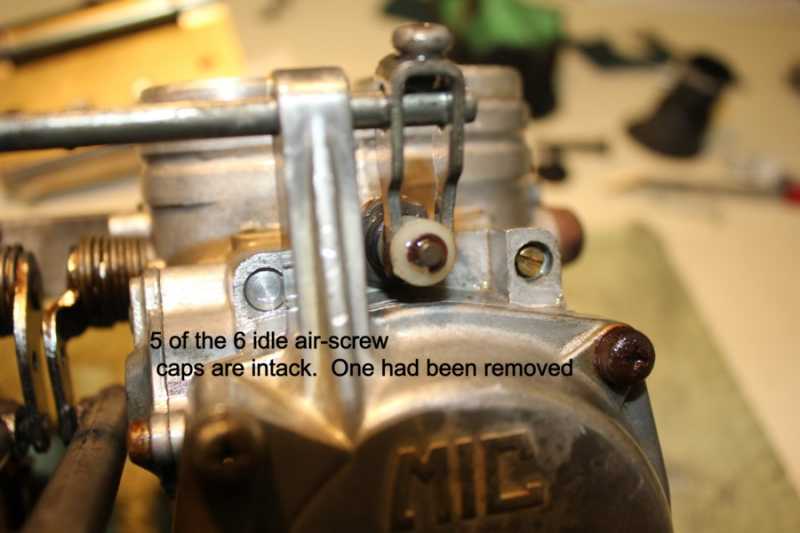
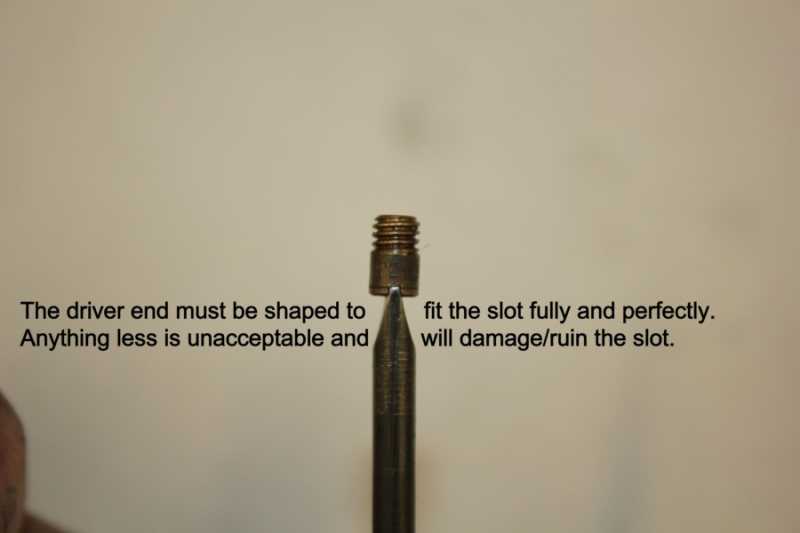
How do you remove the pilot air screws. I have a set where the previous owner has obviously burred the screw slots by not using the correct screwdriver. I am a bit stumped on this and am thinking that I would have to drill them out as a last resort.
Any ideas
Cheers
Rob
How do you remove the pilot air screws. I have a set where the previous owner has obviously burred the screw slots by not using the correct screwdriver. I am a bit stumped on this and am thinking that I would have to drill them out as a last resort.
Any ideas
Cheers
Rob
Please Log in or Create an account to join the conversation.
- scotch
-
Topic Author
- Offline
- Sustaining Member
-
- Posts: 2046
- Thanks: 945
Re: Part 2: Complete rebuild 1979 carburettors
11 years 7 months ago - 6 months 1 week ago
The tear-down continues: Some pictures may be out of apparent order !
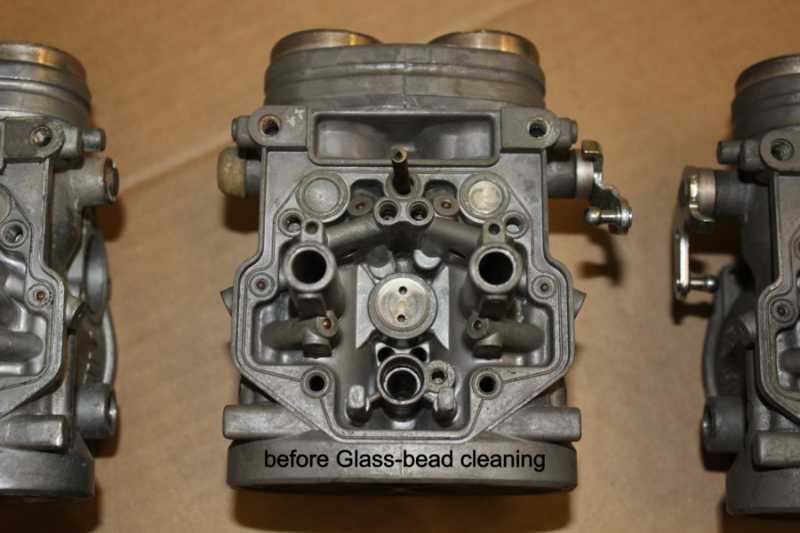
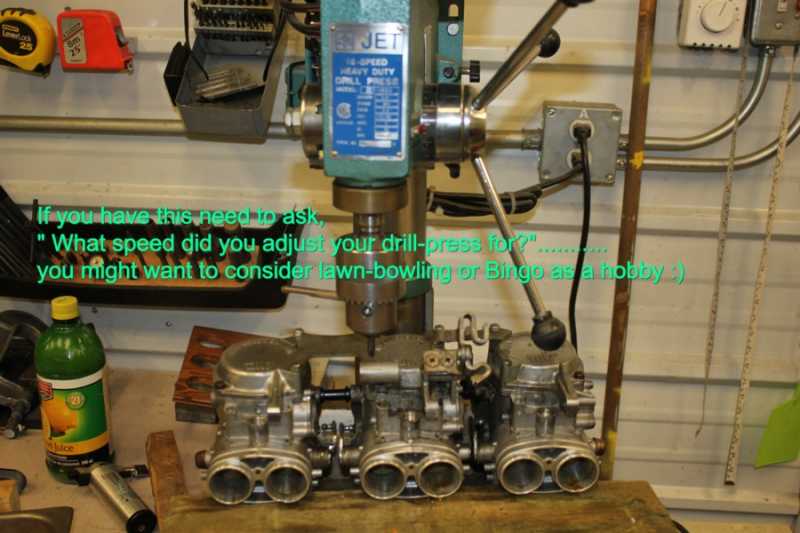
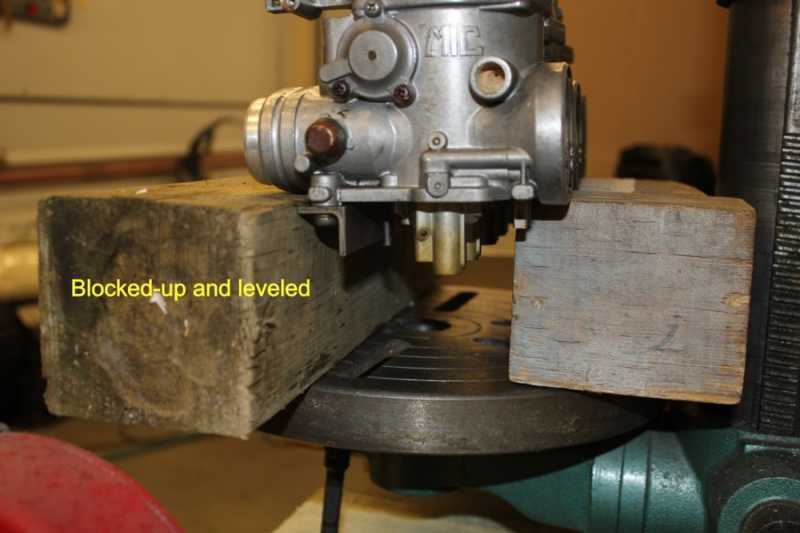
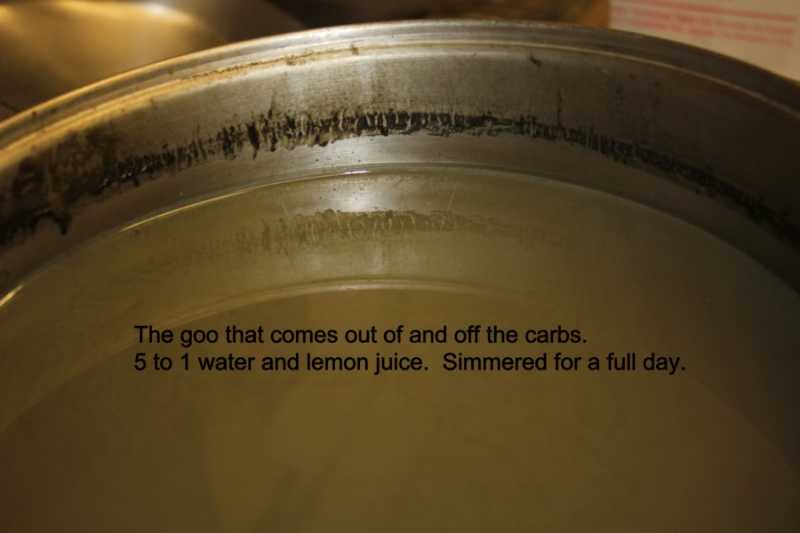
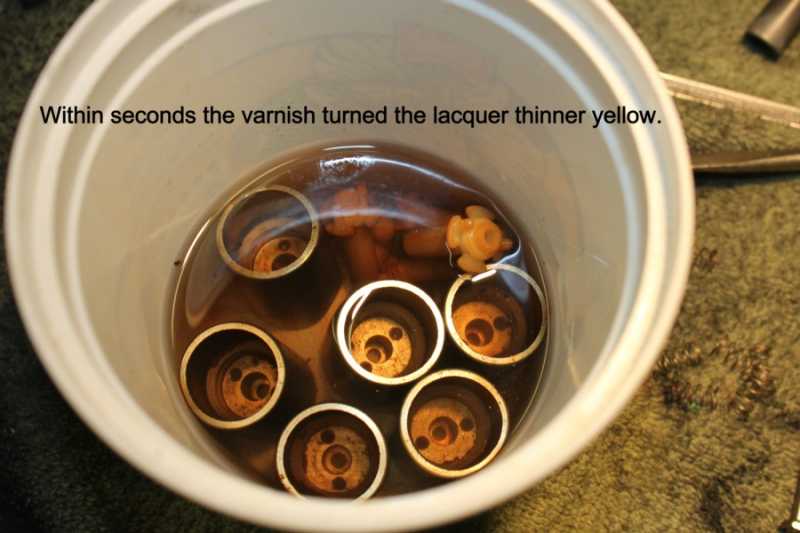
The following is a crude but reasonable method for cleaning. Laquer thinner and a brush is the best and quickest method for cleaning exterior surfaces.
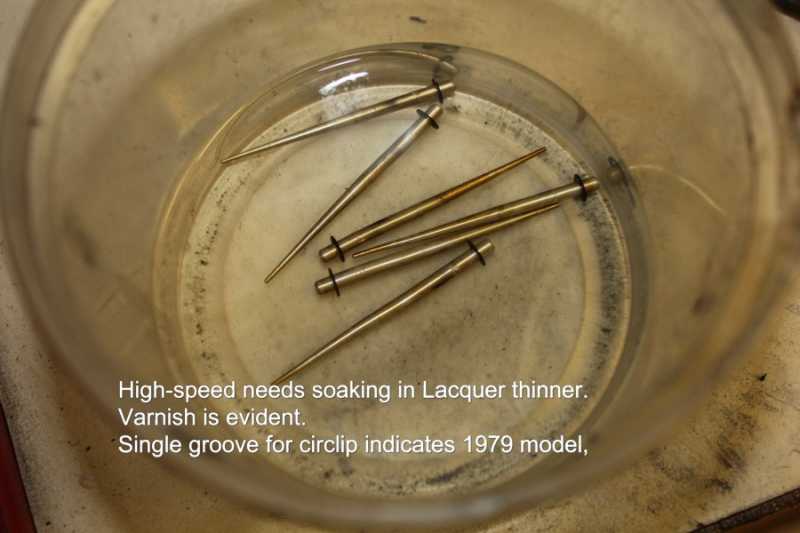
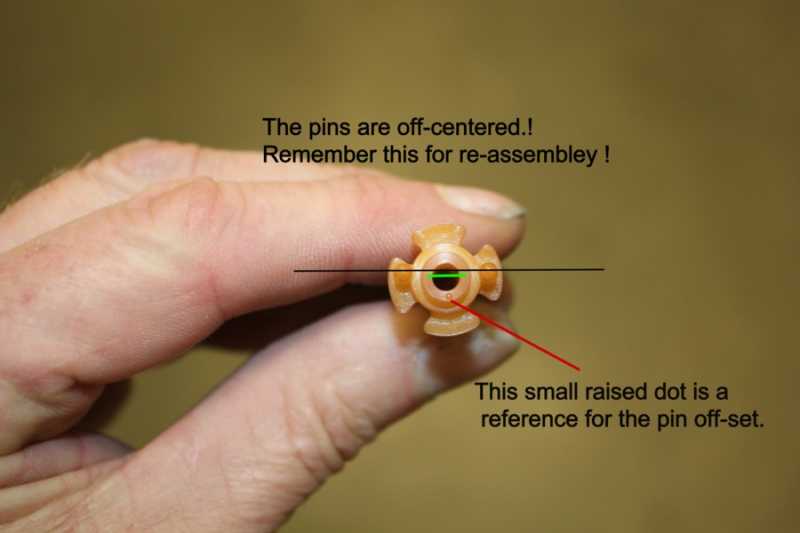
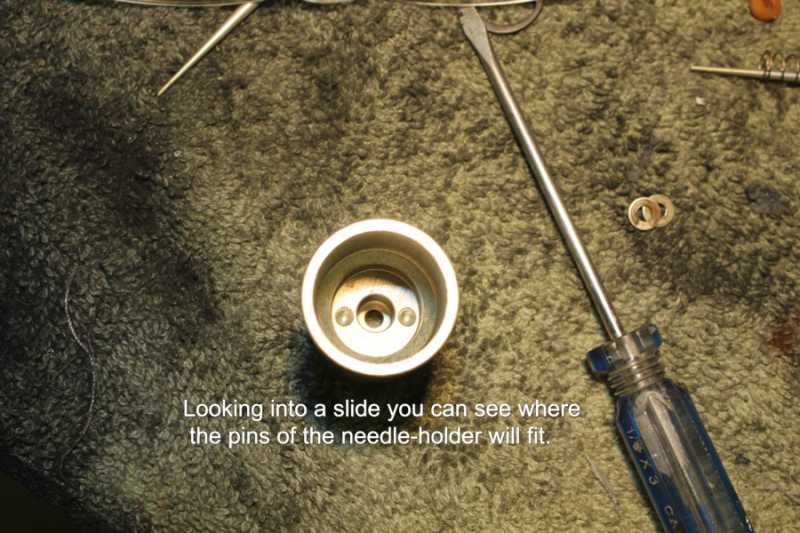
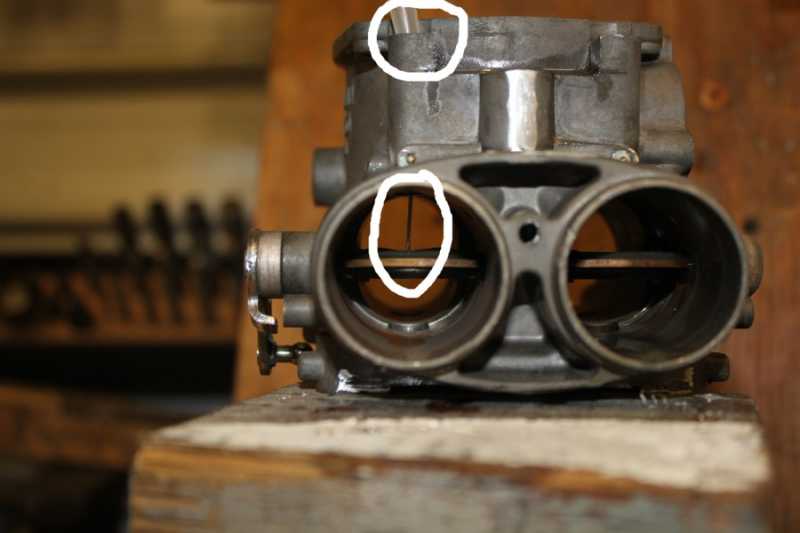
Since writing this article I have discovered that the small "dot/pin" is for off-setting the Main-needle in the Emulsion-tube opening (in the venturi). All the high-speed needles favor the Air-filter side of the port. It's only a theory but I believe this has to do with the fuel spray pattern at the lower operating range of this port/needle.

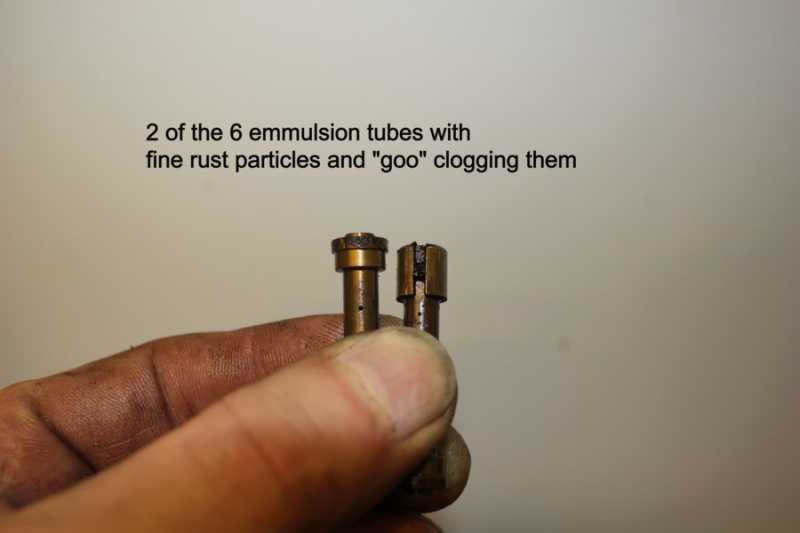
I do not recommend reusing "old" jets. The slightest amount of corrosion pitting will adversely affect their ability to distribute an even pattern of fuel. NEVER use "Jet Cleaners". If the jets are "that" bad.....replace them !
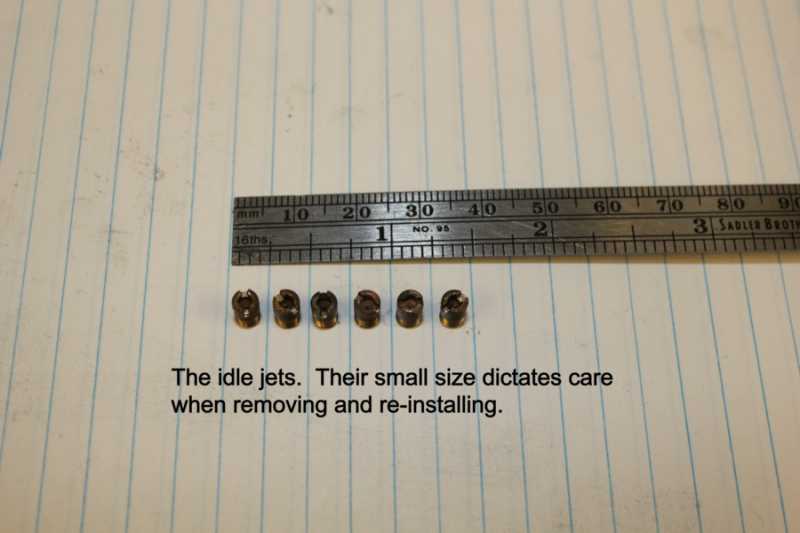

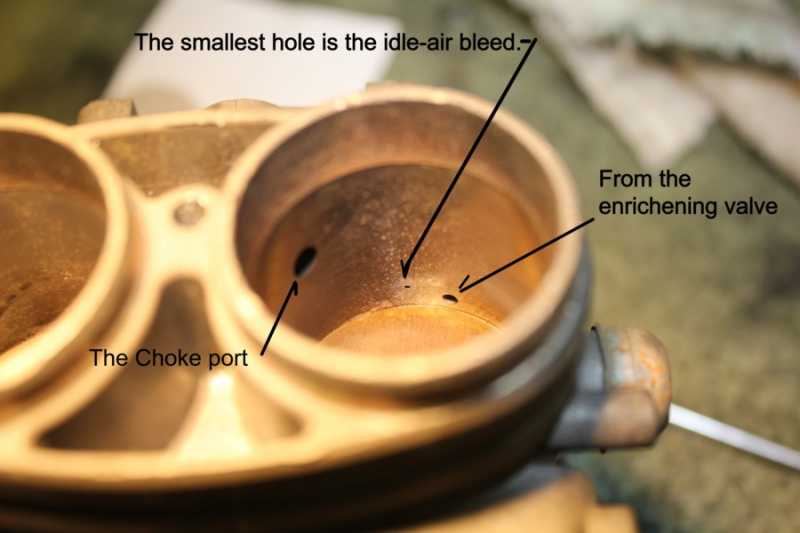
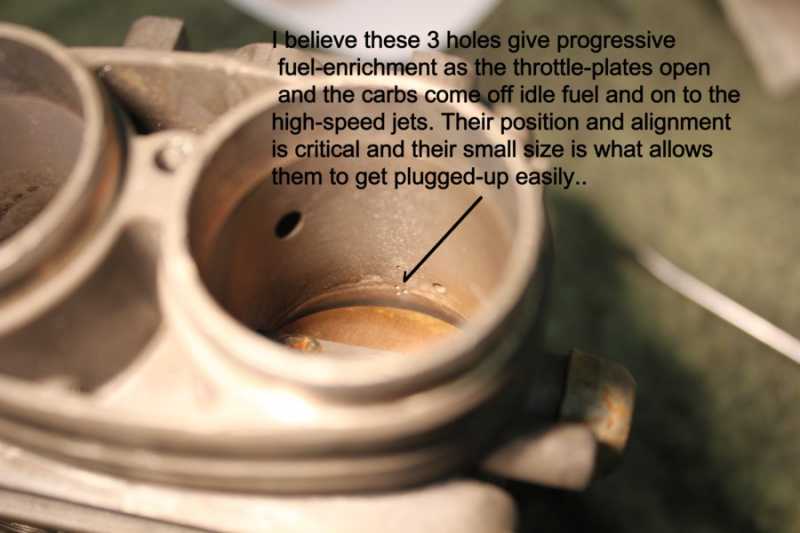
Transition jets; now better understood.

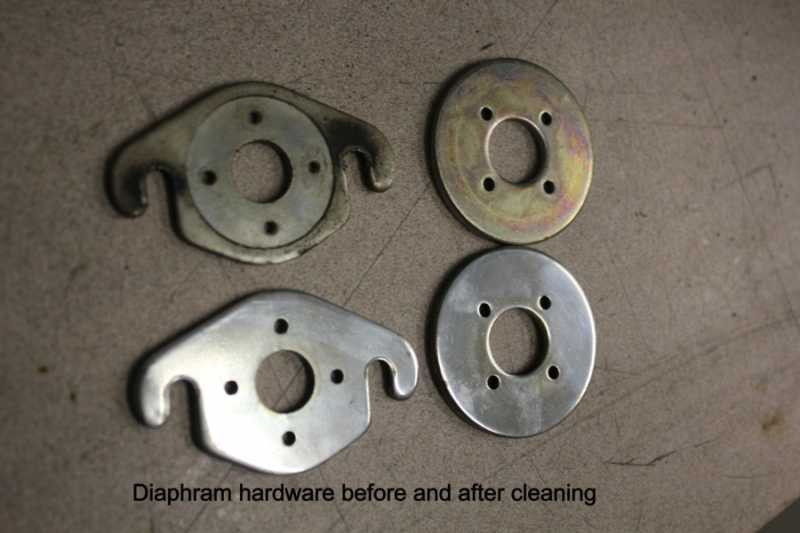
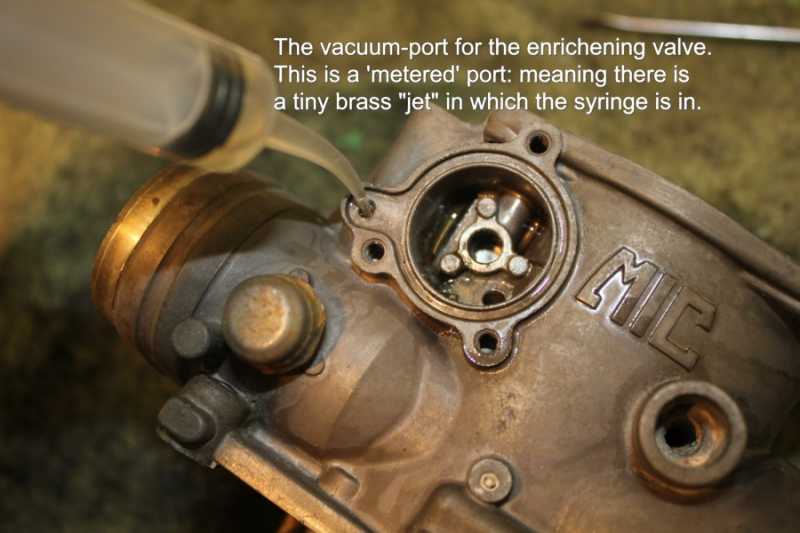
I have determined that the "Enrichment Diaphragm and Piston" can be completely removed with no adverse affects and with testing on 3 sets of my own carbs can state factually that a "slight" improvement in fuel mileage has been noted with this simple modification. Merely replace the cover with a pliable gasket material to ensure there are no vacuum leaks..
The following is a crude but reasonable method for cleaning. Laquer thinner and a brush is the best and quickest method for cleaning exterior surfaces.
Since writing this article I have discovered that the small "dot/pin" is for off-setting the Main-needle in the Emulsion-tube opening (in the venturi). All the high-speed needles favor the Air-filter side of the port. It's only a theory but I believe this has to do with the fuel spray pattern at the lower operating range of this port/needle.
I do not recommend reusing "old" jets. The slightest amount of corrosion pitting will adversely affect their ability to distribute an even pattern of fuel. NEVER use "Jet Cleaners". If the jets are "that" bad.....replace them !
Transition jets; now better understood.
I have determined that the "Enrichment Diaphragm and Piston" can be completely removed with no adverse affects and with testing on 3 sets of my own carbs can state factually that a "slight" improvement in fuel mileage has been noted with this simple modification. Merely replace the cover with a pliable gasket material to ensure there are no vacuum leaks..
1980 KZ 1300 sr# KZT30A-009997
Always High - Know Fear !
Always High - Know Fear !
-
IMG_3770.JPG
-
IMG_3771.JPG
-
IMG_3772.JPG
-
IMG_3773.JPG
-
IMG_3774.JPG
-
IMG_3775.JPG
-
IMG_3778.JPG
-
IMG_3779.JPG
-
IMG_3781.JPG
-
IMG_3782.JPG
-
IMG_3791.JPG
-
IMG_3800.JPG
-
IMG_3802.JPG
-
IMG_3803.JPG
-
IMG_3804.JPG
-
IMG_3805.JPG
-
IMG_3806.JPG
-
IMG_3808.JPG
-
IMG_3809.JPG
-
IMG_3811.JPG
-
IMG_3812.JPG
-
IMG_3813.JPG
-
IMG_3814.JPG
-
IMG_3815.JPG
-
IMG_3816.JPG
-
IMG_3817.JPG
-
IMG_3819.JPG
-
IMG_3822.JPG
-
IMG_3823.JPG
-
IMG_3824.JPG
-
IMG_3826.JPG
-
IMG_3827.JPG
-
IMG_3828.JPG
-
IMG_3830.JPG
-
IMG_3831.JPG
-
IMG_3832.JPG
-
IMG_3833.JPG
Last edit: 6 months 1 week ago by scotch.
The following user(s) said Thank You: zed_thirteen, PaulD
Please Log in or Create an account to join the conversation.
- scotch
-
Topic Author
- Offline
- Sustaining Member
-
- Posts: 2046
- Thanks: 945
Re: Part 2: Complete rebuild 1979 carburettors
11 years 7 months ago - 11 years 7 months ago
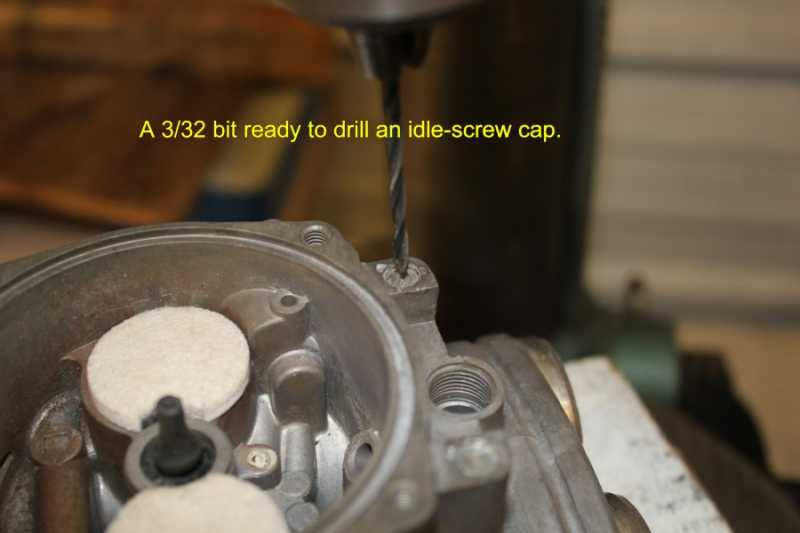
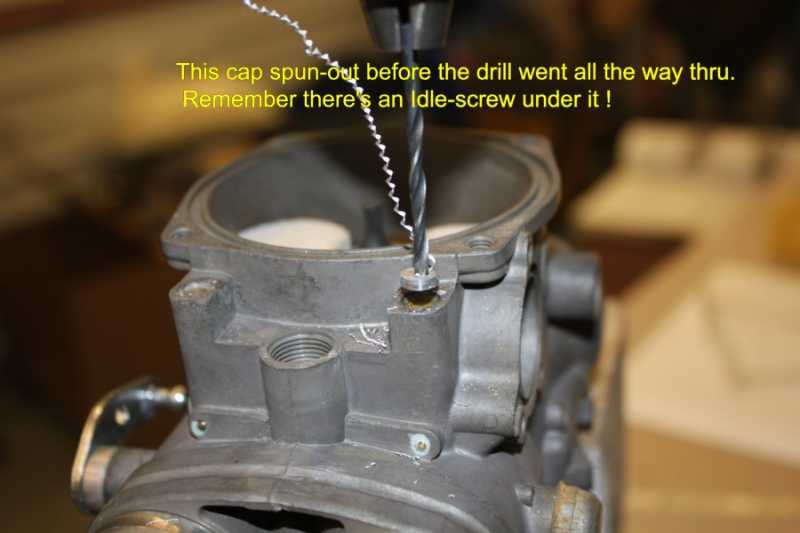
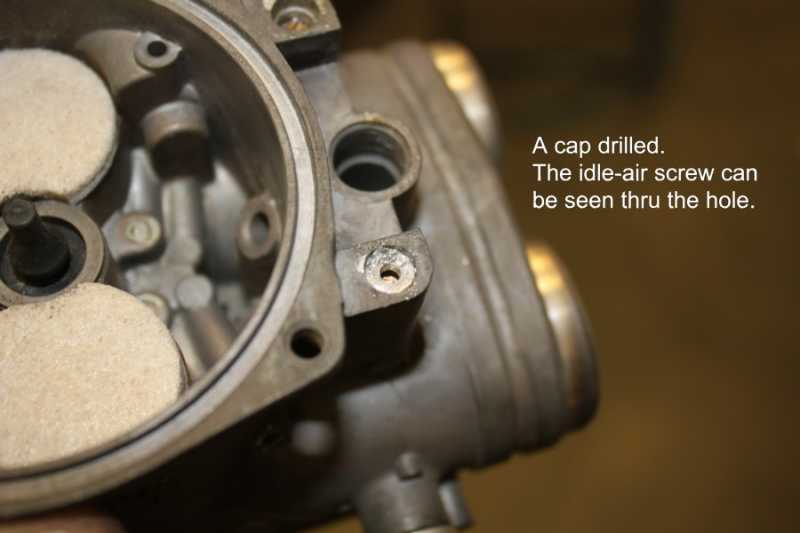
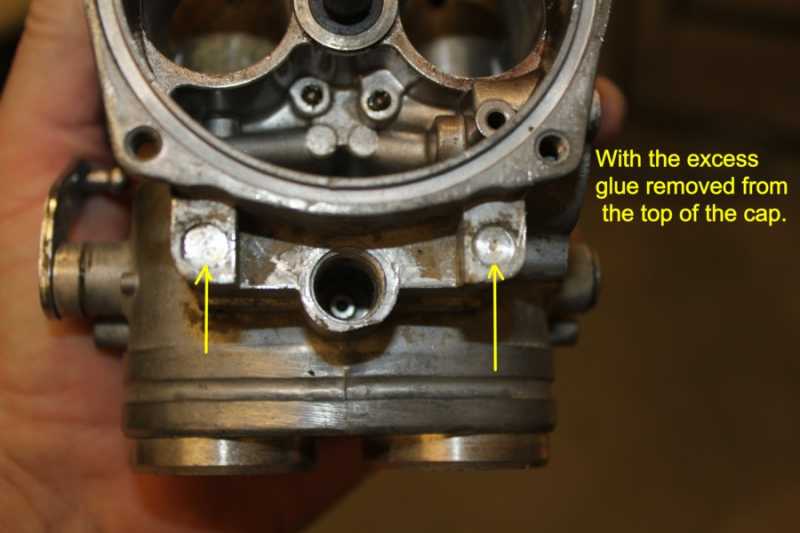
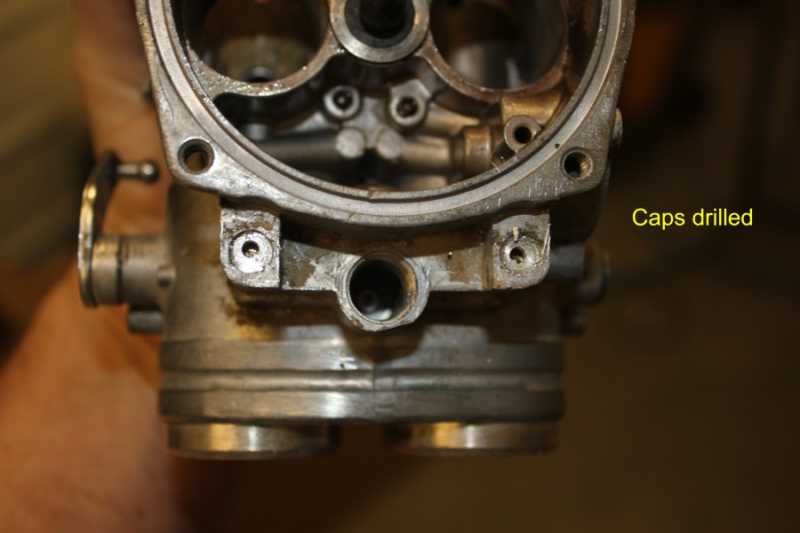
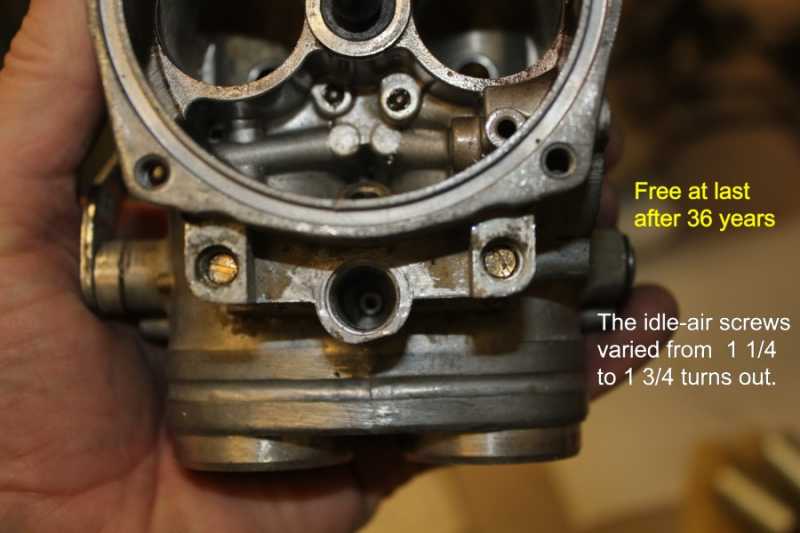
If the idle screws are buggered then you're going to have to try to screw them back down, drill them and use an extractor. The very thought sends chills up my spine!
1980 KZ 1300 sr# KZT30A-009997
Always High - Know Fear !
Always High - Know Fear !
Last edit: 11 years 7 months ago by scotch.
Please Log in or Create an account to join the conversation.
- scotch
-
Topic Author
- Offline
- Sustaining Member
-
- Posts: 2046
- Thanks: 945
Re: Part 2: Complete rebuild 1979 carburettors
11 years 7 months ago - 11 years 5 months ago
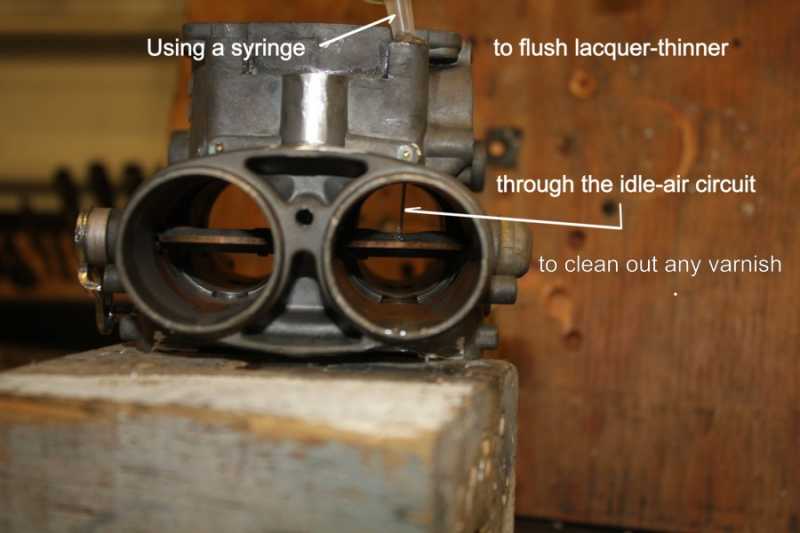
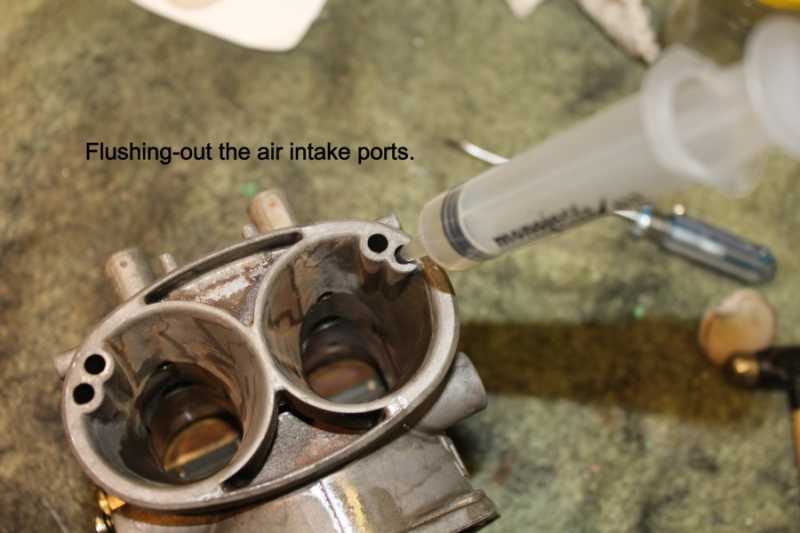
Re: Pictures 3827 and 3828 - What you see in the venturi is the stream of lacquer-thinner!
NOTE: The seals on the throttle shaft ends could be damaged if soaked excessively in strong cleaners such as lacquer-thinner. The use of lacquer-thinner for manual surface cleaning and gallery flushing using a syringe is OK.
NOTE: The seals on the throttle shaft ends could be damaged if soaked excessively in strong cleaners such as lacquer-thinner. The use of lacquer-thinner for manual surface cleaning and gallery flushing using a syringe is OK.
1980 KZ 1300 sr# KZT30A-009997
Always High - Know Fear !
Always High - Know Fear !
Last edit: 11 years 5 months ago by scotch.
The following user(s) said Thank You: Bob4717, Shelbygt, PaulD
Please Log in or Create an account to join the conversation.
Moderators: scotch
Time to create page: 0.248 seconds